All kinds of camera filters have been with us for a really long time. For the very first time, they probably appeared in the Snapchat application, where, for example, the well-known photo with a dog's face comes from. Gradually, these filters continued to spread, and now you can find them on, for example, Instagram and even Facebook. But the truth is that these filters are practically only available on iPhones and iPads. Of course, this makes sense, since the camera from Instagram or Facebook is not available in macOS. However, there are other apps on Mac that you can use to make video calls – like Skype. If you want to take a shot from the other side of the video call, or if you simply want to make her laugh, then you've come to the right place.
It could be interest you

Certain "filters" are already available in Skype. However, these filters are only meant to change the background. You can either blur the background or insert a picture into it, which is useful for example at work or in a cafe. However, you would look in vain for filters directly on your face in Skype. However, there are various apps that you can use to apply these funny filters, such as from Snapchat, to your face. It all works very simply - you set the filter you want to use, then in Skype you switch the video source from the built-in camera to the camera that comes from the application with filters. You can then simply change the filters during the call. One of the many applications that you can use is SnapCamera. As the name suggests, this app offers filters from Snapchat.
How to use Snapchat filters in Skype on Mac
If you want to use the SnapCamera application on your Mac, the procedure is really very simple. Just follow these steps:
- First, of course, you need to download the application SnapCamera has been downloaded a they installed.
- Download SnapCamera free help this link, on the page then just tap on Download. Then perform a classic installation.
- Once you install the app, it run a allow access k microphone a camera.
- After that, all you have to do is in the application select a filter, which you want to apply.
- As I mentioned above, eventually you need to switch in Skype source videa from the built-in camera to SnapCamera.
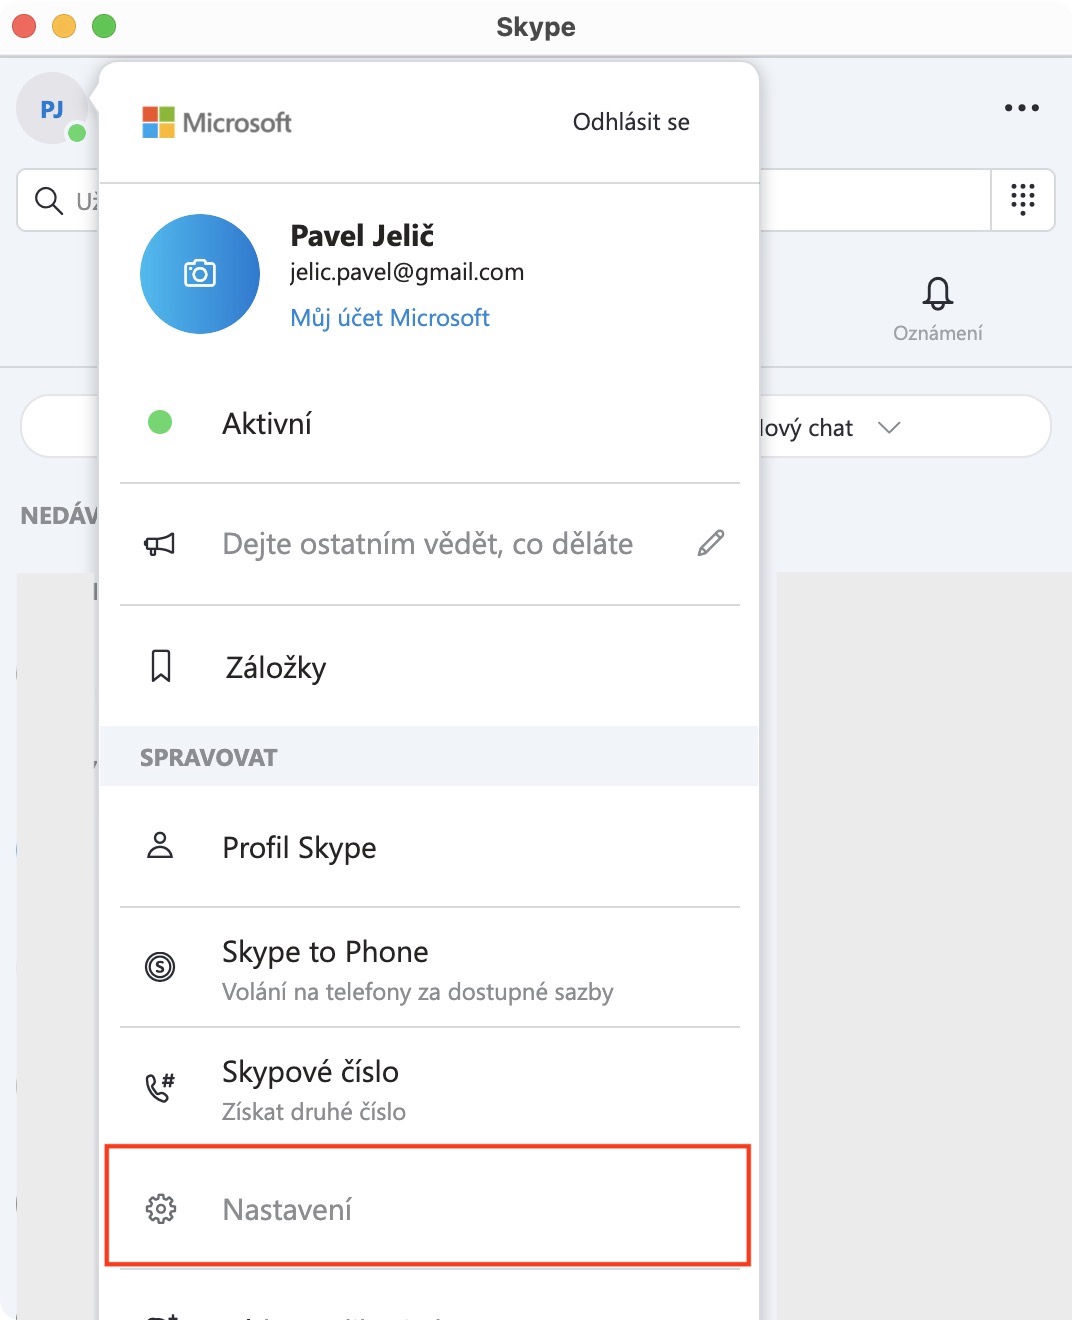
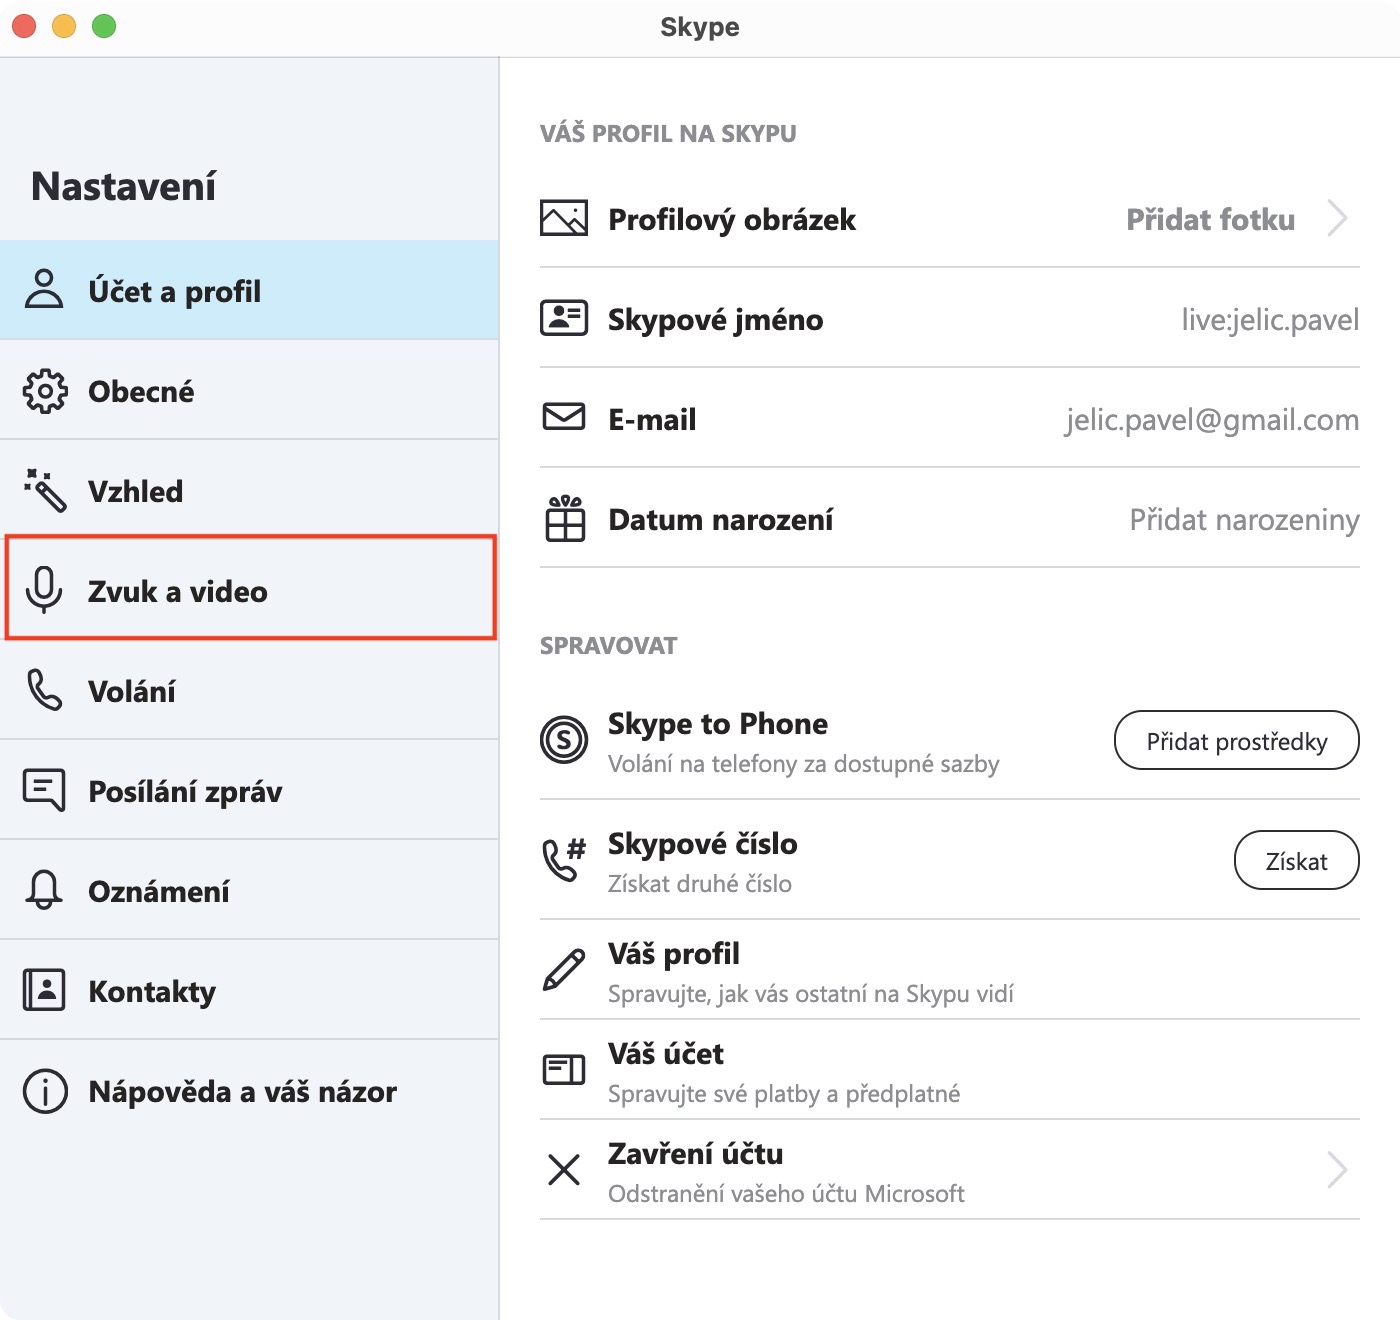
- You can do this by tapping in the app Skype or Whatsapp na your profile icon, and then on Settings. Then go to the section Audio and video and in the box Camera select from the menu SnapCamera.
- If you don't see SnapCamera in Skype, you need the app restart.
It should be noted that you can also choose SnapCamera as a video source in the same way other applications, for example in Zoom, or perhaps Google Hangout. Once you have selected SnapCamera, after changing the filter in the application, it is not necessary to somehow end the call or restart the application - everything works in real time. If you use multiple webcams, it is necessary in the application SnapCamera to perform camera settings, from which the image will be taken. Even though it's not a goddamn great feature, I believe that many users can enjoy the various filters.


