In our series on native Apple applications, this time we're looking at QuickTime Player. While last episode we covered the basics of playback, today we're going to focus on recording and creating content.
It could be interest you
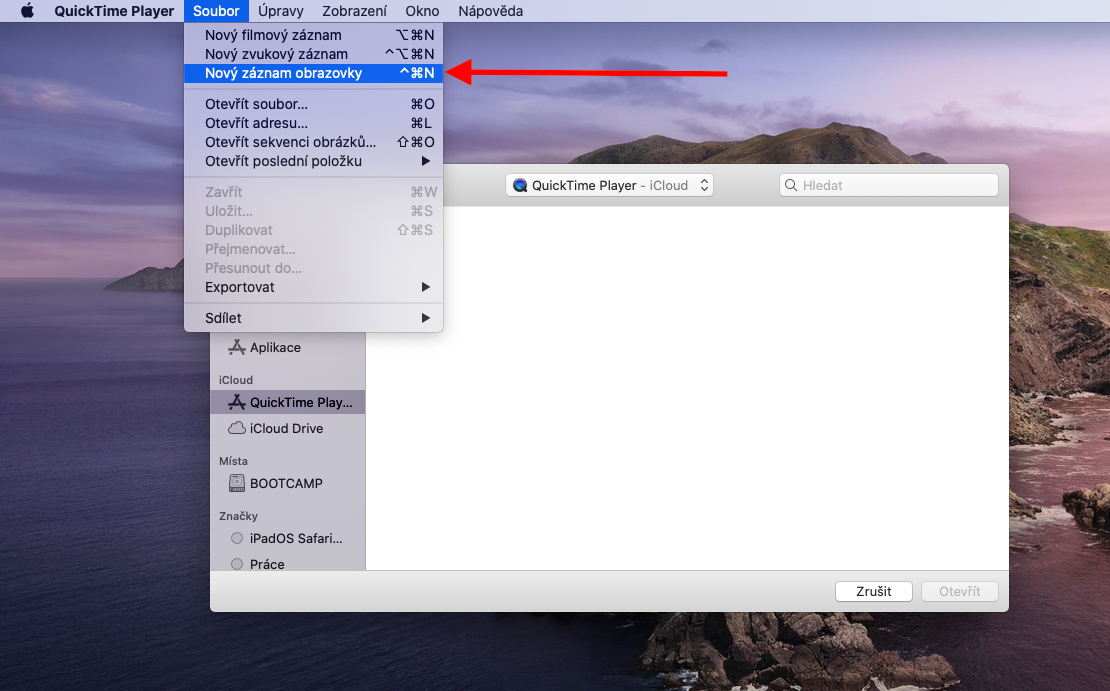
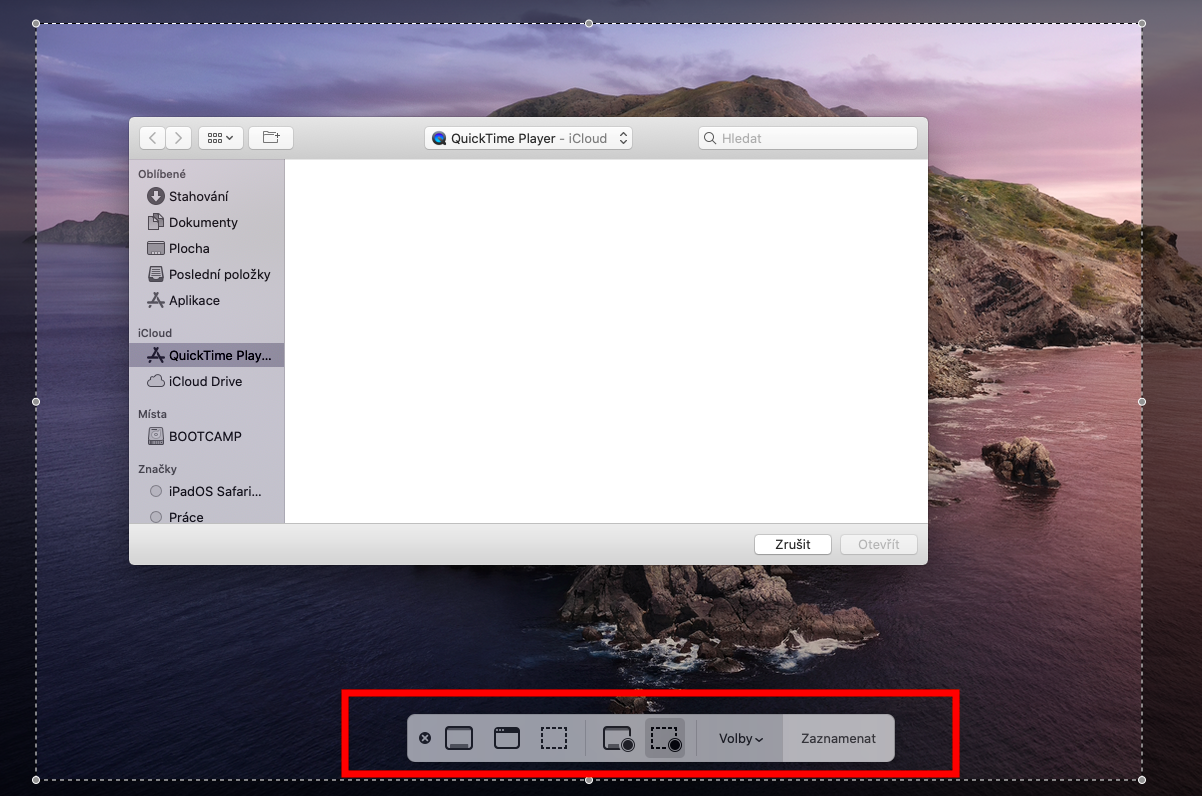
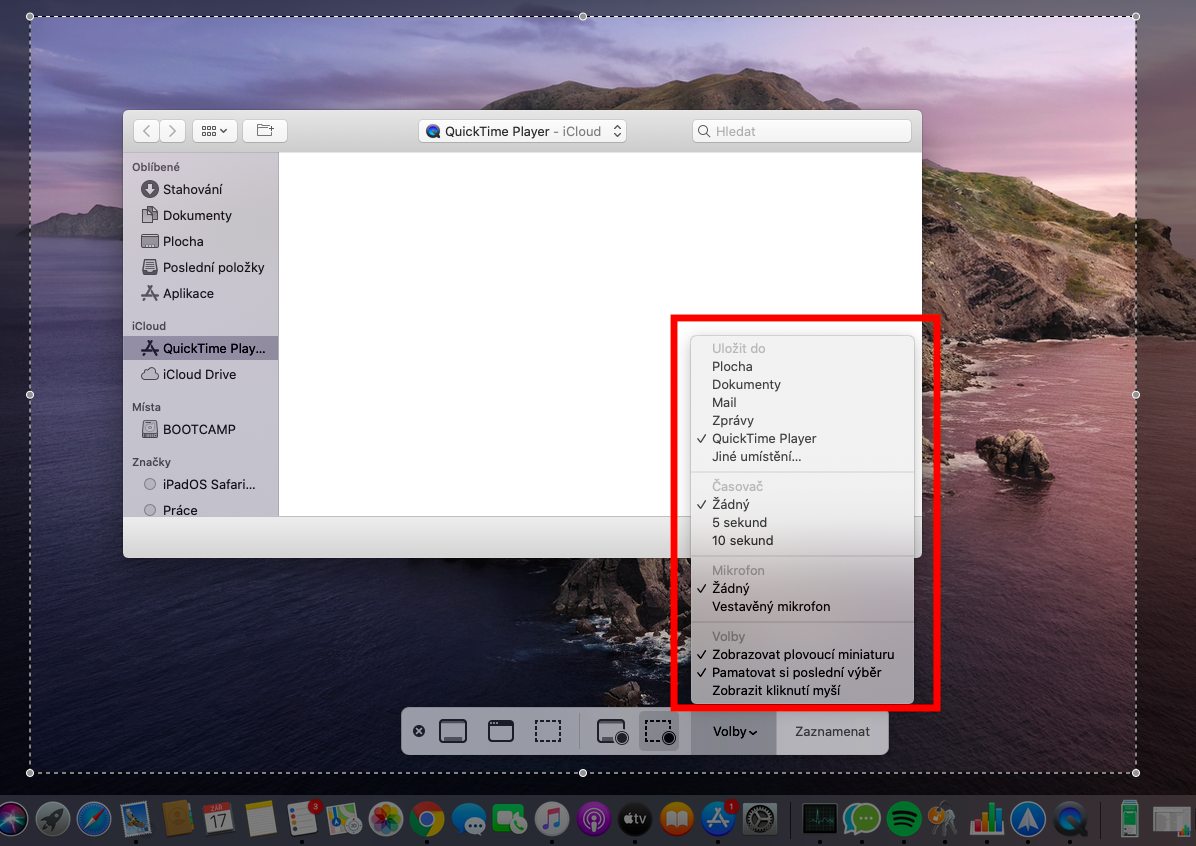
Among other things, you can use the native QuickTime Player application on Mac to record the screen of your computer or Apple TV. The captured recording can then be opened in QuickTim and saved on your Mac. To take a screen recording, launch QuickTime Player on your Mac, then click File -> New Screen Recording in the toolbar at the top of the screen. You will see a toolbar where in the Options section you can choose what content will be recorded, where it will be saved, which microphone you want to use or whether you want to activate a timer. After making all the settings, start recording by clicking the Record button on the toolbar at the bottom of the window. To stop recording, click Stop Recording in the menu bar at the top of your Mac.
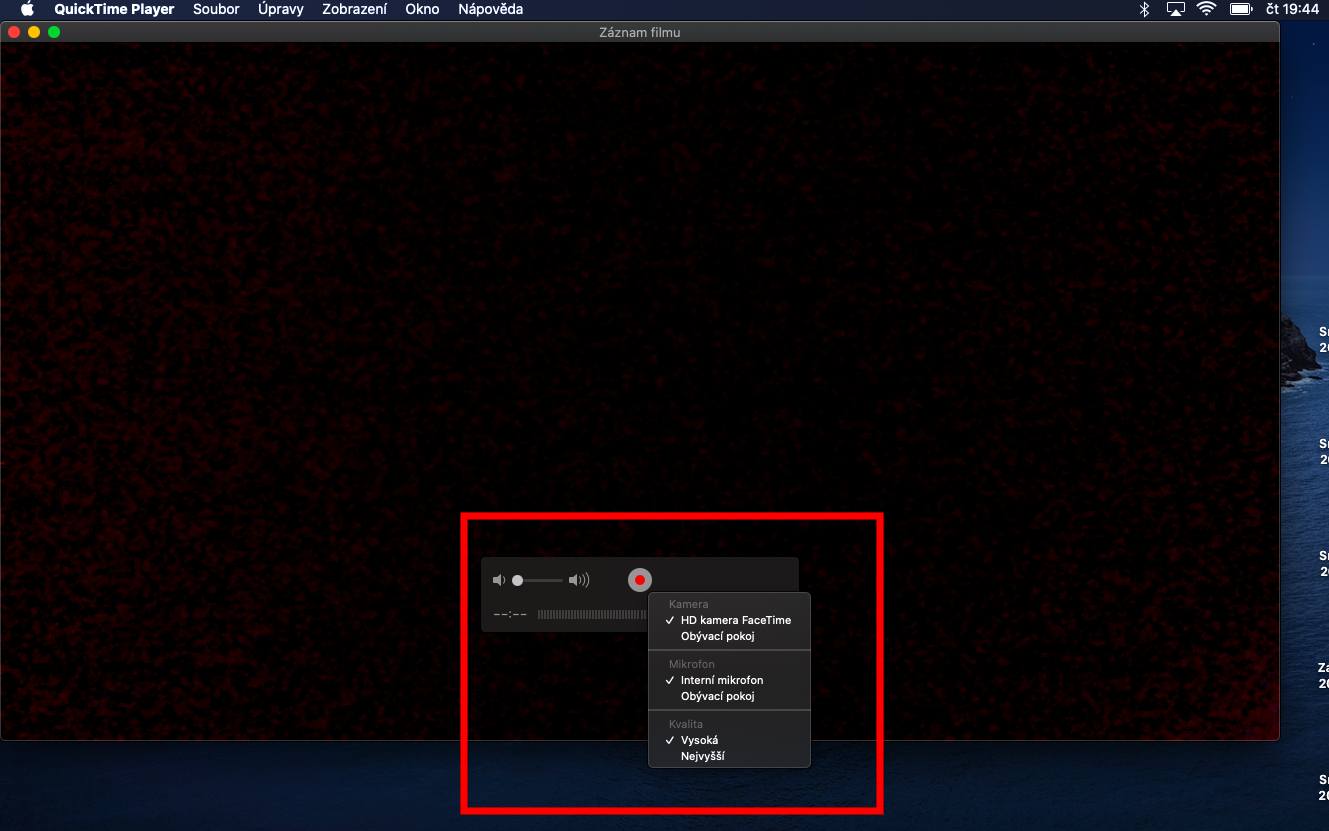
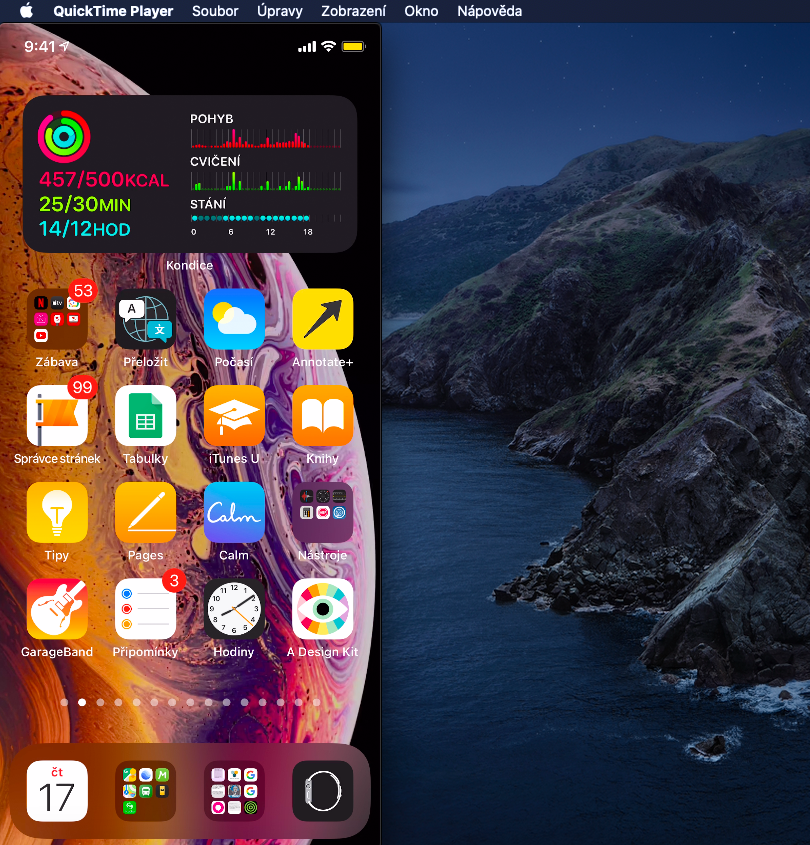
If you want to create a movie recording on your Mac using a webcam, or using an iPhone, iPad or iPod touch, click File -> New Movie Recording on the toolbar at the top of the screen. It will automatically start recording on your Mac's webcam, after clicking Options you can select a different camera, microphone, and choose the recording quality. You start the recording by clicking the Record button and stop it by clicking the Stop button. If you just want to pause the recording, hold down the Alt (Option) key and click the Record button. If you want to record from your iPhone, iPad or iPod touch, first connect the device to your Mac. Start QuickTime Player, click File -> New Movie Recording on the toolbar at the top of the screen, and after clicking Options (the arrow next to the recording button), choose the name of the connected device. Click the red button to start recording.
