Today's installment of our regular series on native Apple apps will once again be dedicated to Photos on the Mac. This time we'll focus on working with libraries and individual files, explain how to prevent the creation of duplicate images, and describe the options for managing photos in the application.
It could be interest you
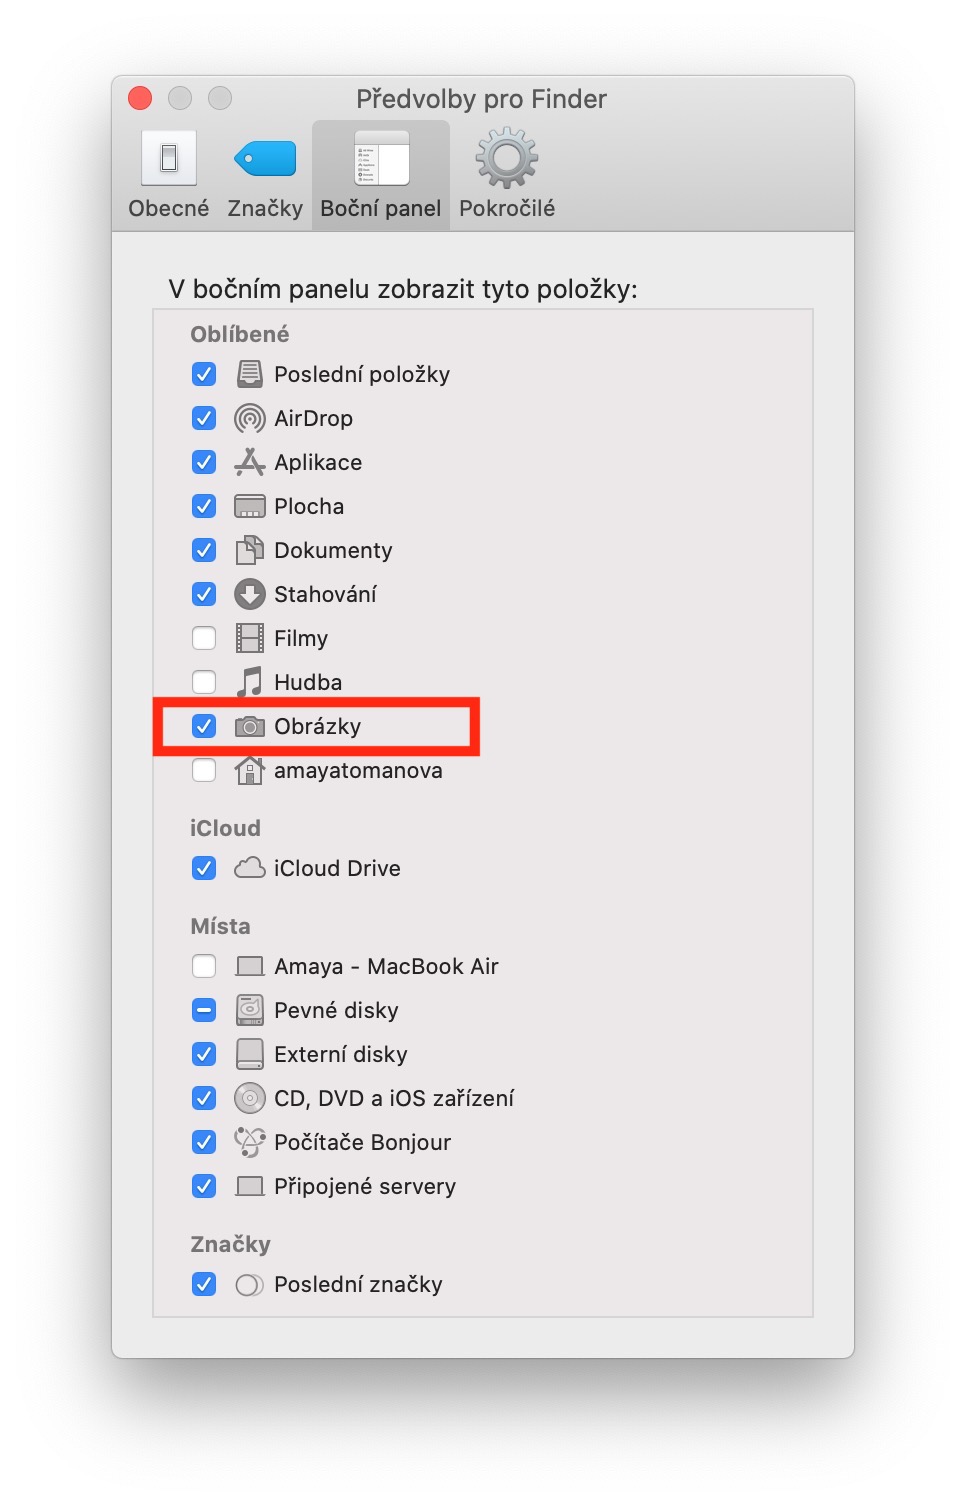
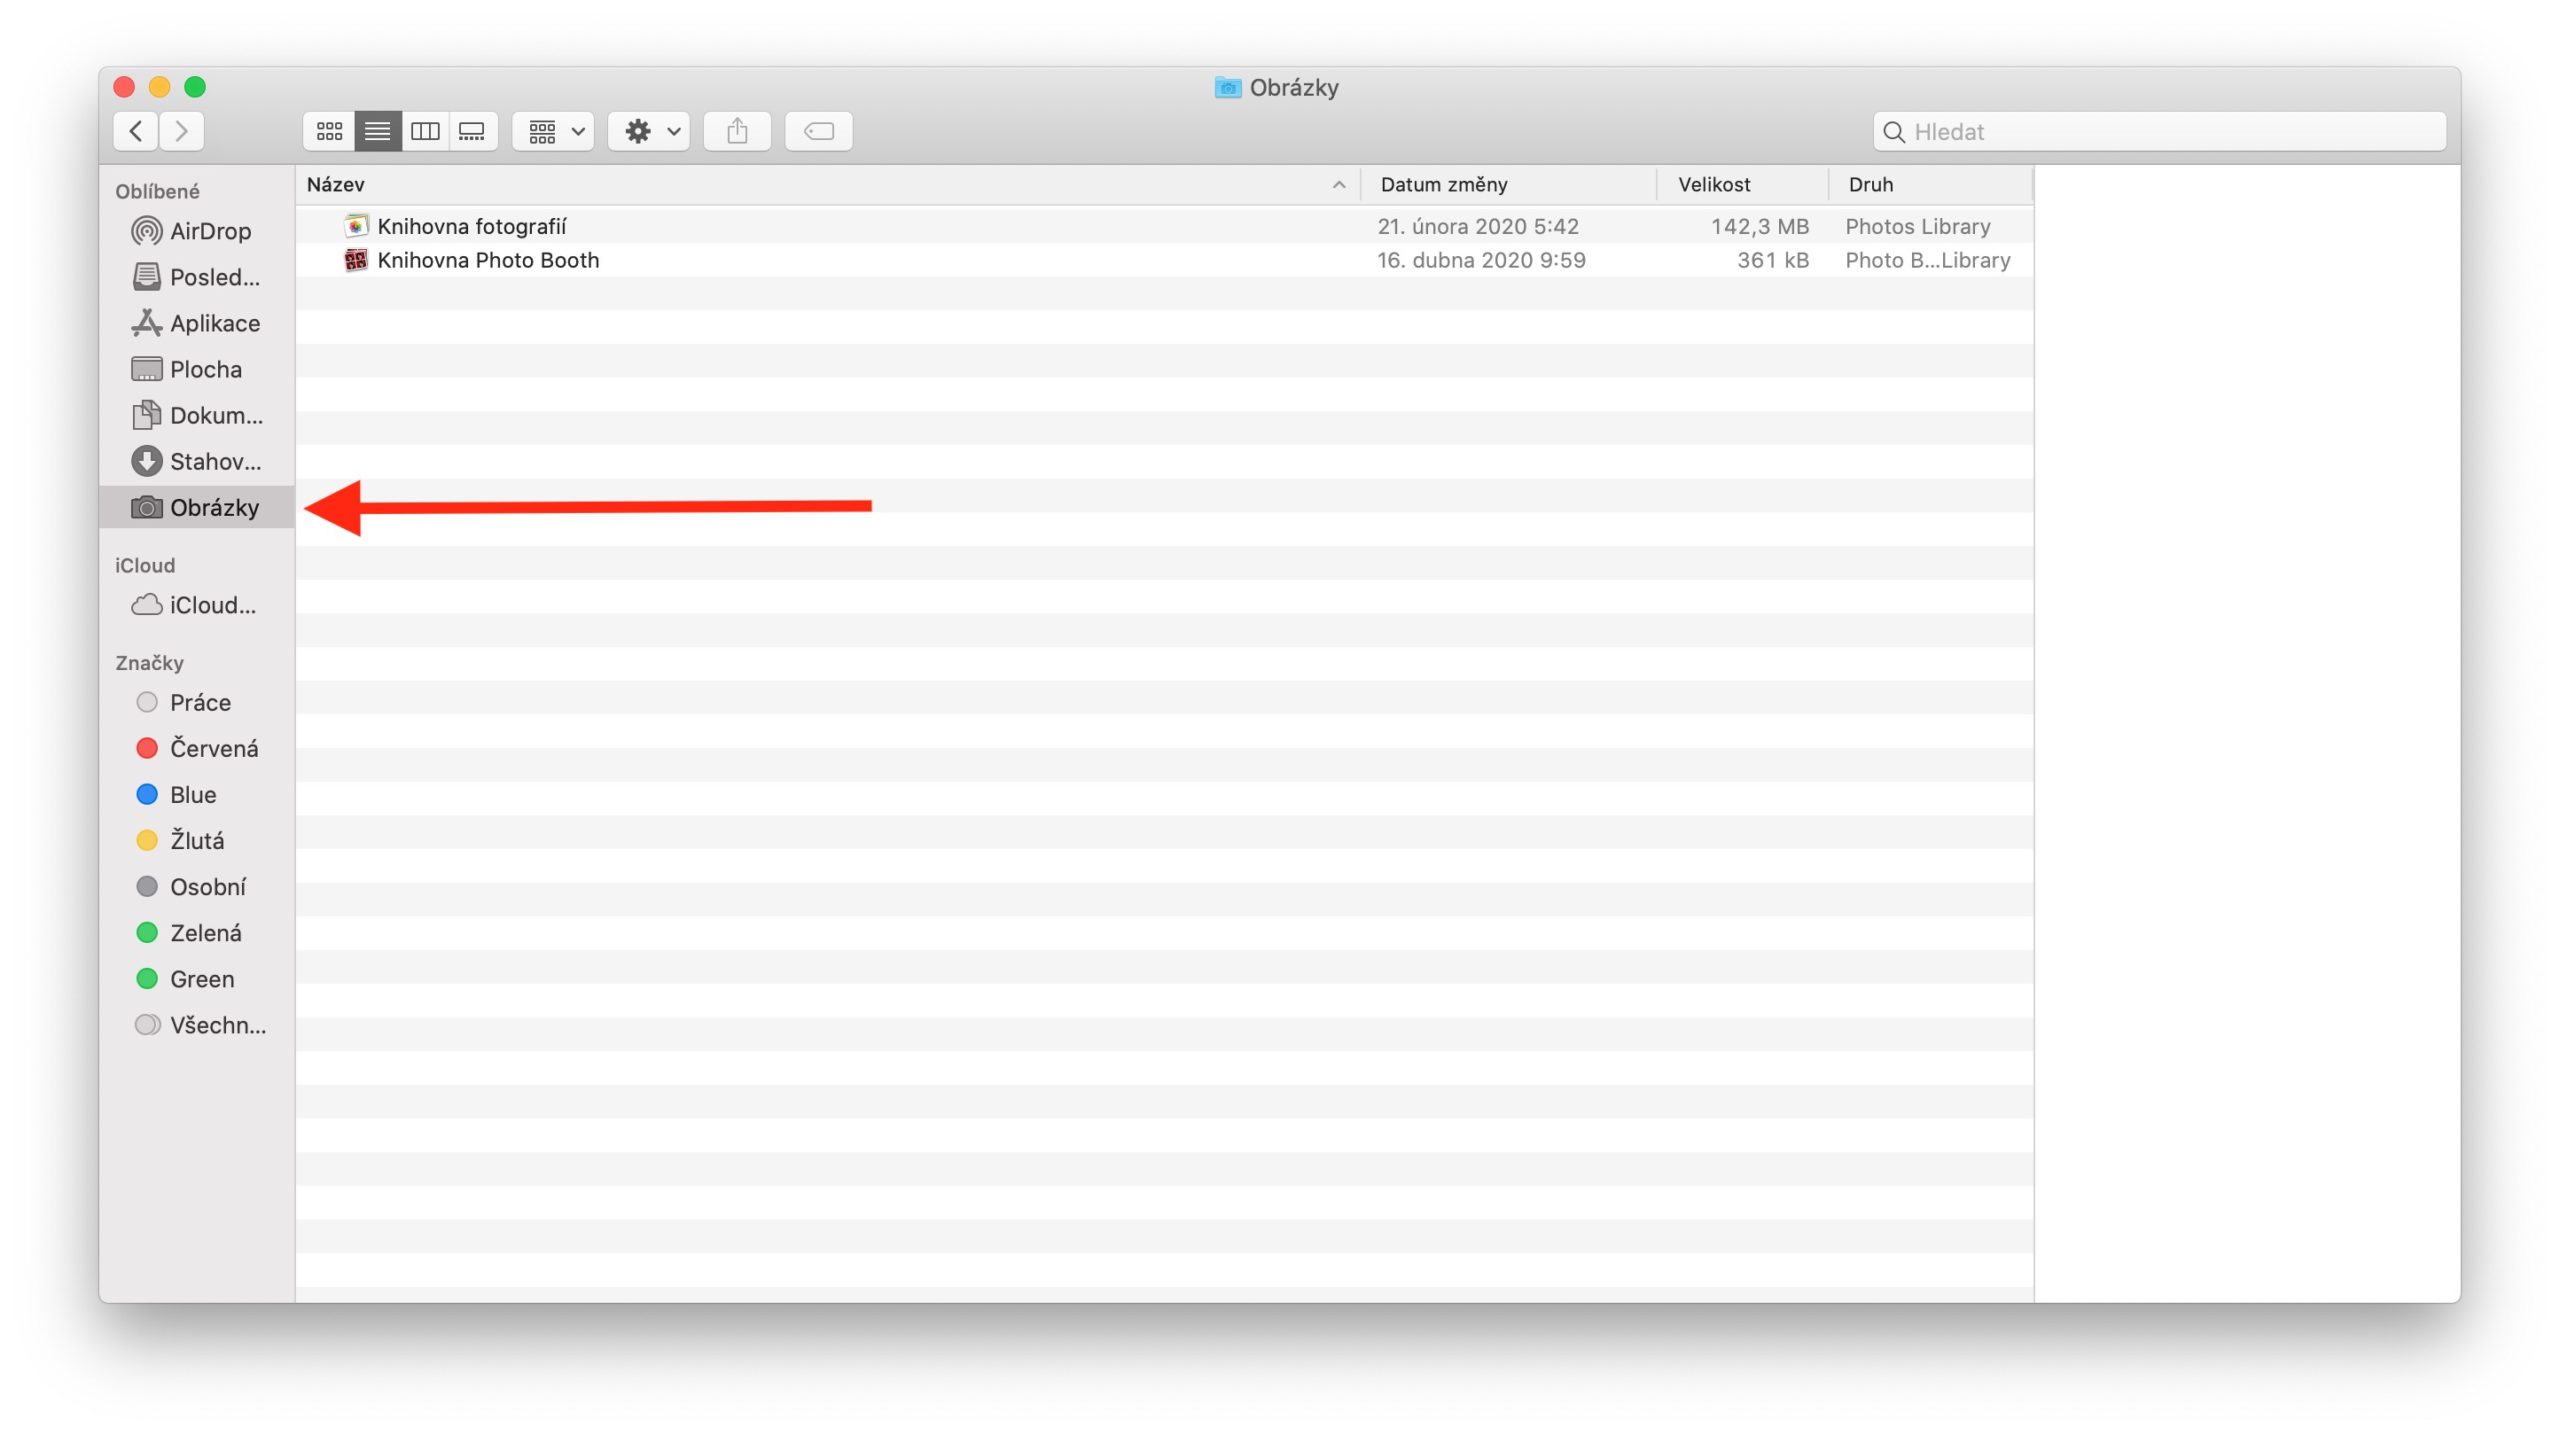
The first time you use native Photos on your Mac, you create a library or select the one you want to use. This automatically makes this library your system library, the only one that can use iCloud Photos and shared albums. But of course you can create more libraries in Photos. You can find the System Library in the Pictures folder on your Mac - you'll find it in the left sidebar when you launch the Finder. If you don't see Pictures here, with the Finder open, click Finder on the toolbar at the top of your Mac's screen, click Preferences, and then click the Sidebar tab in the preferences window to check Pictures. You can move the library from Pictures to another location either on your Mac or on external storage. You can only work with photos from one specific library at a time, but you can switch between libraries. First, close the Photos app, then hold Alt (Option) and open Photos again. In the dialog box that appears, select the desired library. To create a new library, first quit the Photos app, then hold down the Alt (Option) key and launch the app again. In the window that appears, choose Create new.
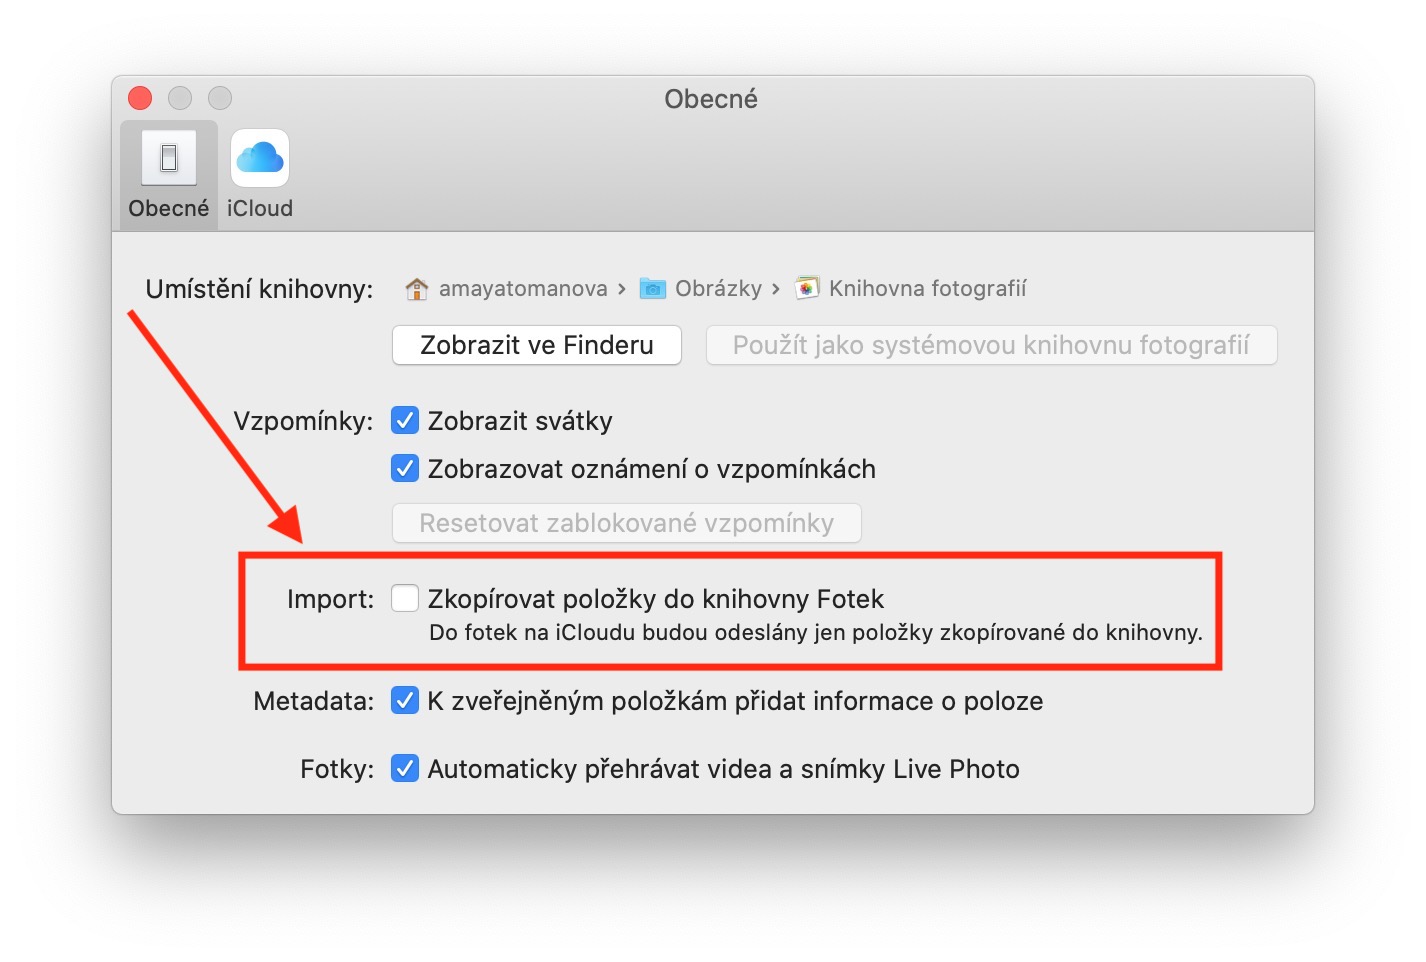
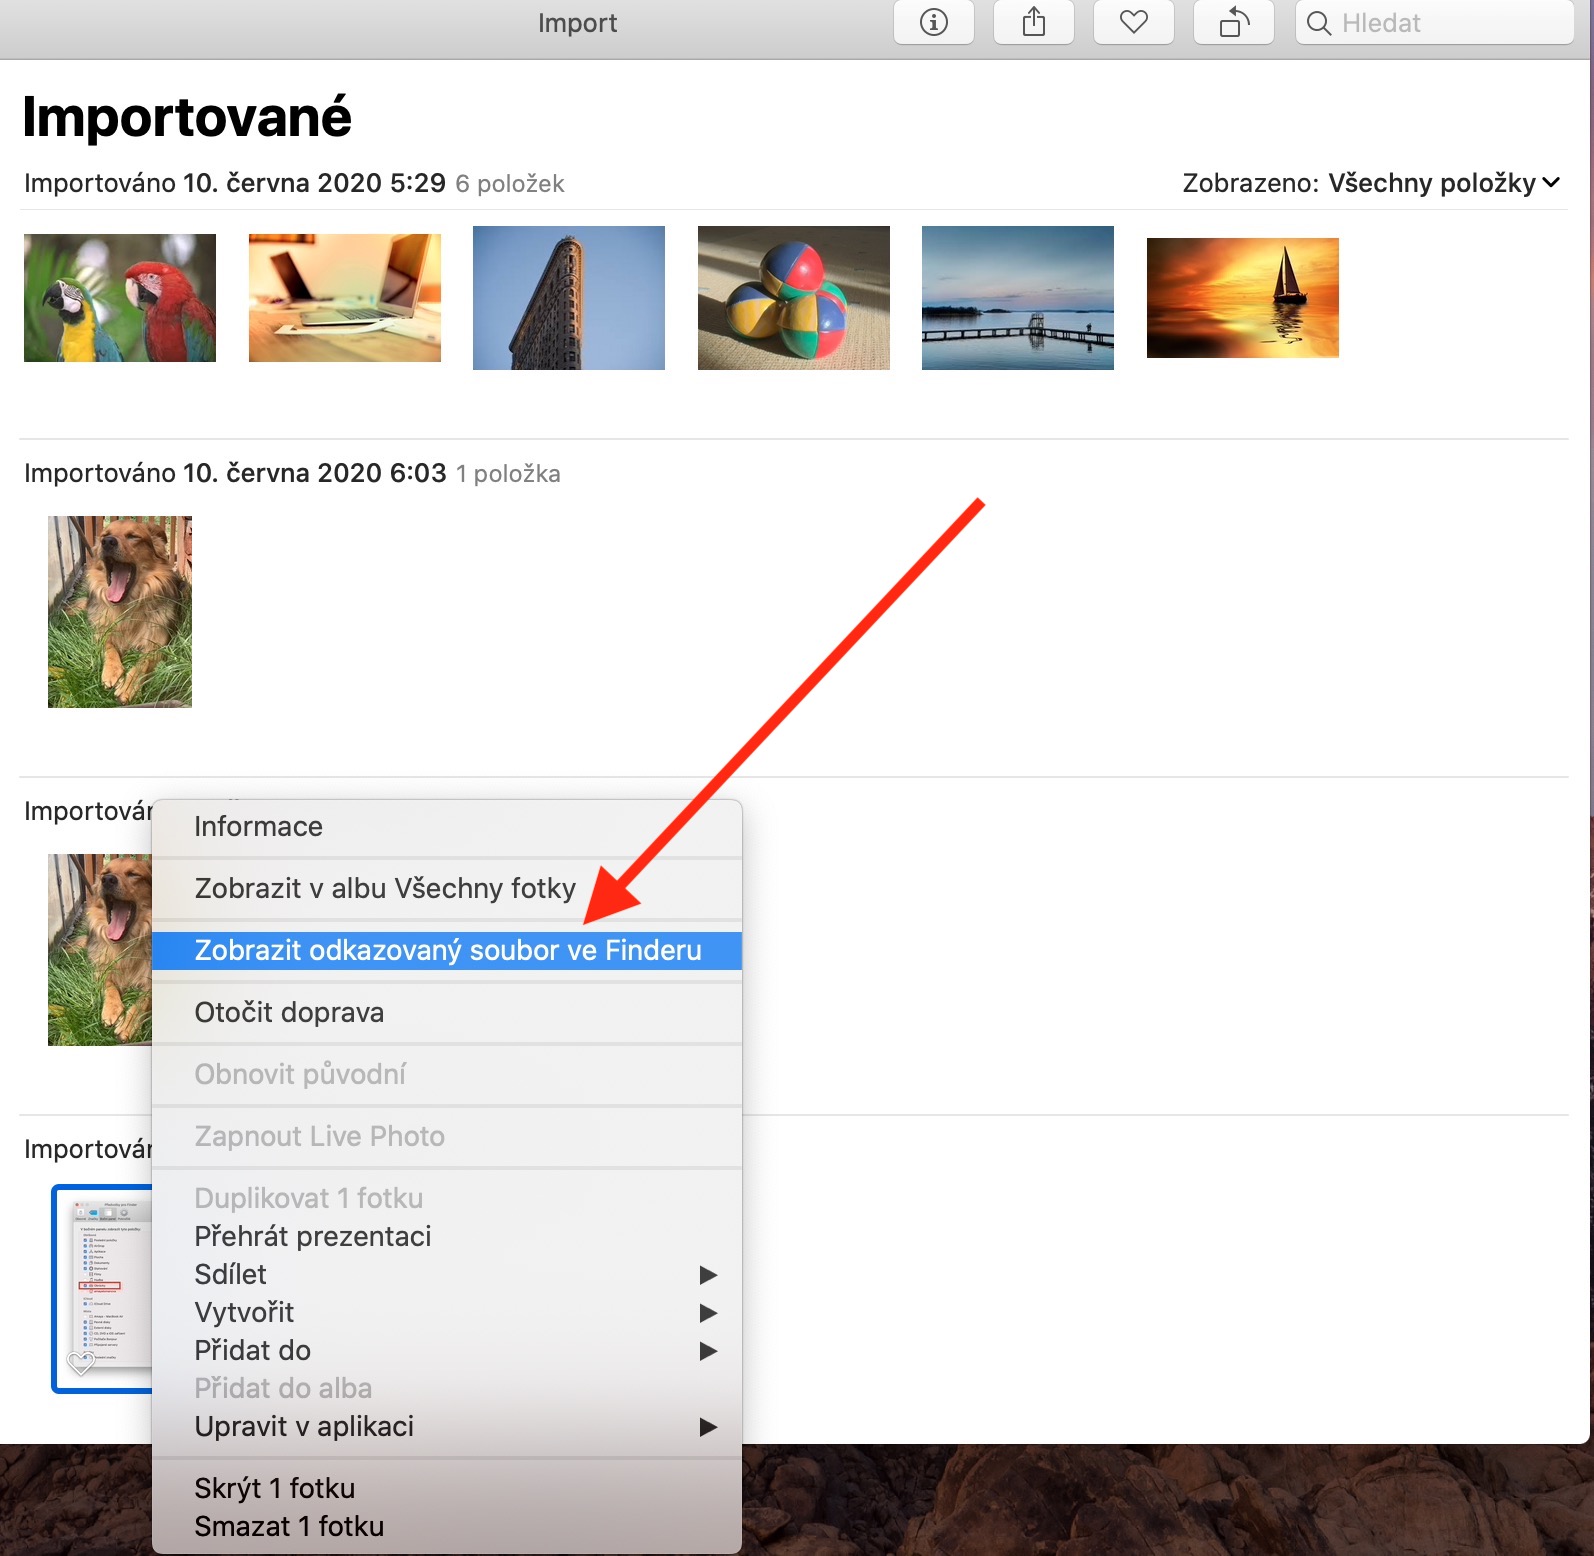
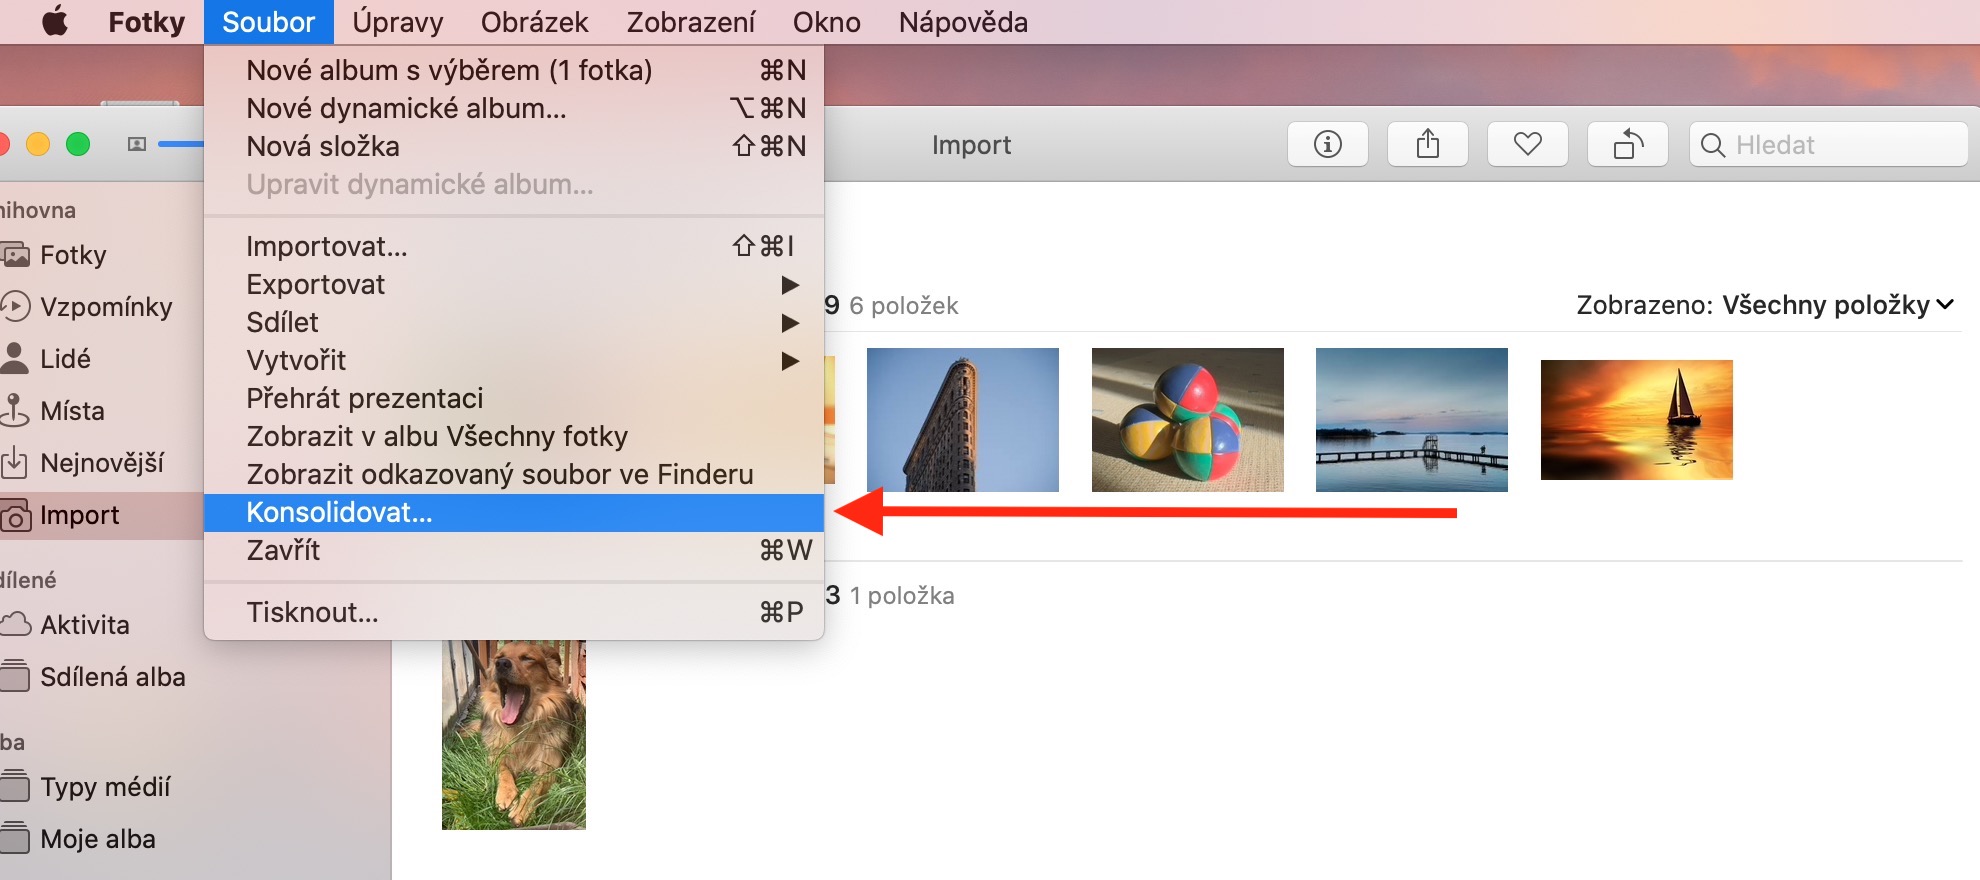
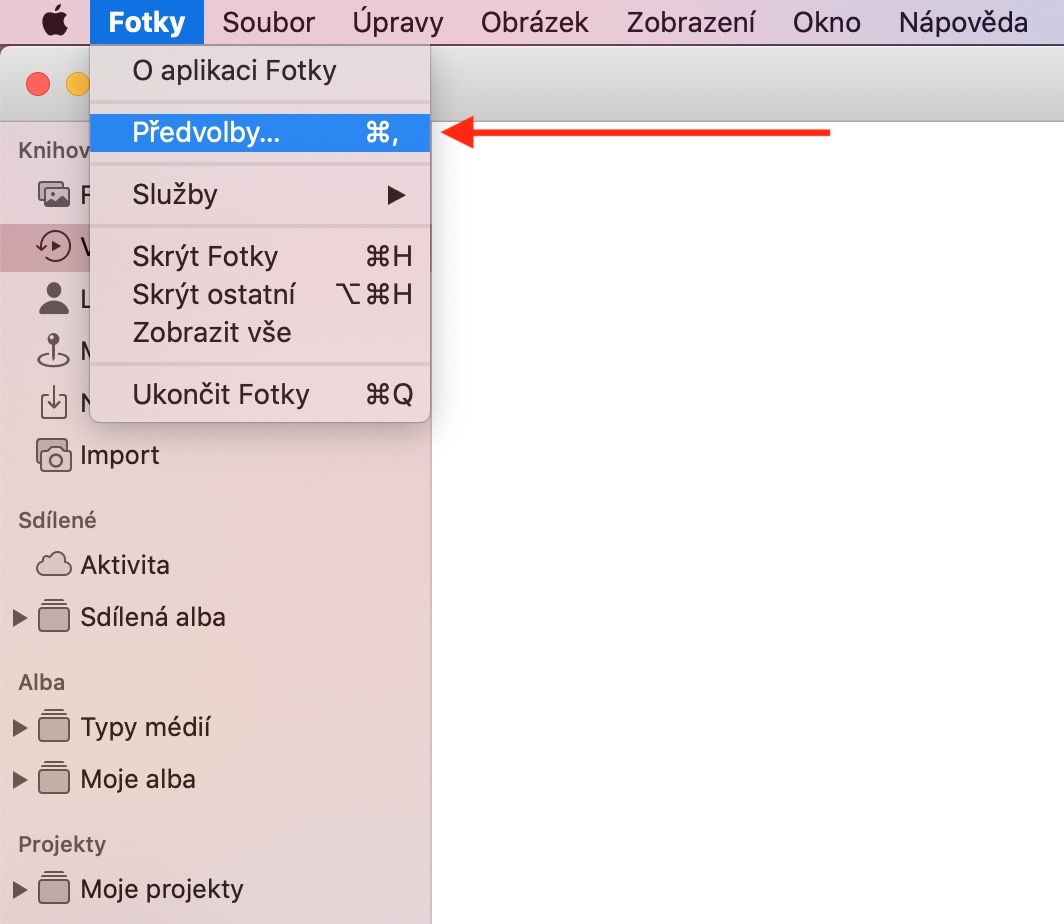
Any files you import into Photos are always saved in the current photo library. To avoid duplicate items on your Mac, you can keep items in their original locations when importing photos. Files stored outside the library are called linked files. These files are not sent to iCloud or backed up as part of a Photo Library backup, but they still appear in Photos. If you want the imported files to be stored outside of the Photos library, click Photos -> Preferences -> General in the toolbar at the top of the screen to uncheck Copy items to Photos library. The application will then leave the files in their original locations. To find a linked file from Photos in Finder, first select it in native Photos, then click File -> Show Linked File in Finder on the toolbar at the top of the screen. If you want to copy the linked files to the Photos library, select the files you want to work with in Photos. On the toolbar at the top of the screen, then click File -> Consolidate and choose Copy.
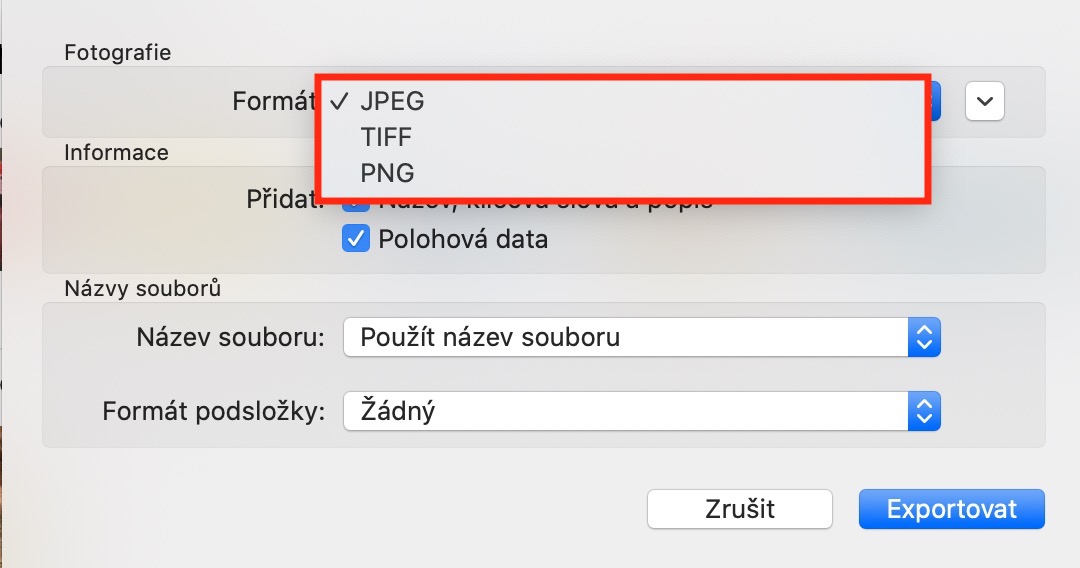
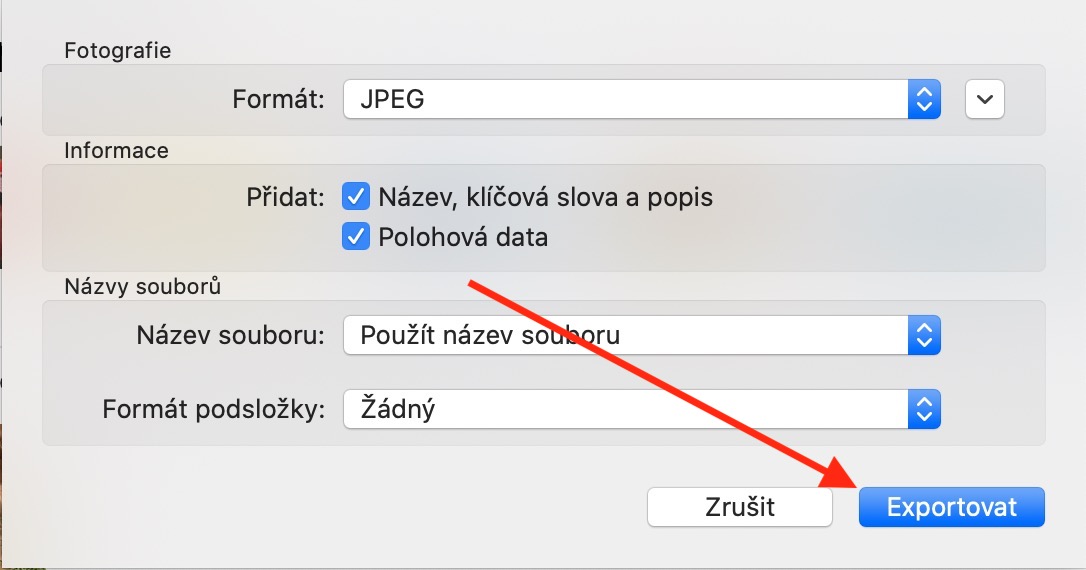
Avoid changing the contents of the library in the Finder - you may accidentally delete or damage the Photos library. If you want to move or copy files, export them first. You do this by selecting the item you want to work with in Photos on your Mac. On the toolbar at the top of the screen, click File -> Export -> Export [XY] Photo. Select the format in which you want to export the images, name them in the File Name menu, and specify how the exported files should be divided into folders in the Subfolder Format menu. Select the location where you want to save the images and click Export. In the new location, you can now operate with photos without any worries.




Hello, I was looking forward to this post, but it doesn't solve my primary problem with the duplication. The essence of my problem is that I have a duplicate photo in the library. It is likely that iPhone photos (approx. 900 photos) were imported into the library more than once. Can you advise how to remove an already imported duplicate directly from the library?
well thank you