In today's modern age, our digital data is incredibly important and often of indescribable value. This is precisely why it is important to perform regular backups, thanks to which we can prevent various inconveniences. You never know what can happen. Usually at the least convenient moment, you can encounter, for example, ransomware that permanently encrypts your files, or a simple disk failure.
Without a backup, you can lose your job, several years of memories in the form of photos, and other important data. In today's article, we will therefore shed light on how to prepare for such cases, or how to use NAS storage for Mac backup through Time Machine.
What exactly is Time Machine?
Time Machine is a native solution directly from Apple that allows you to back up your Mac. The huge advantage is that you don't have to worry about anything. You only need to make the basic settings and then the utility works completely automatically. Backing up can be done, for example, using an external disk or the just-mentioned NAS, which we will now look at together. All settings take only a few minutes.
Preparing the NAS storage
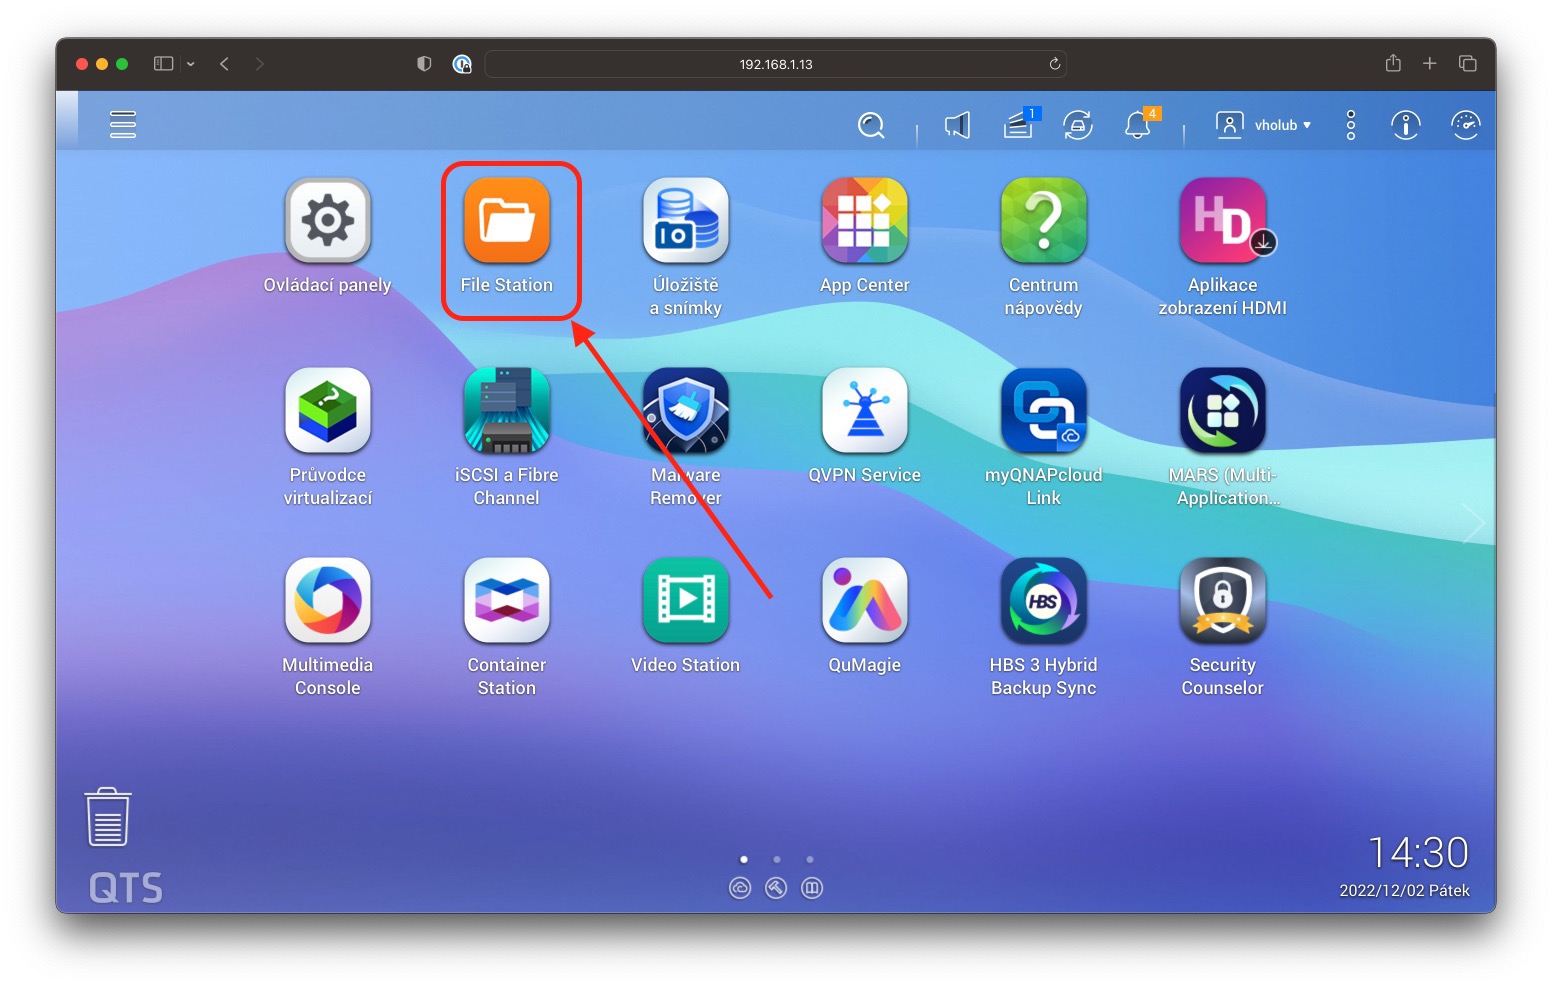
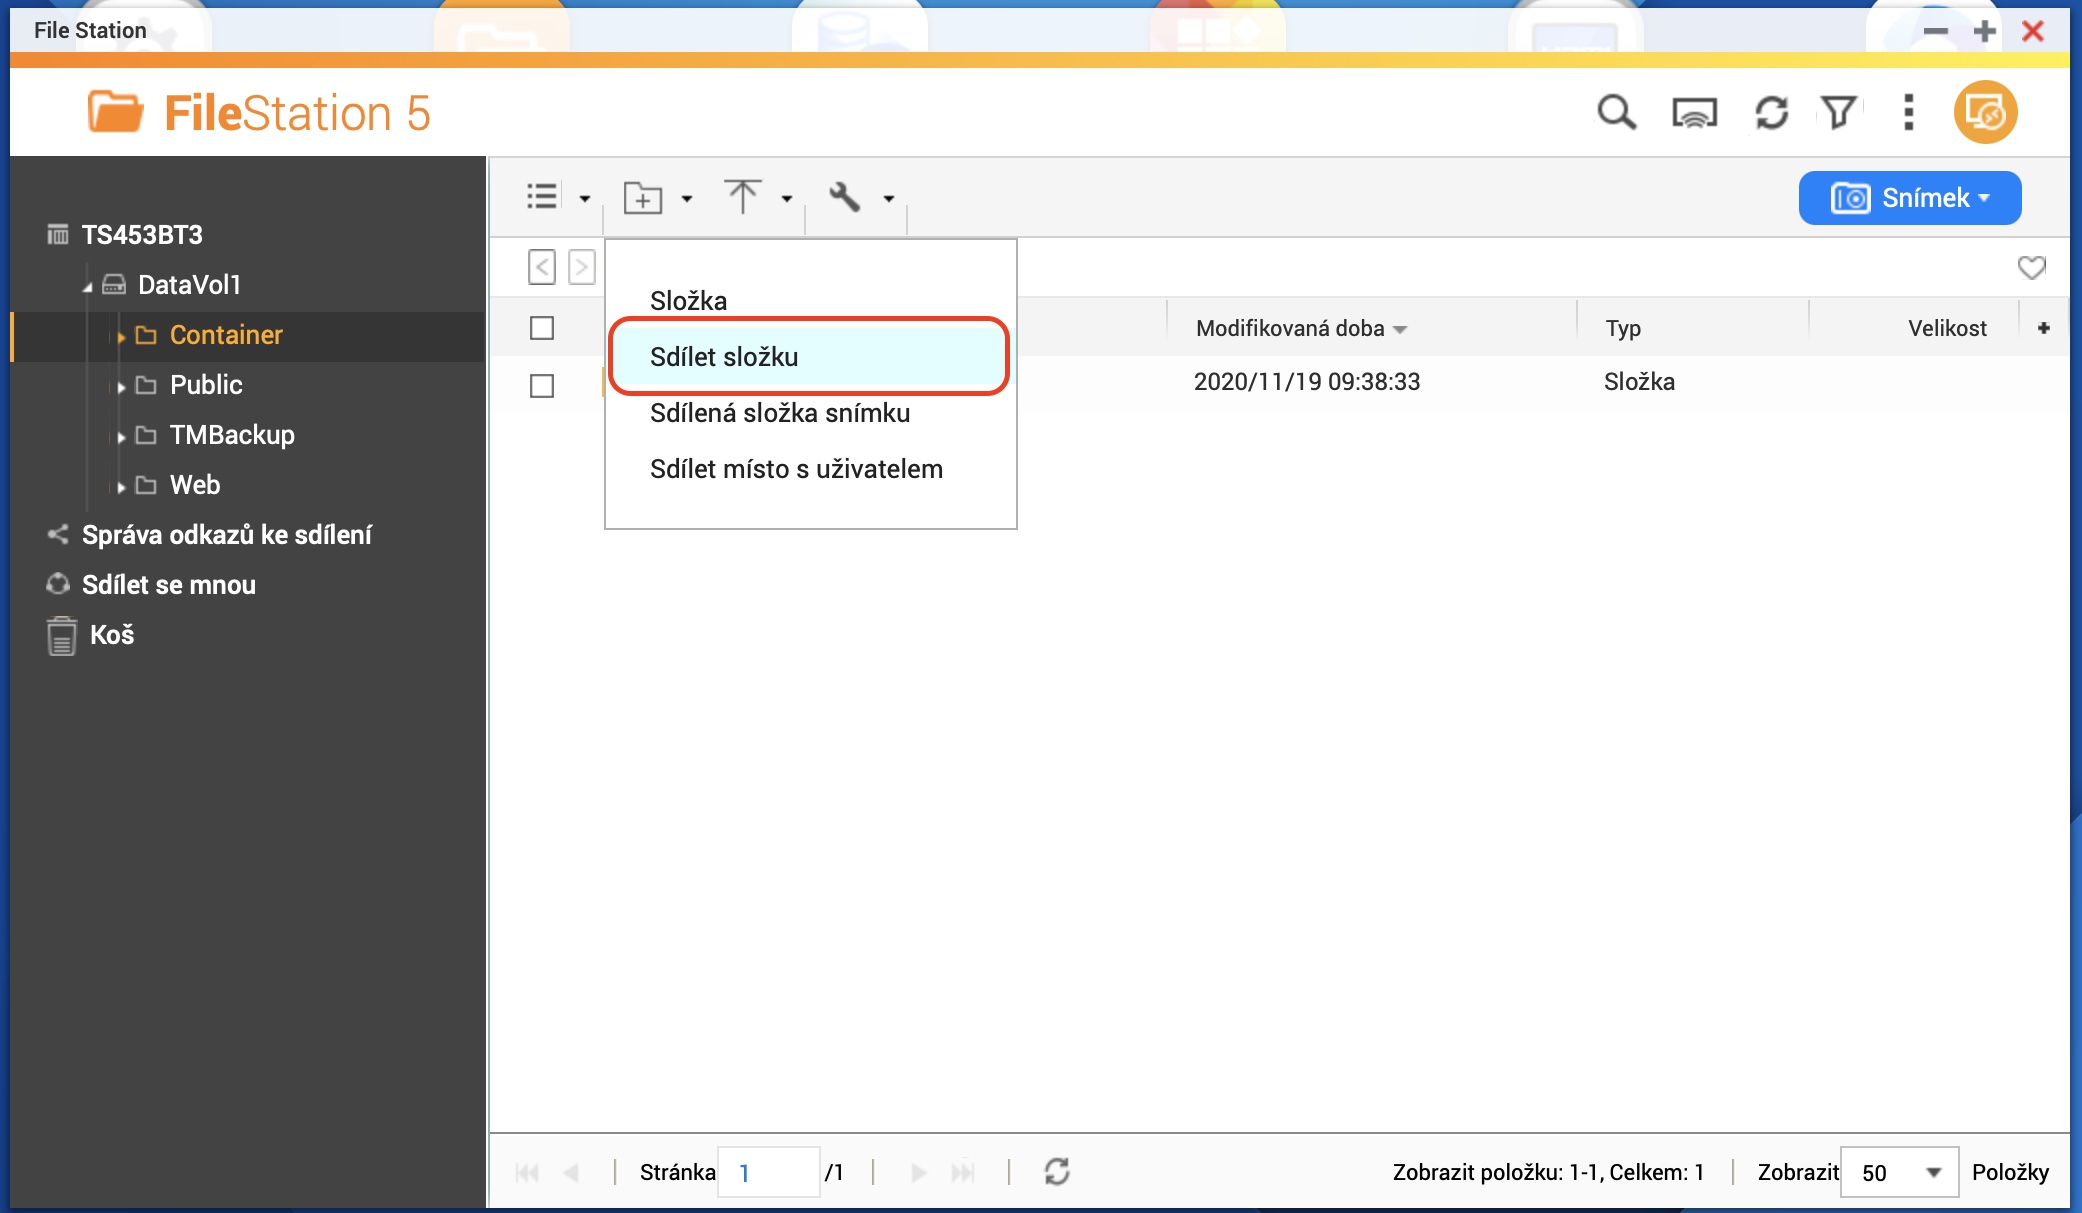
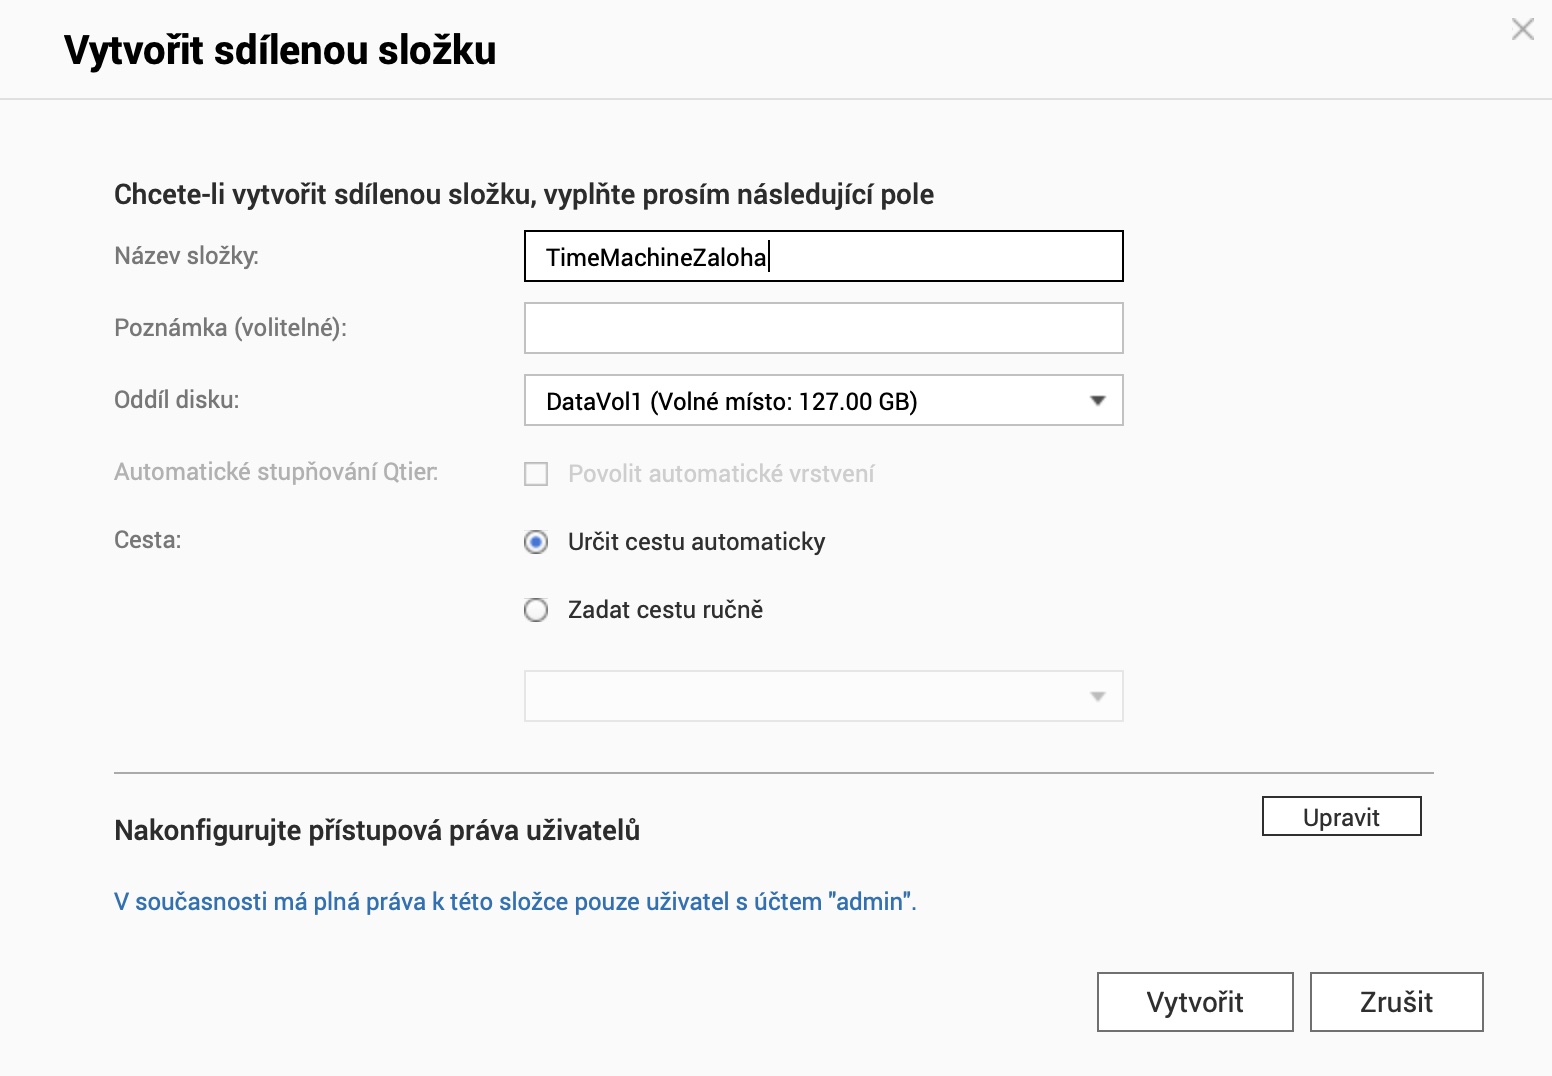
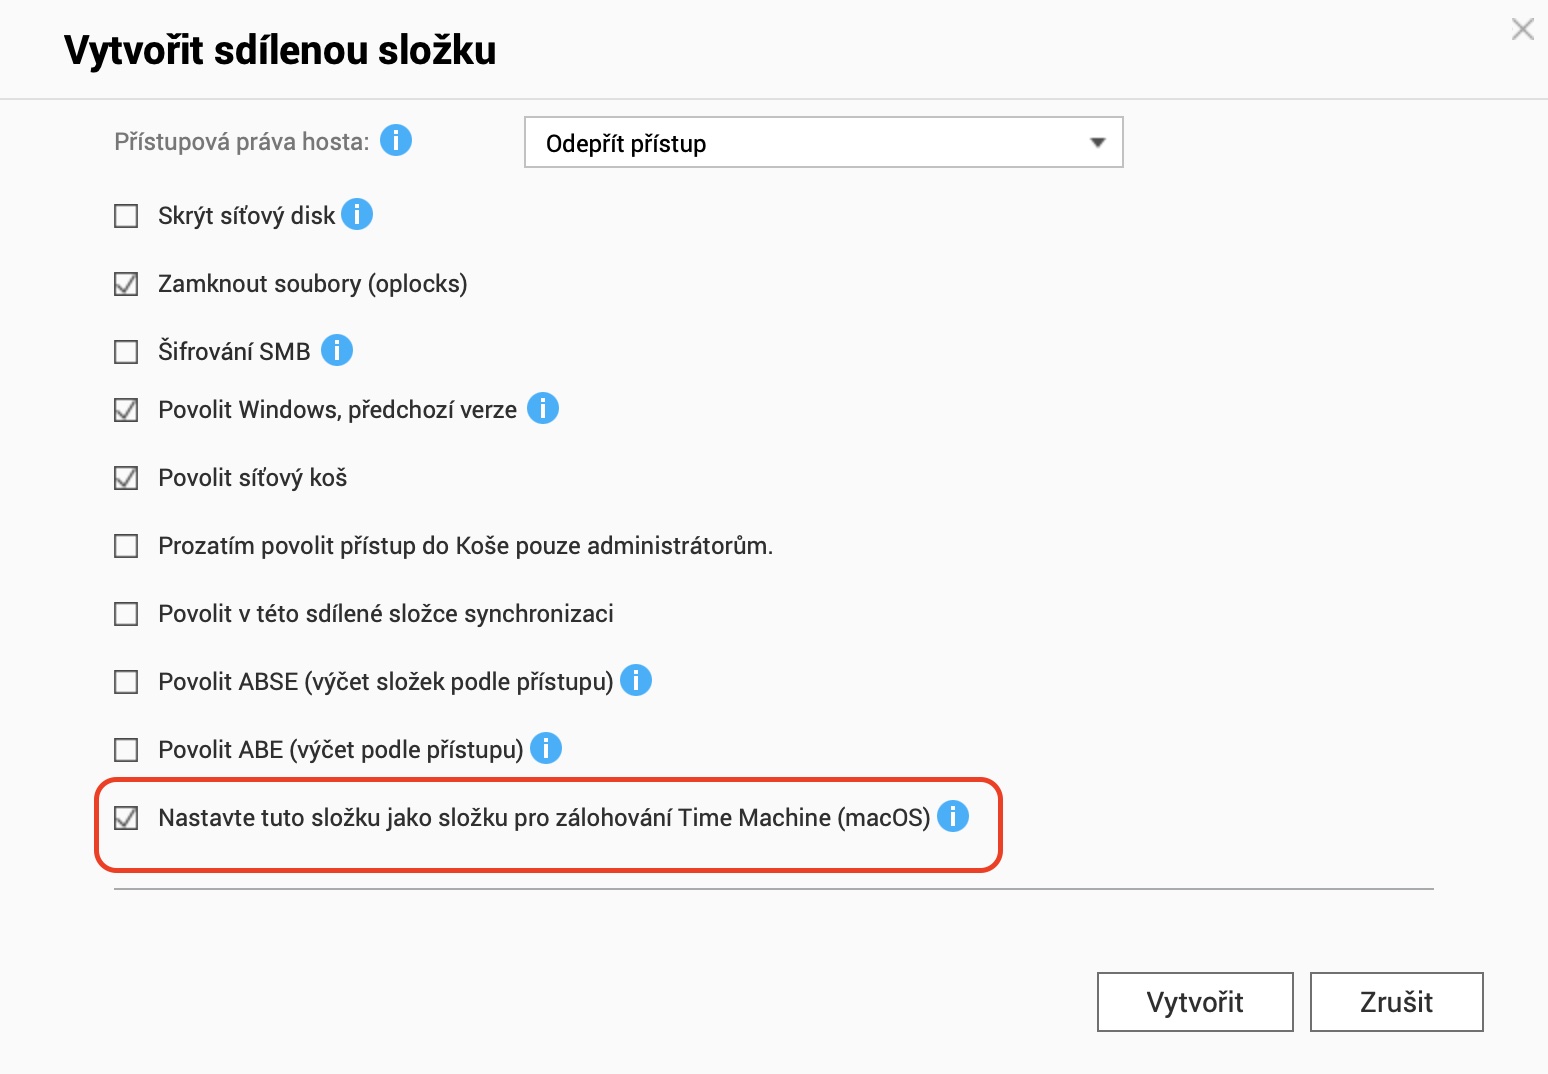
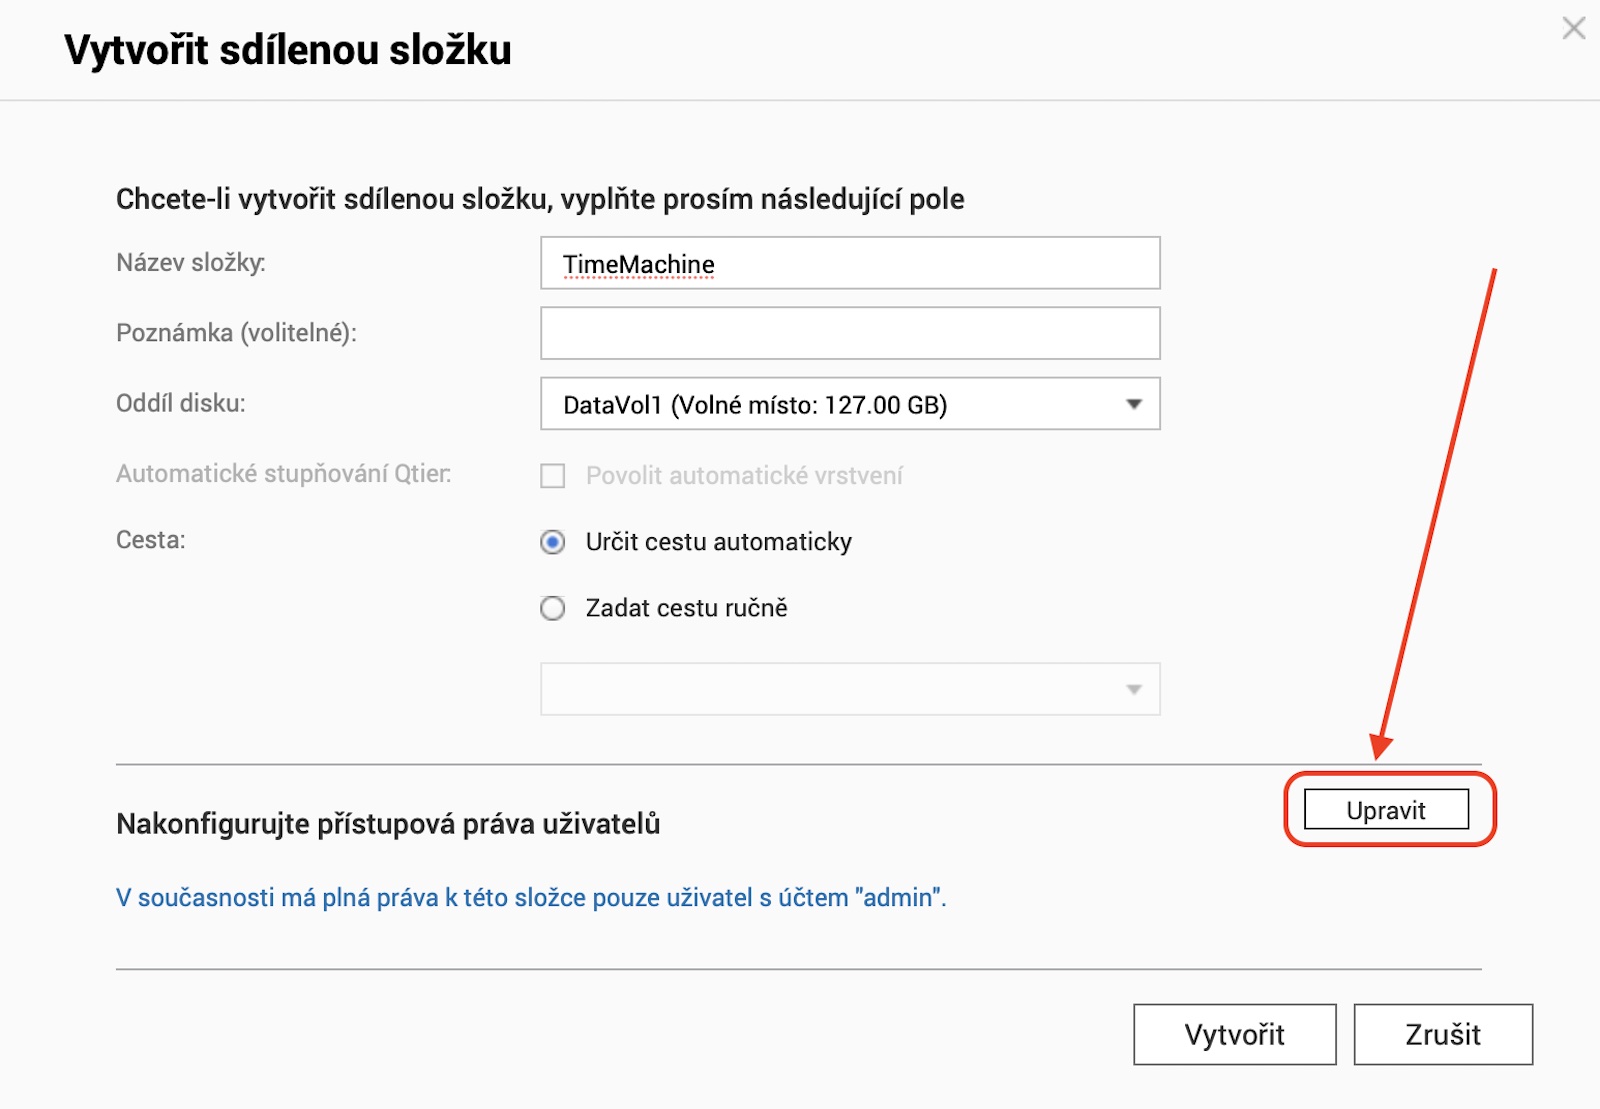
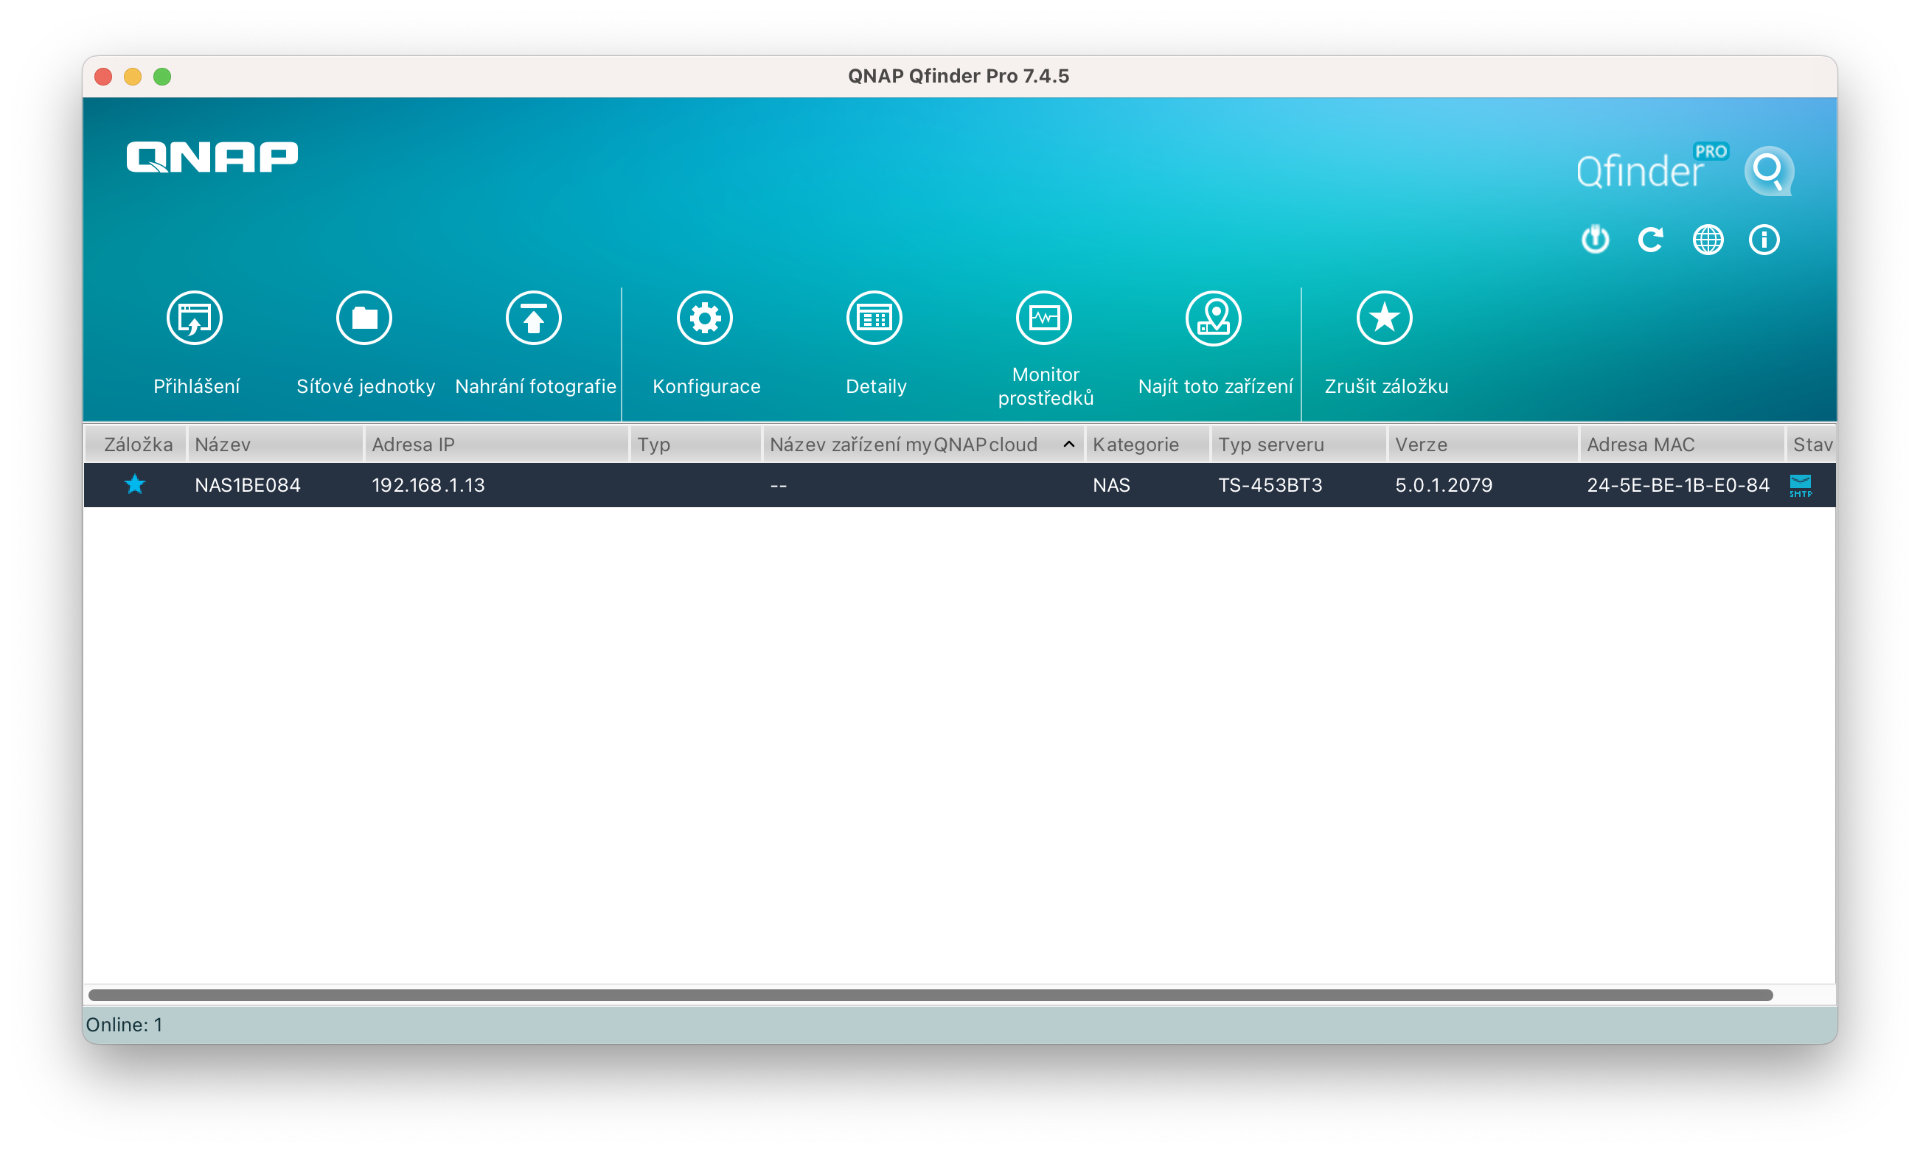
First, it is necessary to prepare the NAS itself. This is precisely why it is necessary to click over from the Qfinder Pro application to the network storage administration, where you just have to choose Queue Station. Now you need to create a partition on which our backups will be stored. At the top, just tap on the folder with the plus sign and choose an option Share folder. All you have to do is choose a name and check the option at the very bottom Set this folder as a Time Machine backup folder (macOS).
Of course, backup can take place via a classic gigabit connection. Owners of QNAP NAS with Thunderbolt 3 are much better off, as you can use the TB3 connection to achieve significantly faster backups.
Preparing NAS for multiple users
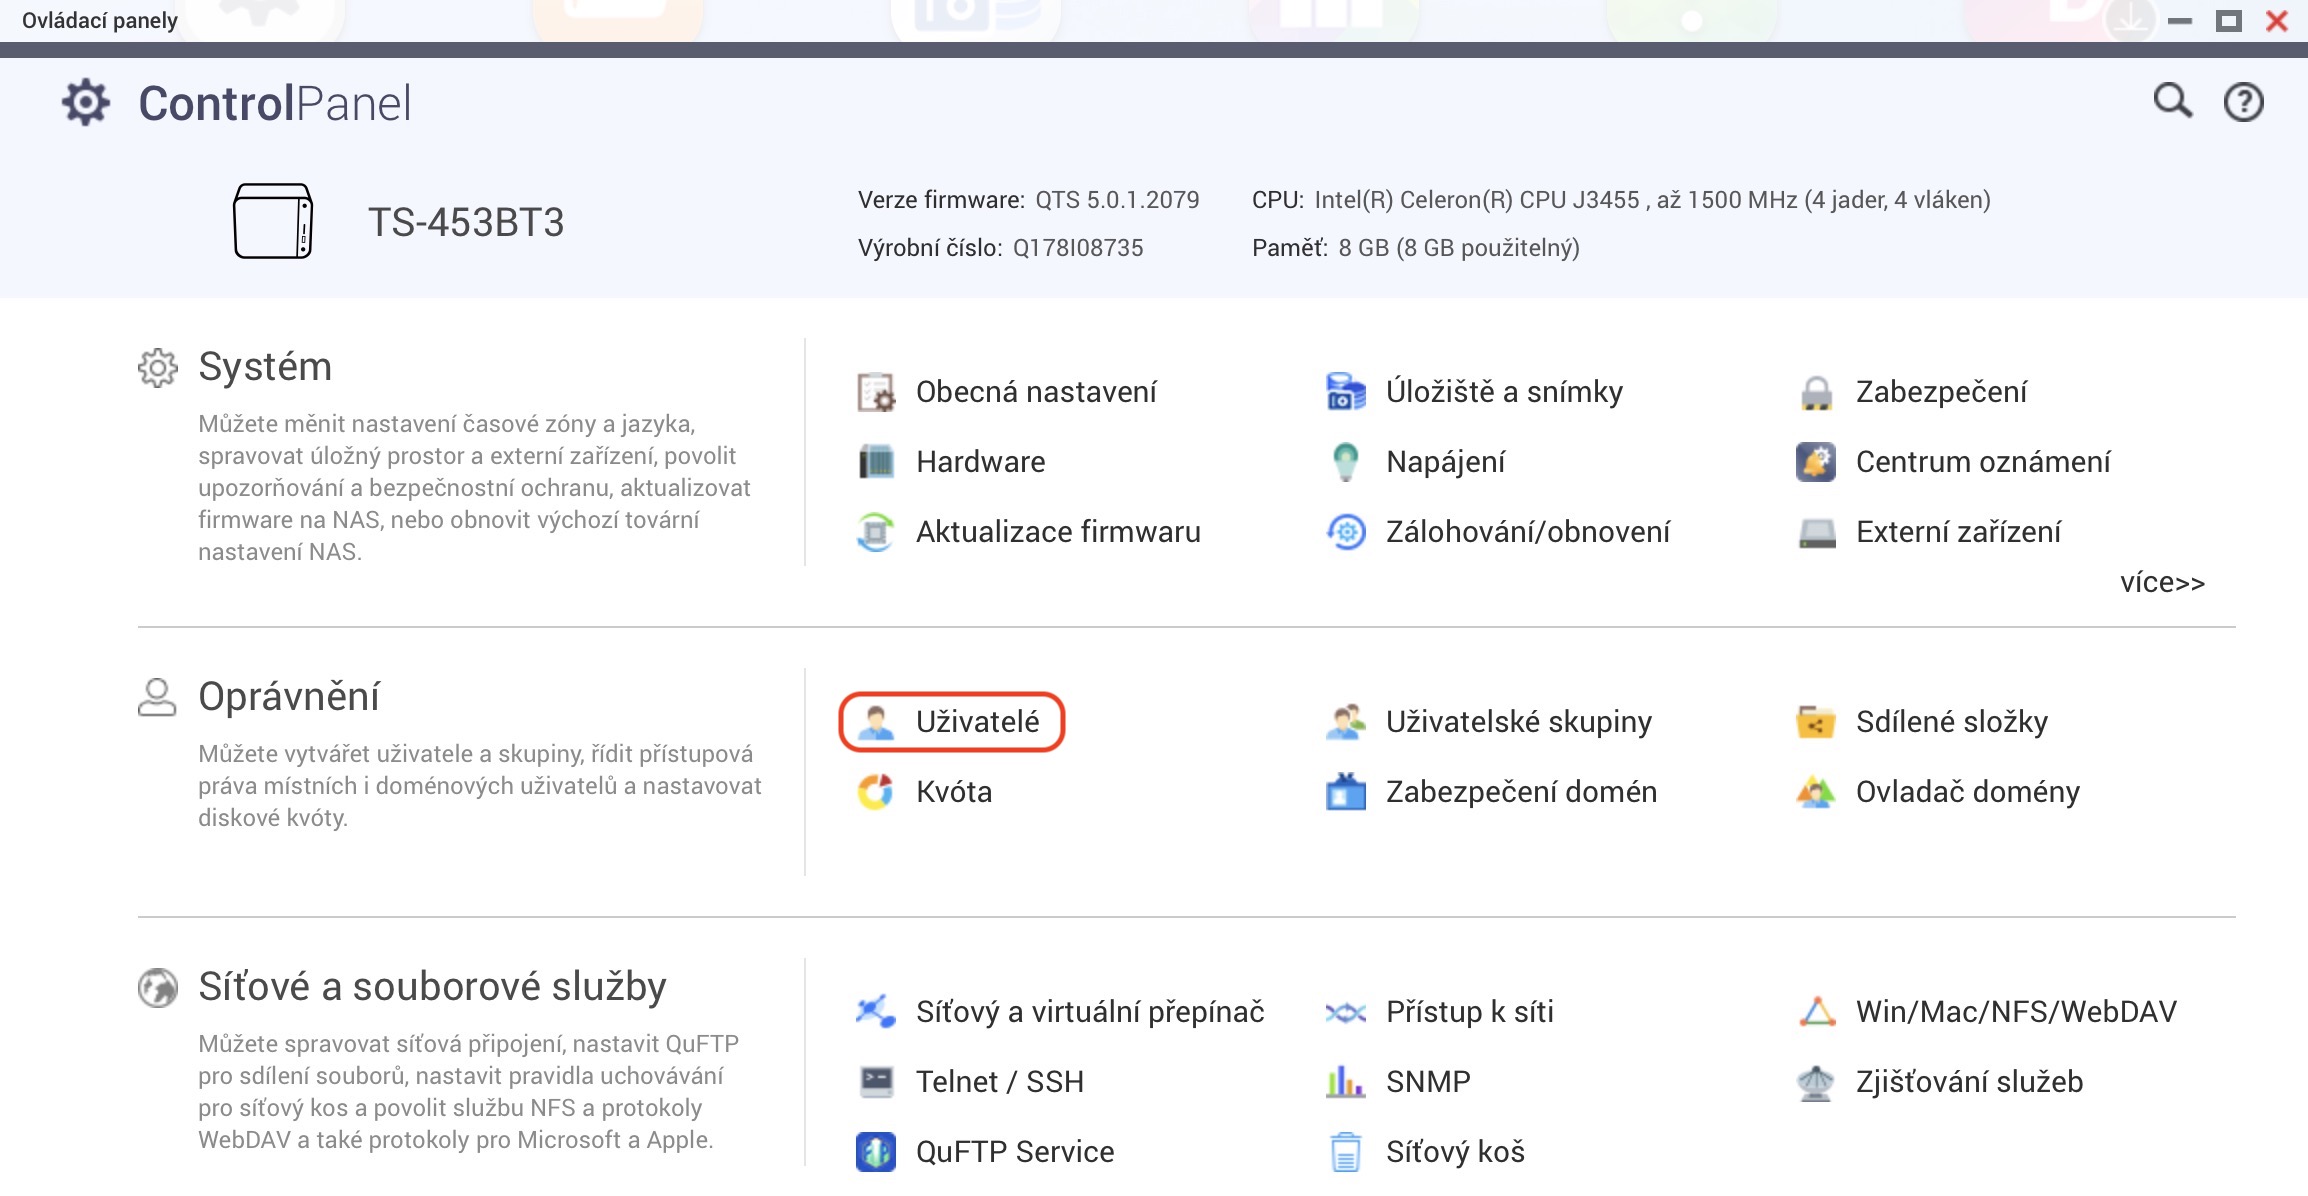
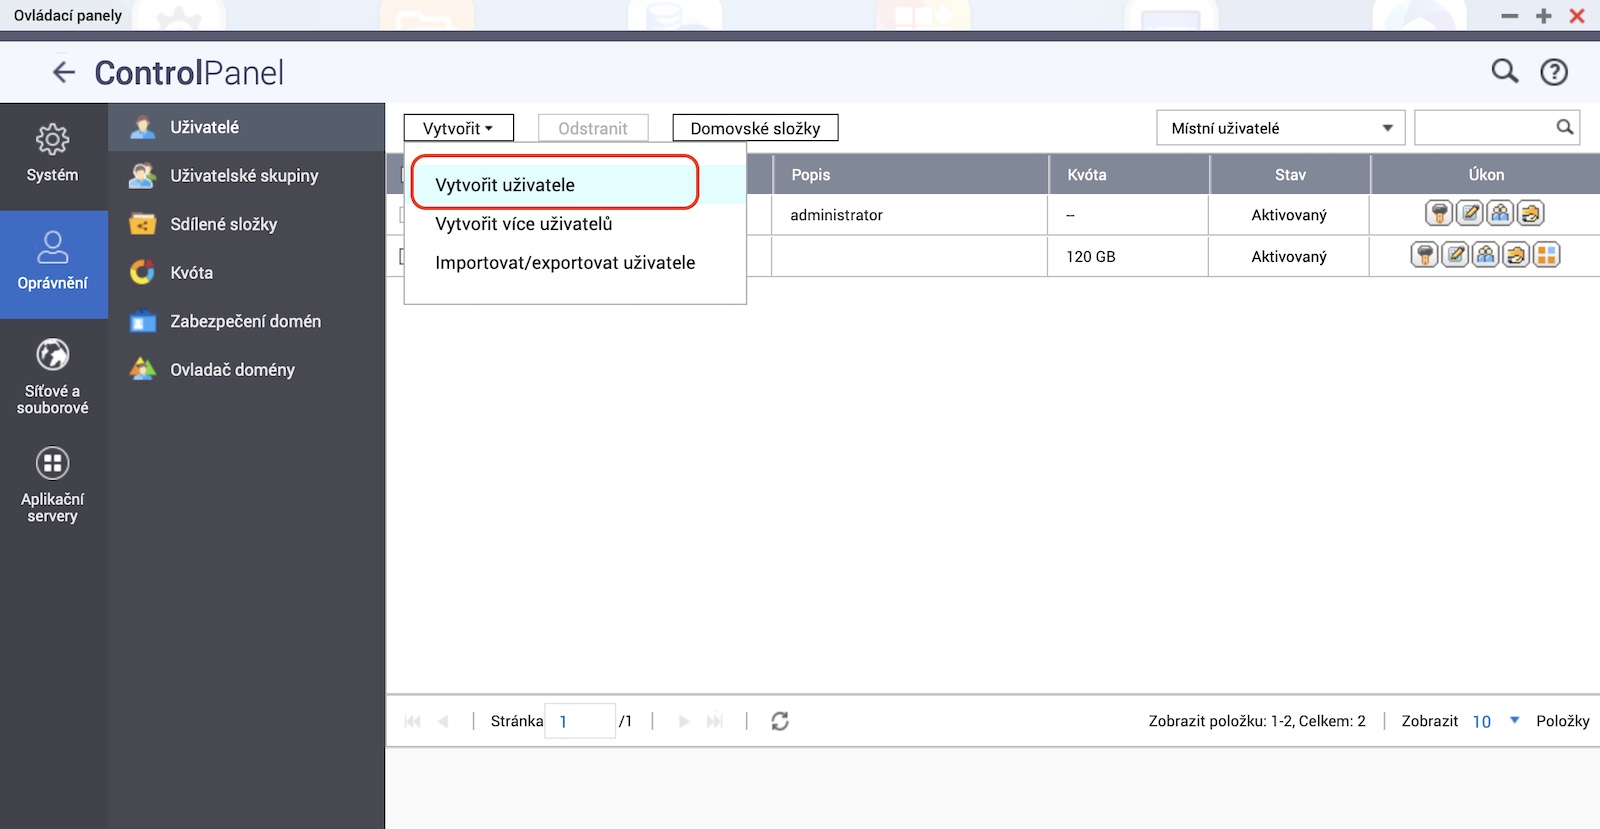
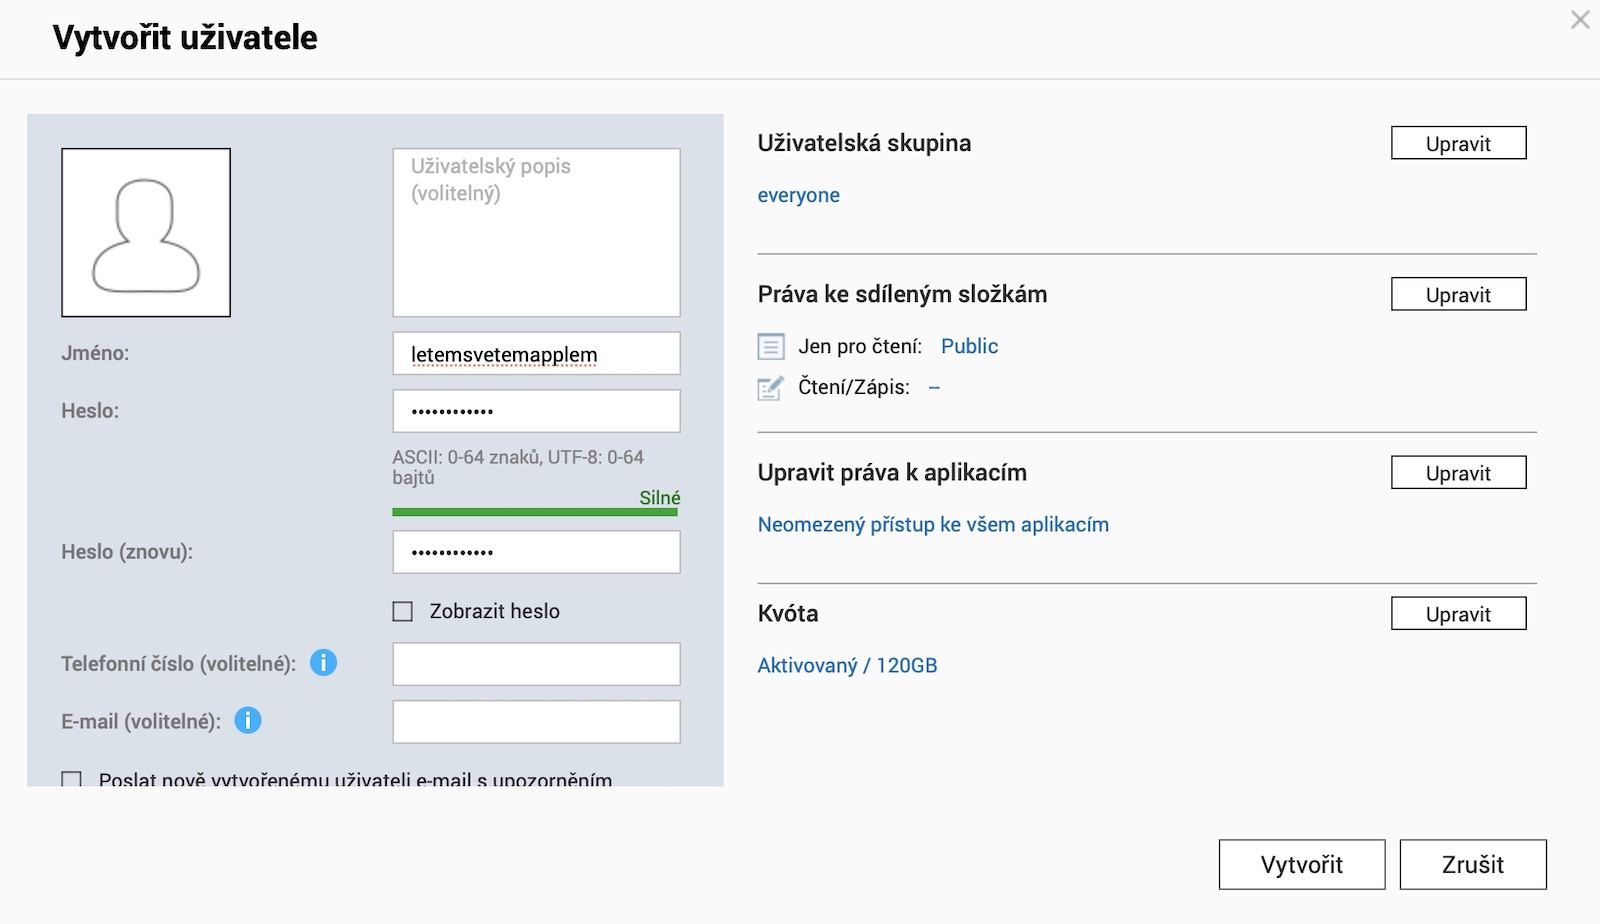
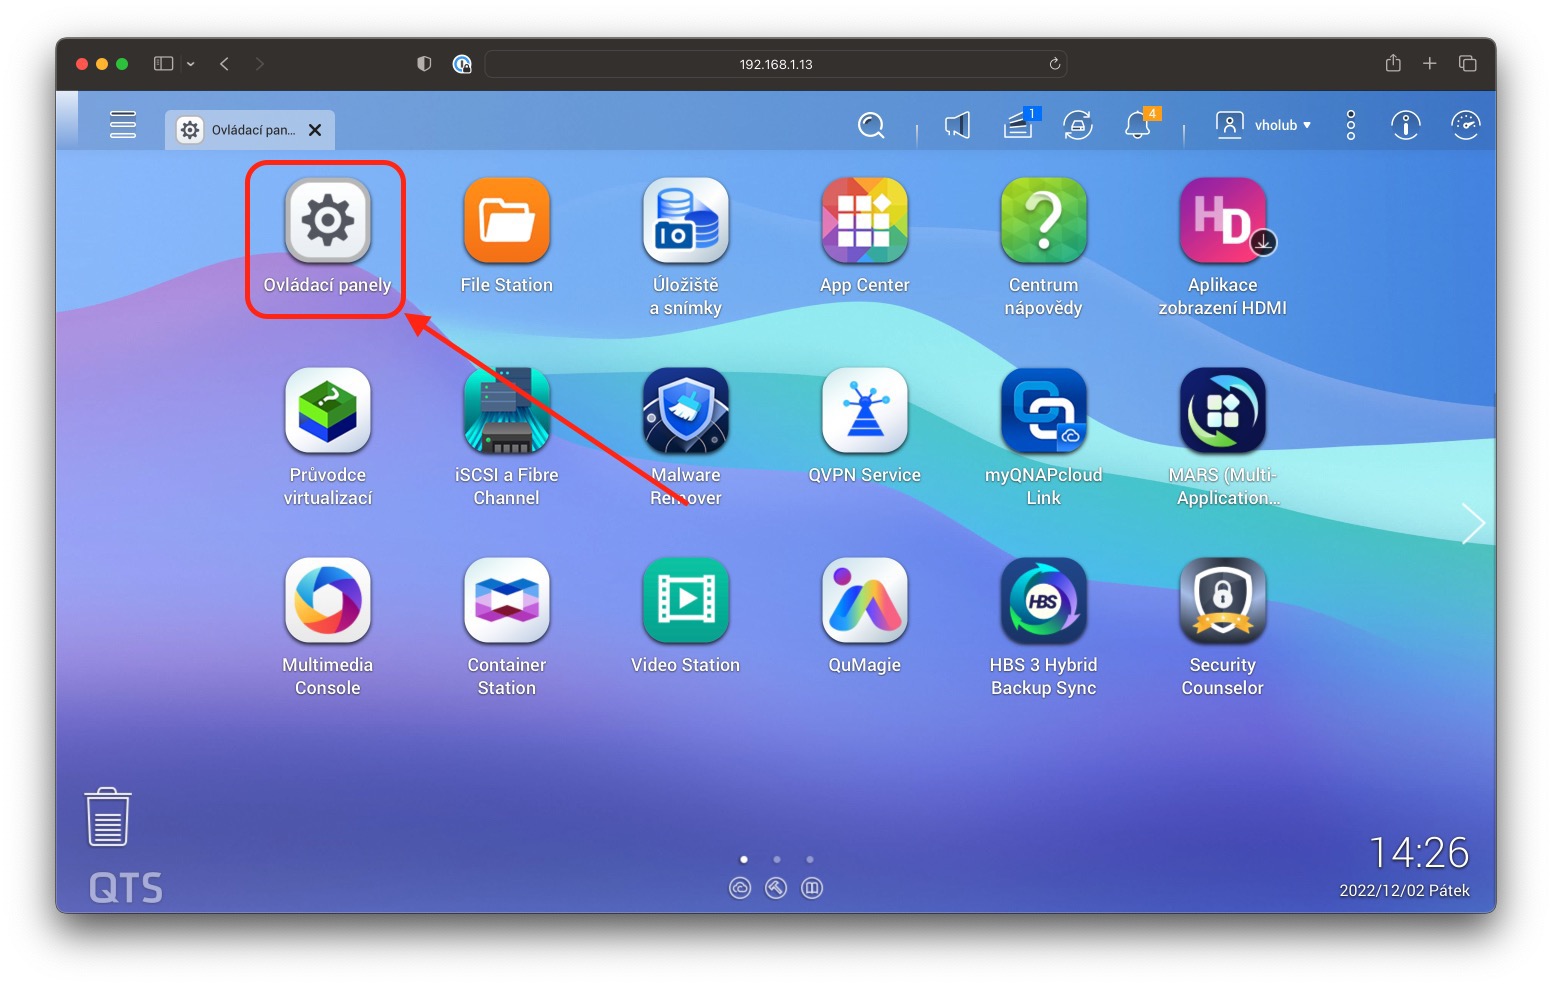
But if, for example, in a company or household we need to back up several Macs through Time Machine, we can easily prepare the storage for this. In this case, it is necessary to open Control panels and in the section Authorization click on the option Users. Now just tap on the option at the top Create and select Create user. With it, we can set a name, password and a number of other data.
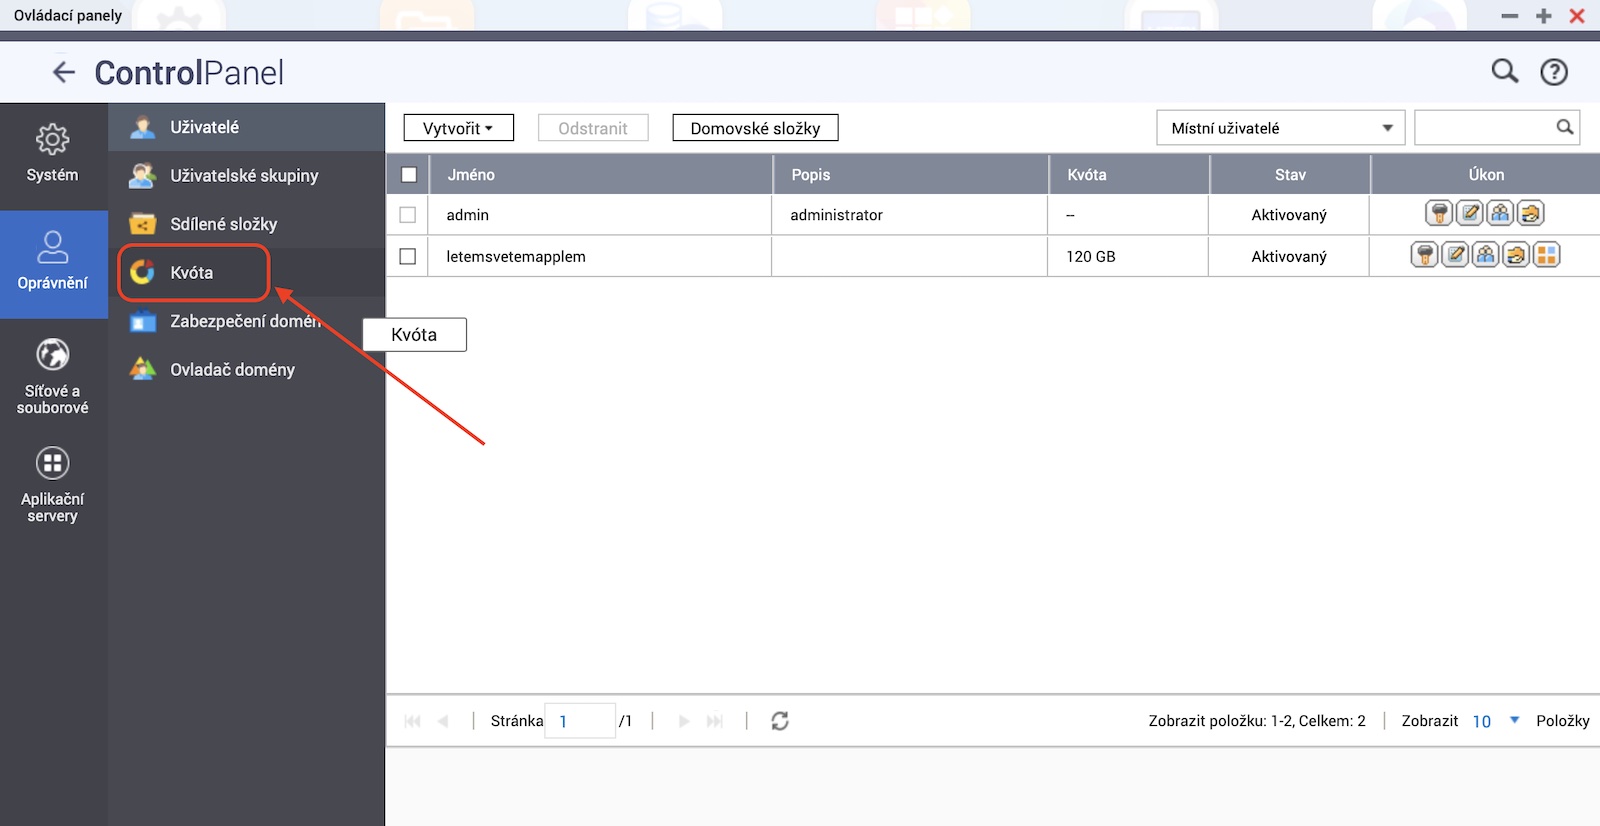
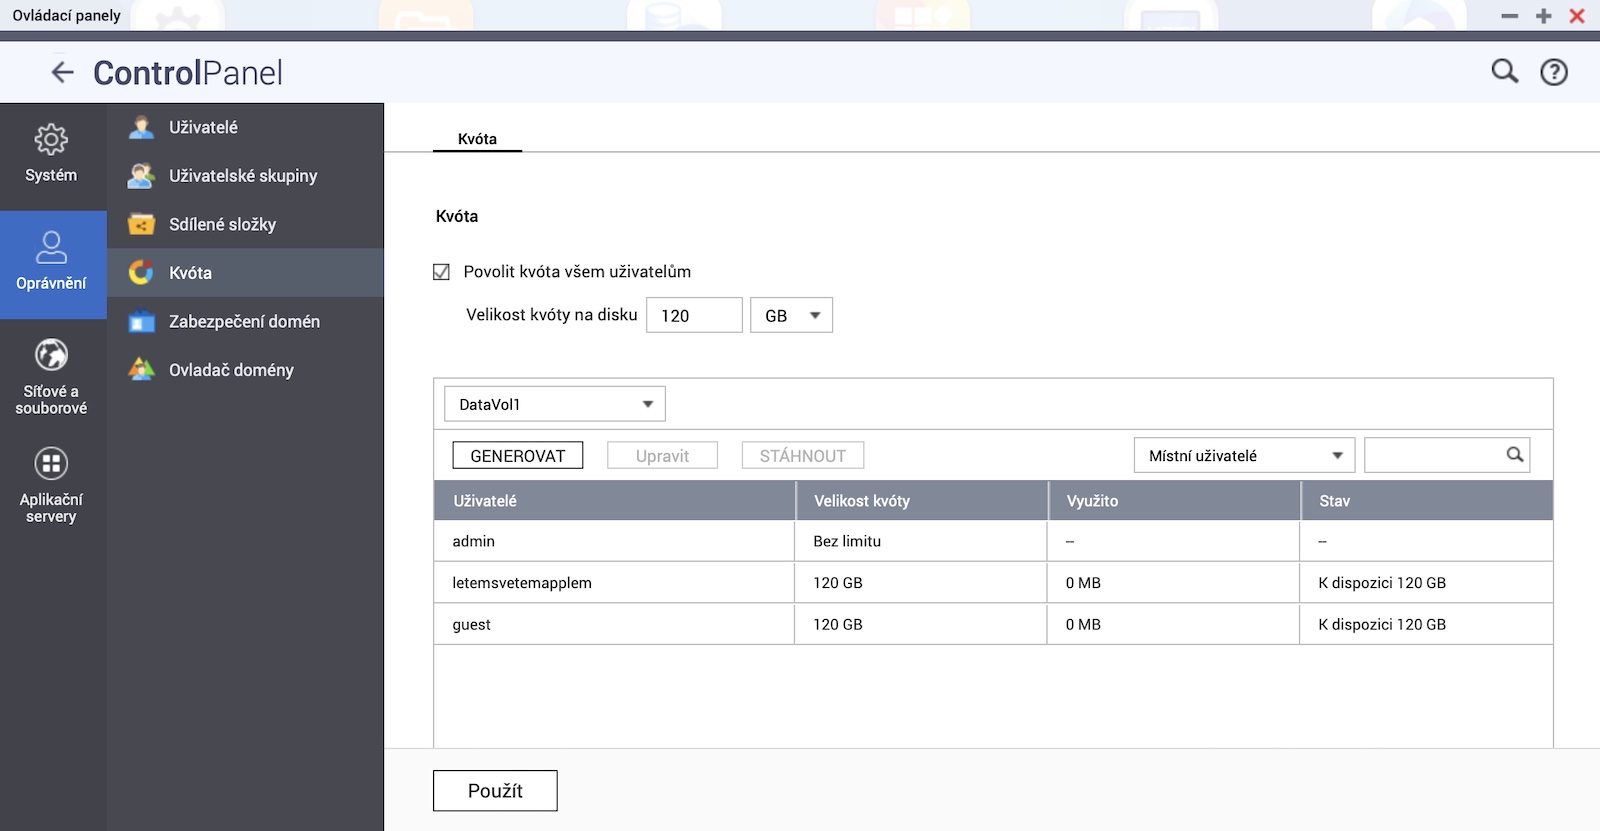
To ensure the limit, it is also a good idea to set a certain quota for these users. In the left panel, we therefore go to the section Quota, where you just need to check the option Allow quota for all users and set the appropriate limit. Of course, we can adjust this for individual users in the section Users, where we created the account.
Step by step procedure:
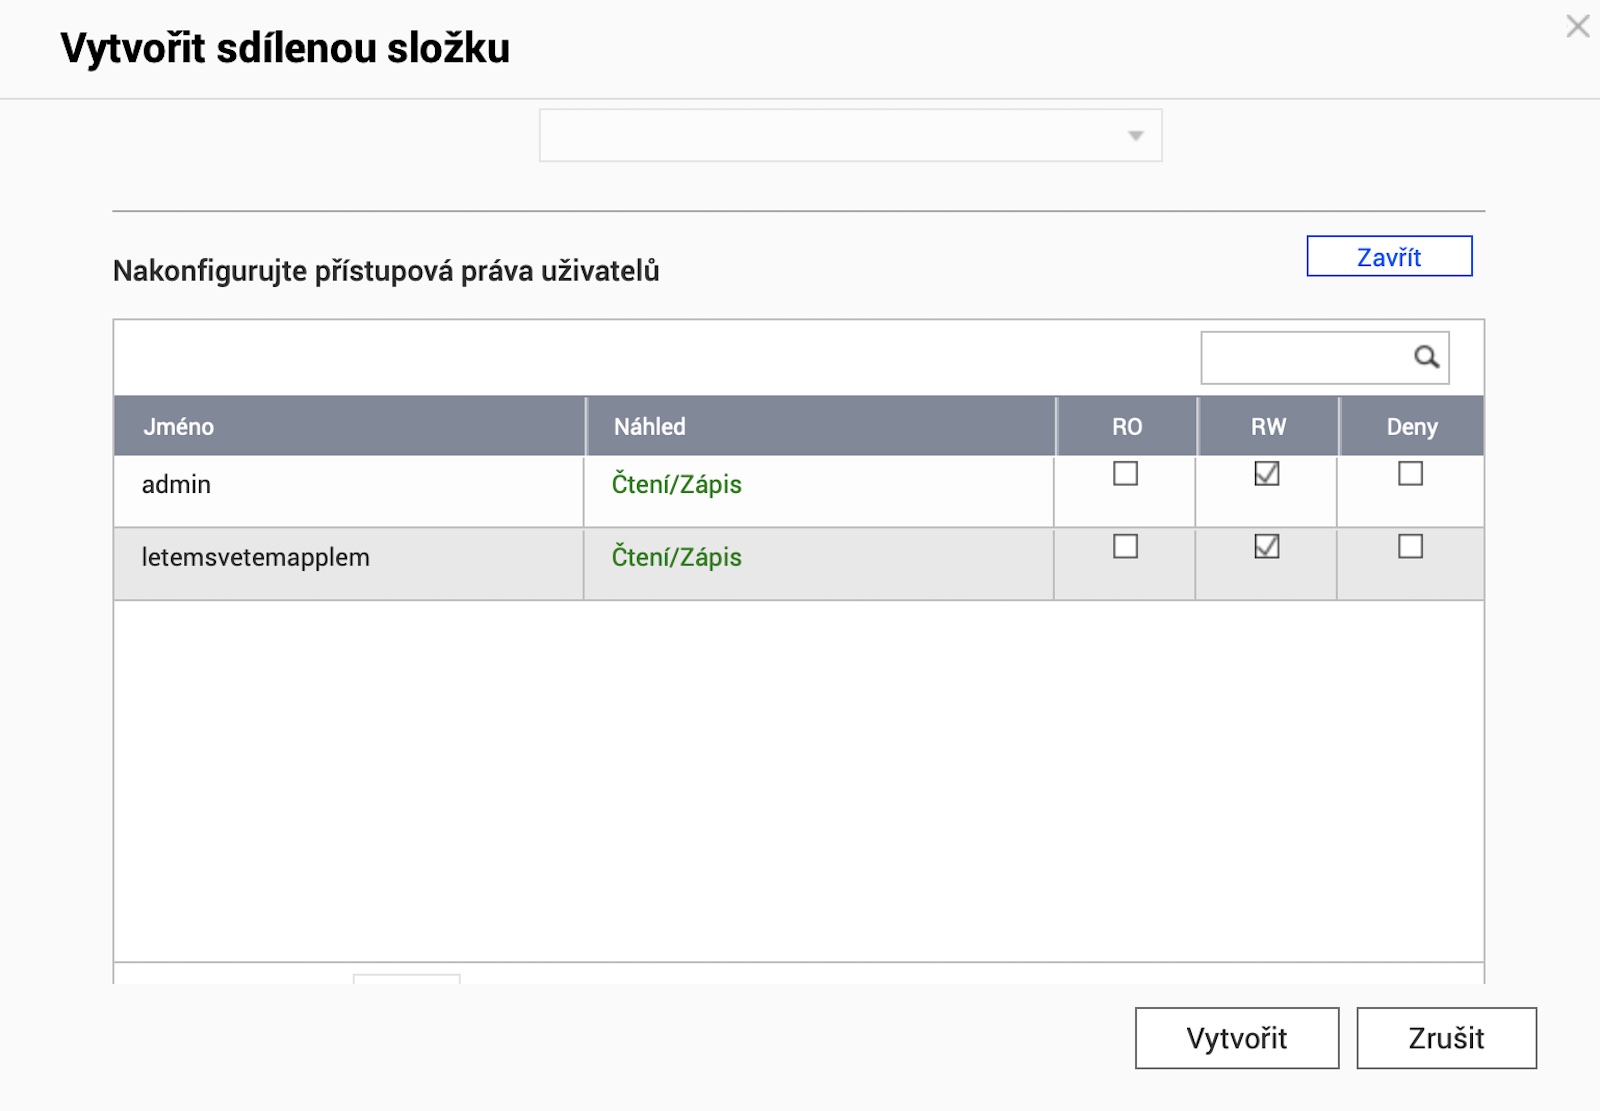
Subsequently, the procedure is almost the same. So just go to Queue Station, where you need to create a shared folder. But now in the section Configure user access rights we have to check the option for the given user RW or read/write and check the option at the very bottom again Set this folder as a Time Machine backup folder (macOS).
SMB settings 3
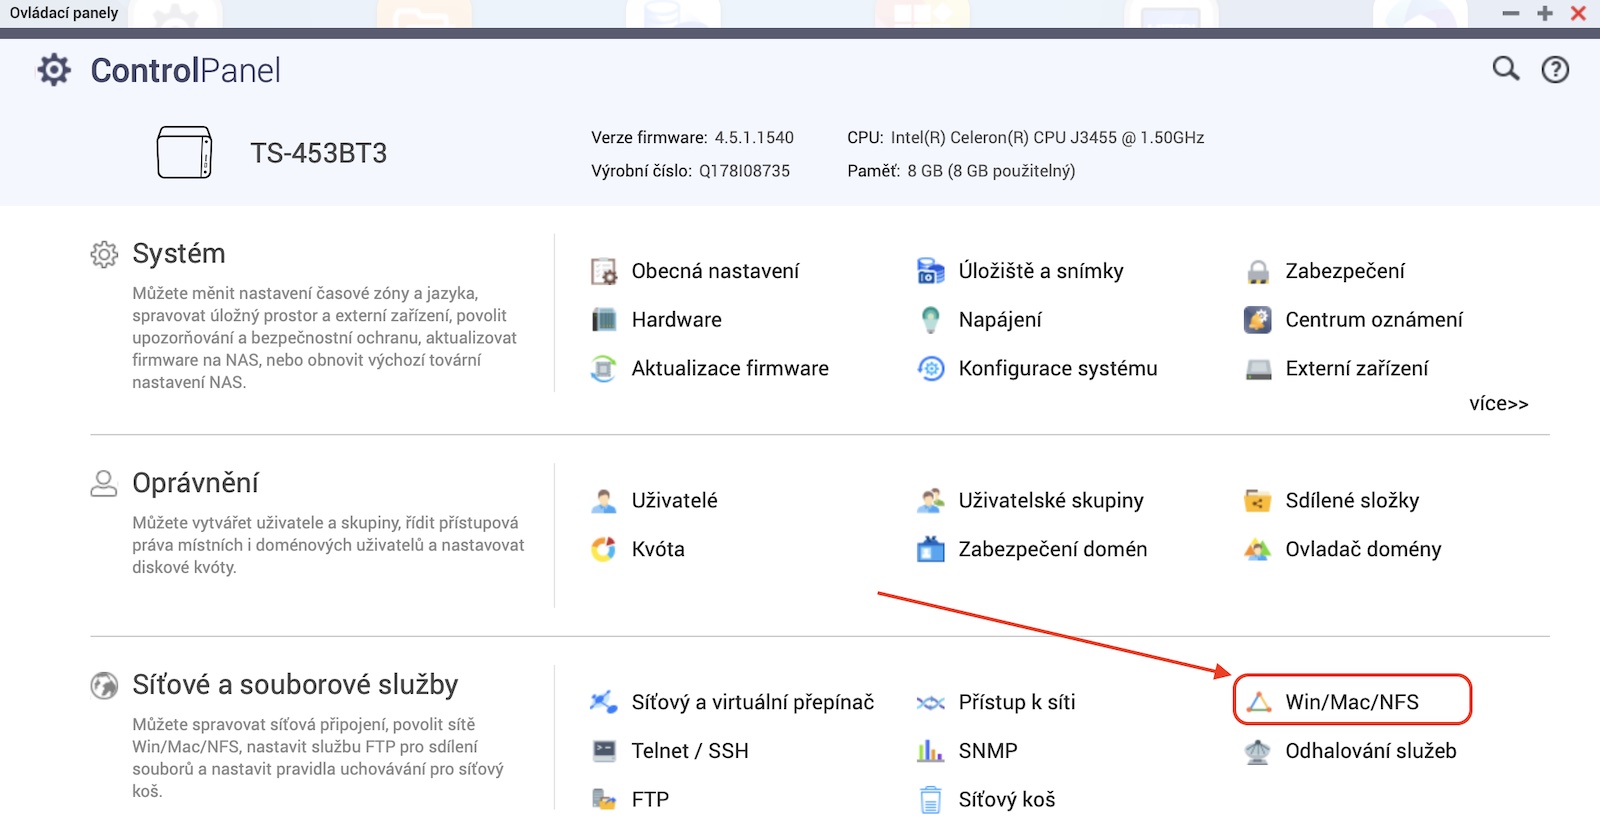
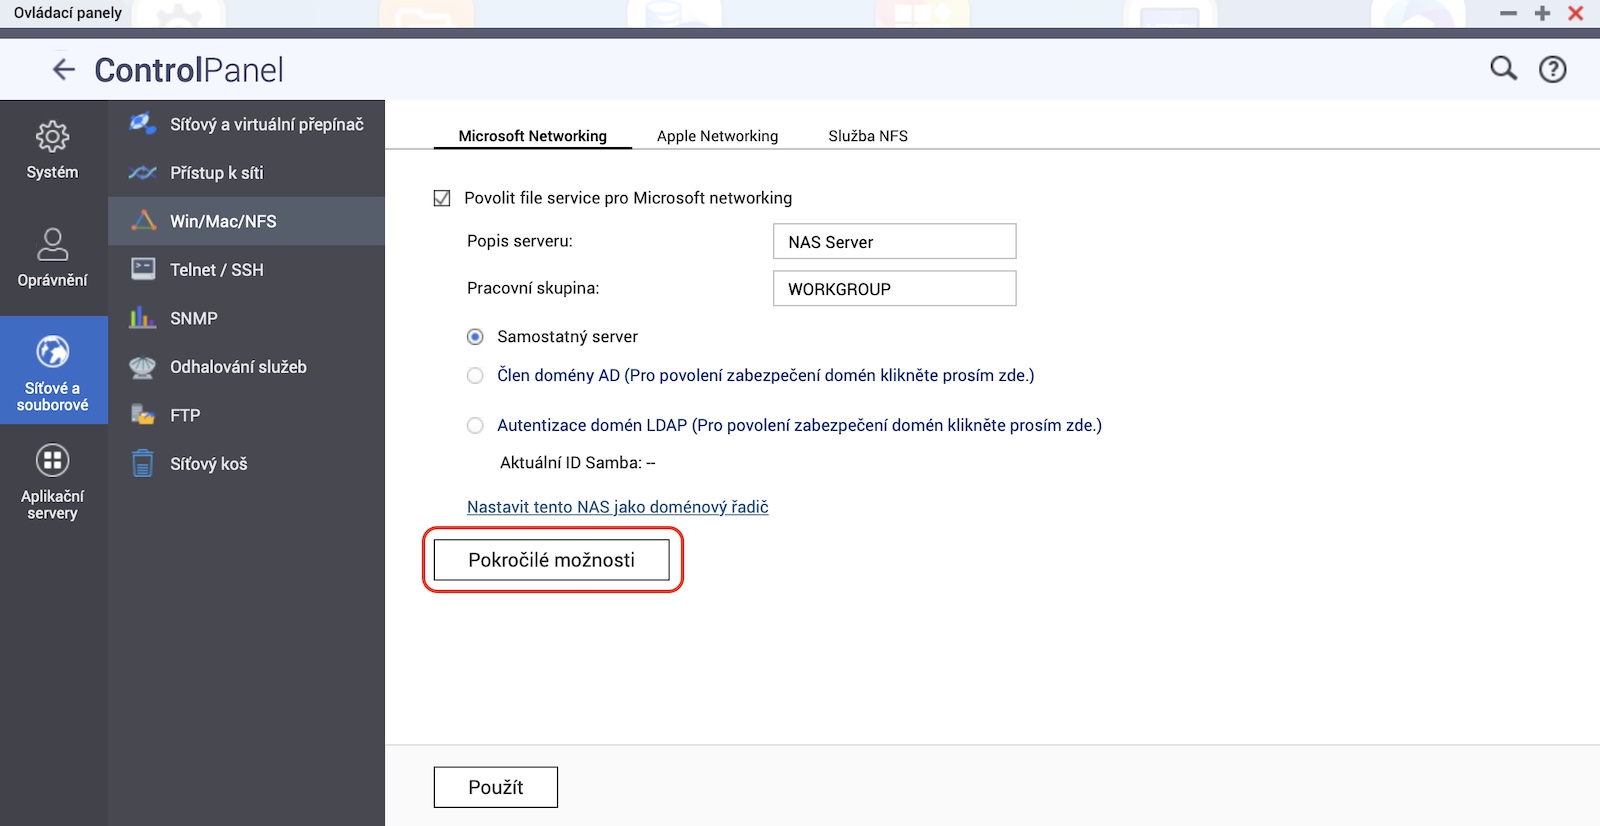
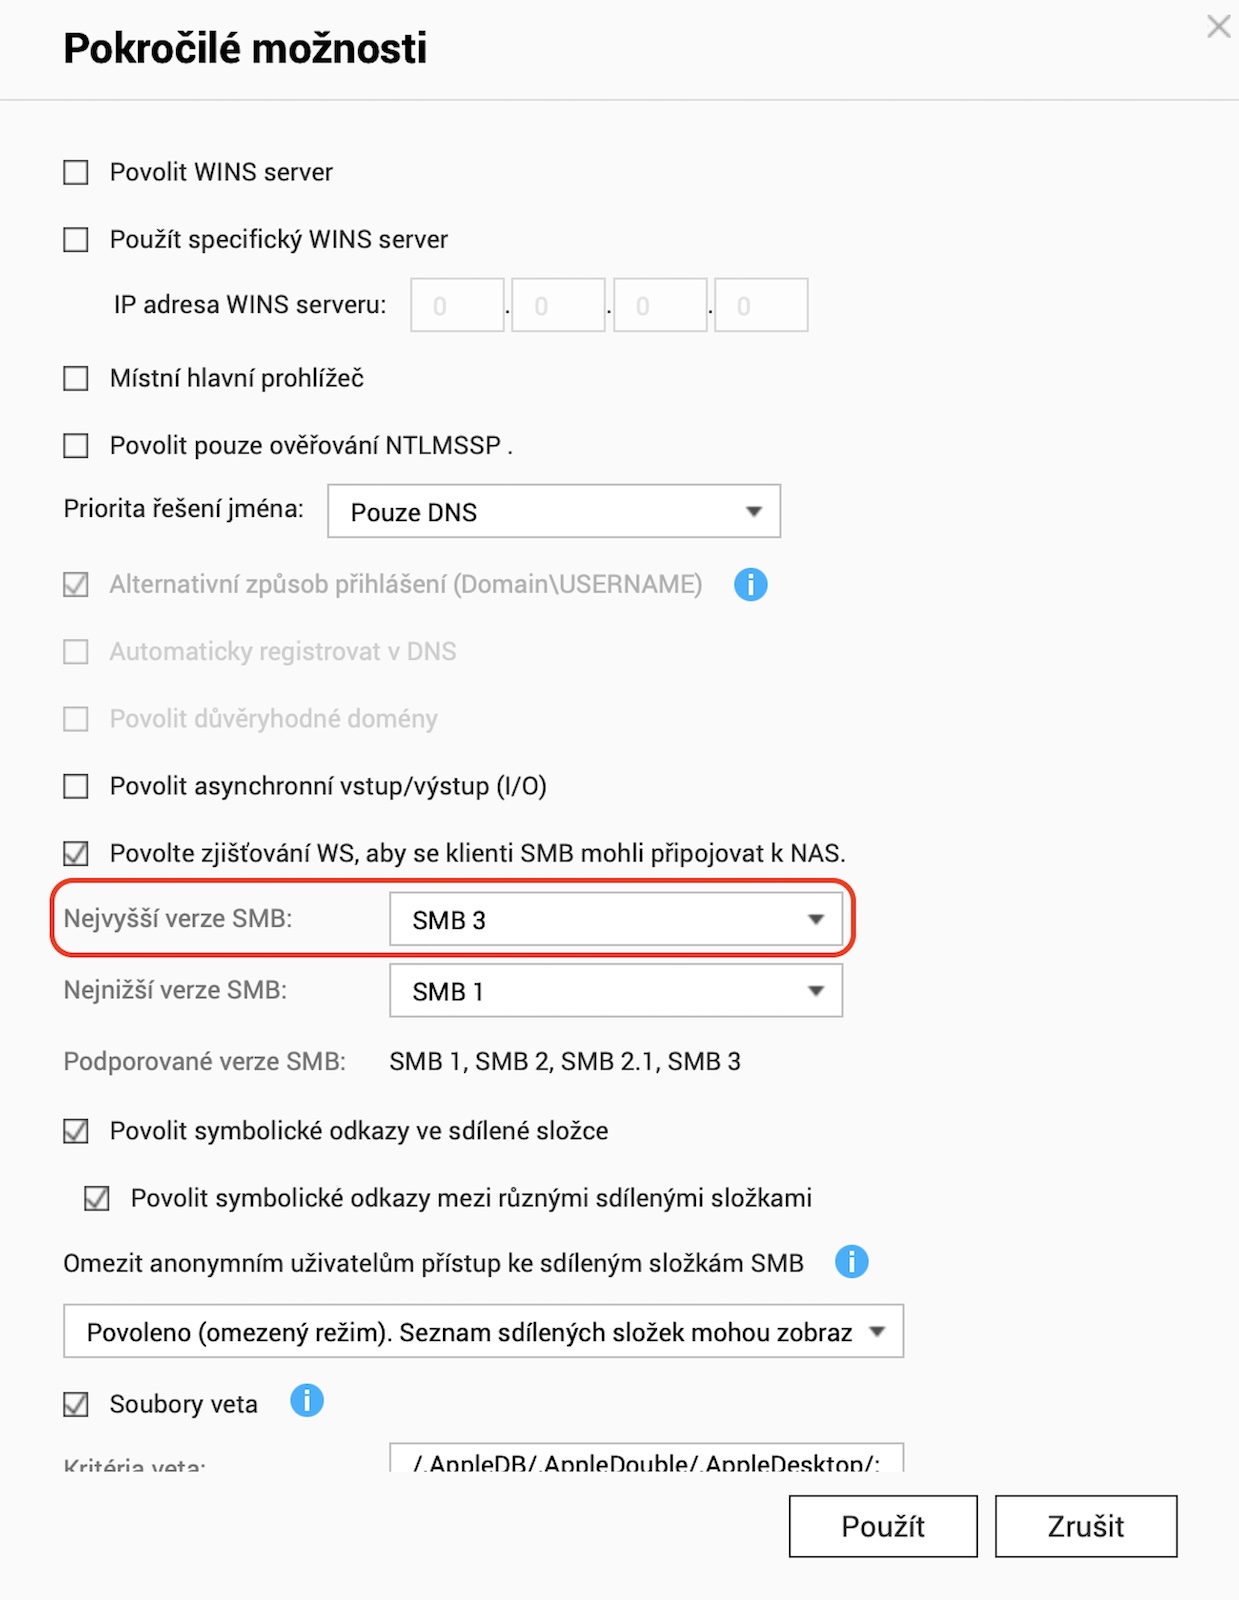
At the same time, one more change must be made for the correct functionality of the backup via Time Machine. IN control panels therefore we will go into the category Network and file services to the section Win/Mac/NFS, where we open Advanced options. Here we make sure that u The highest version of SMB we have it set SMB3.
Automatic backup settings
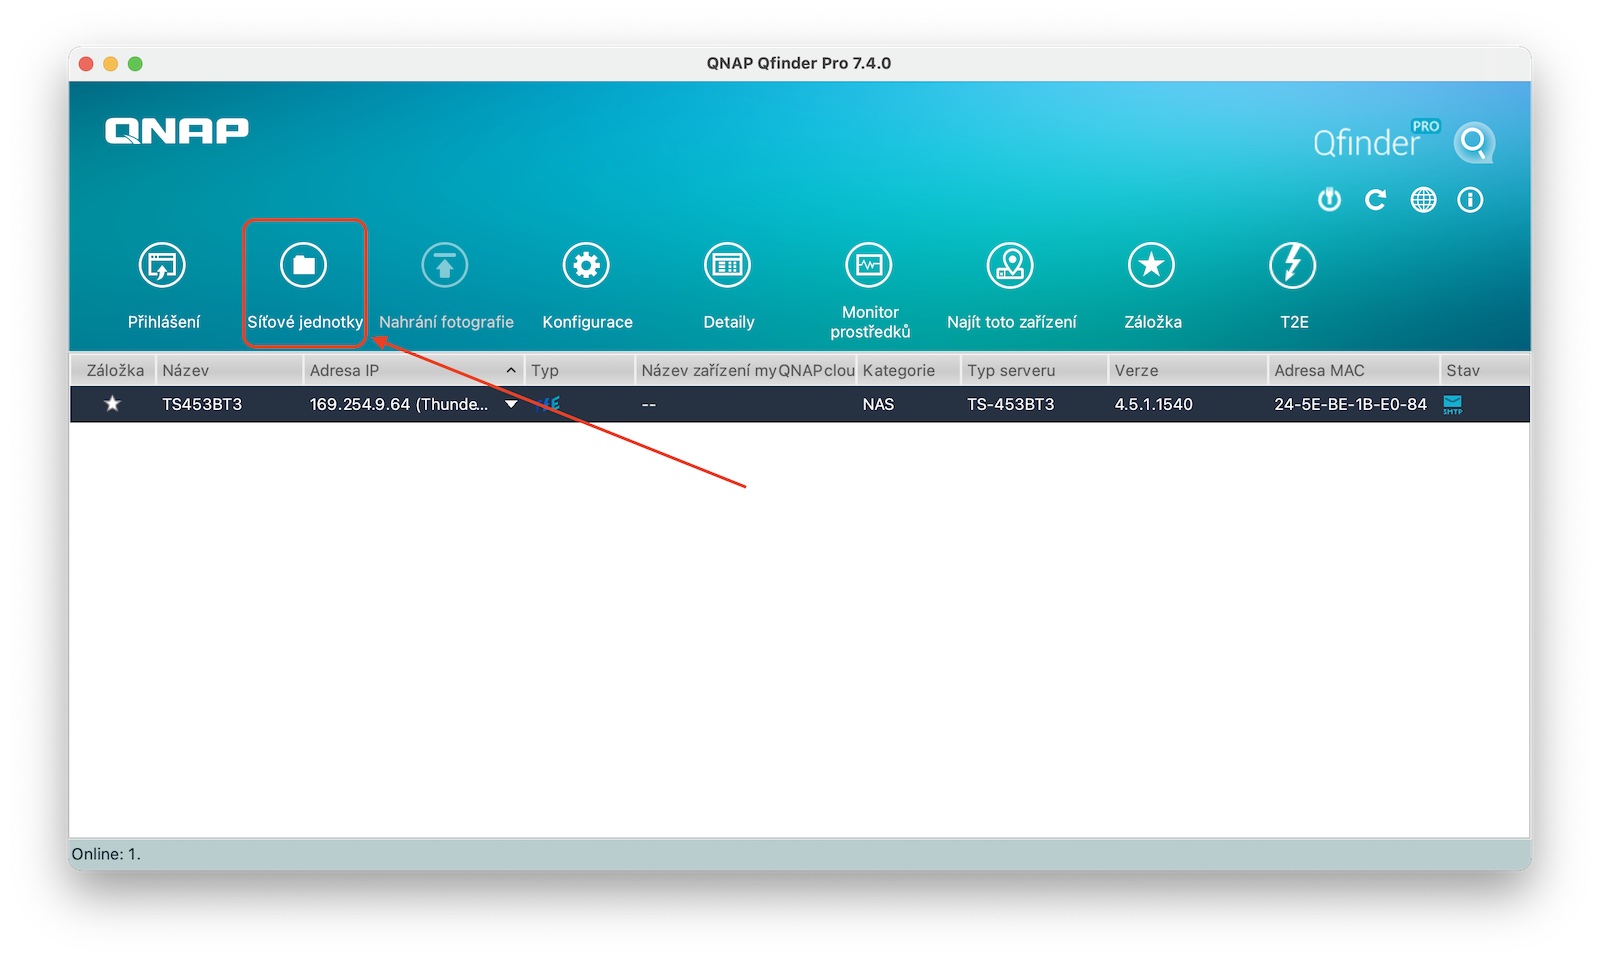
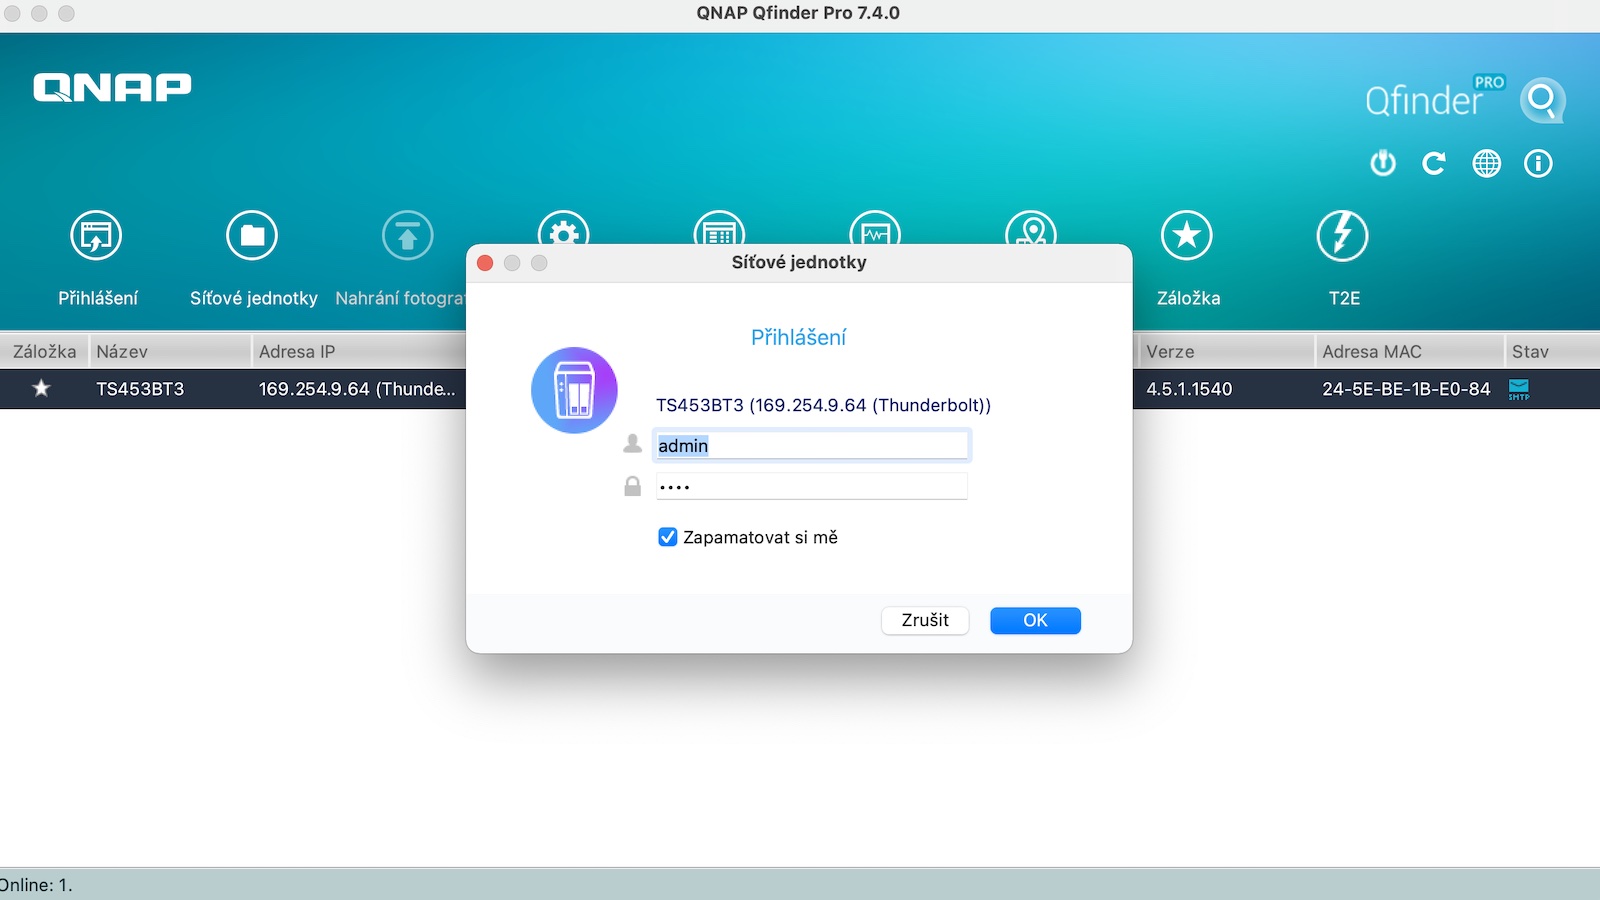
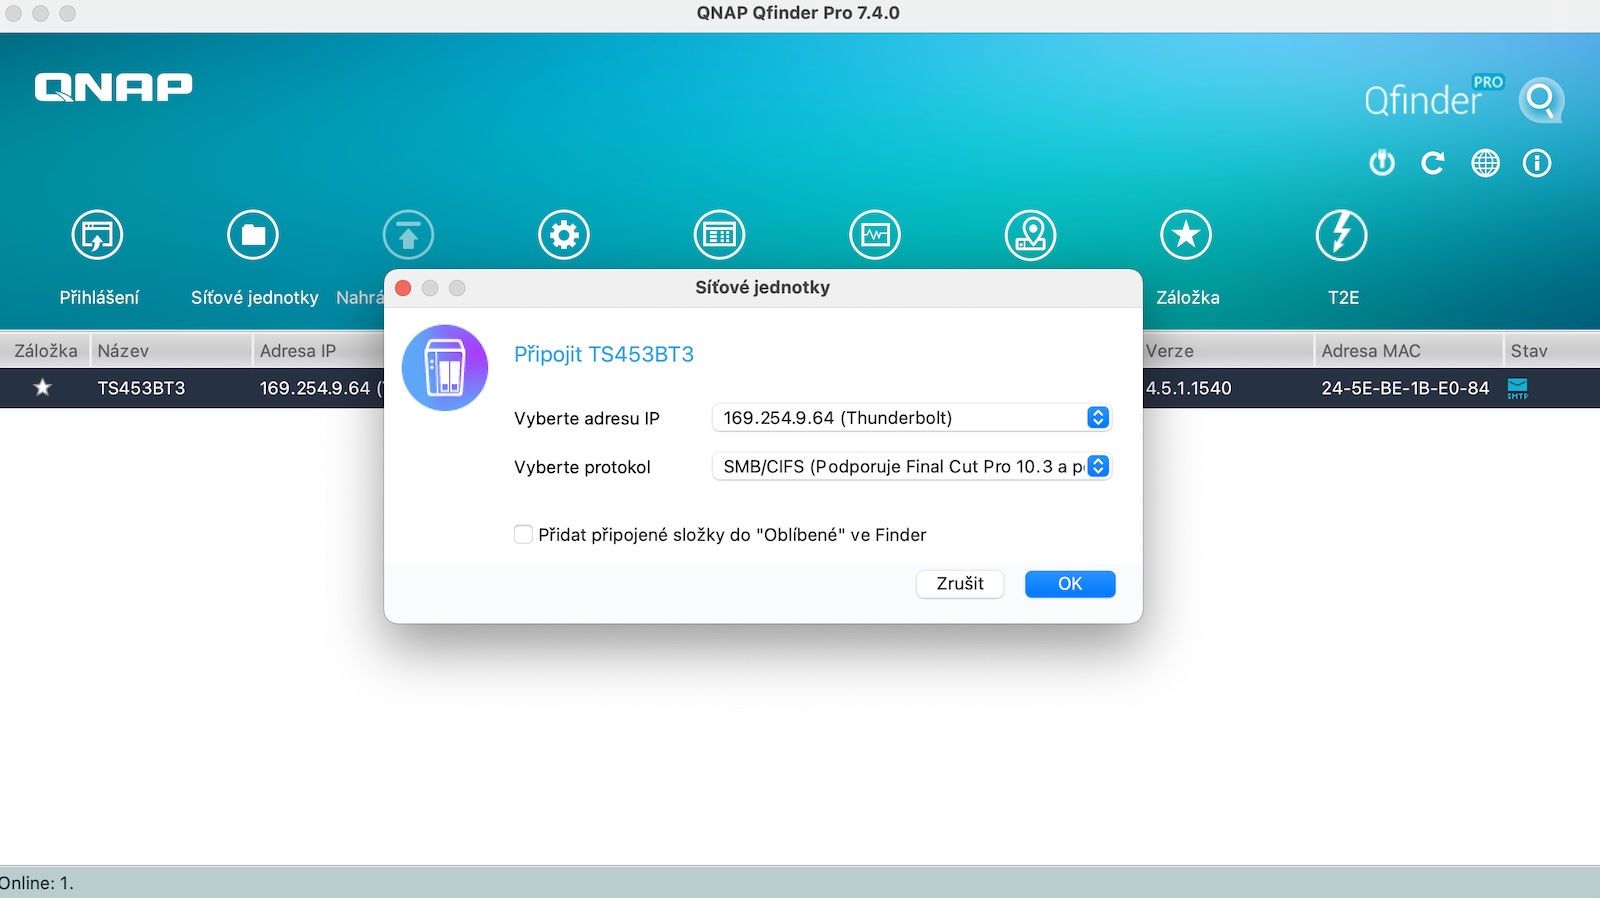
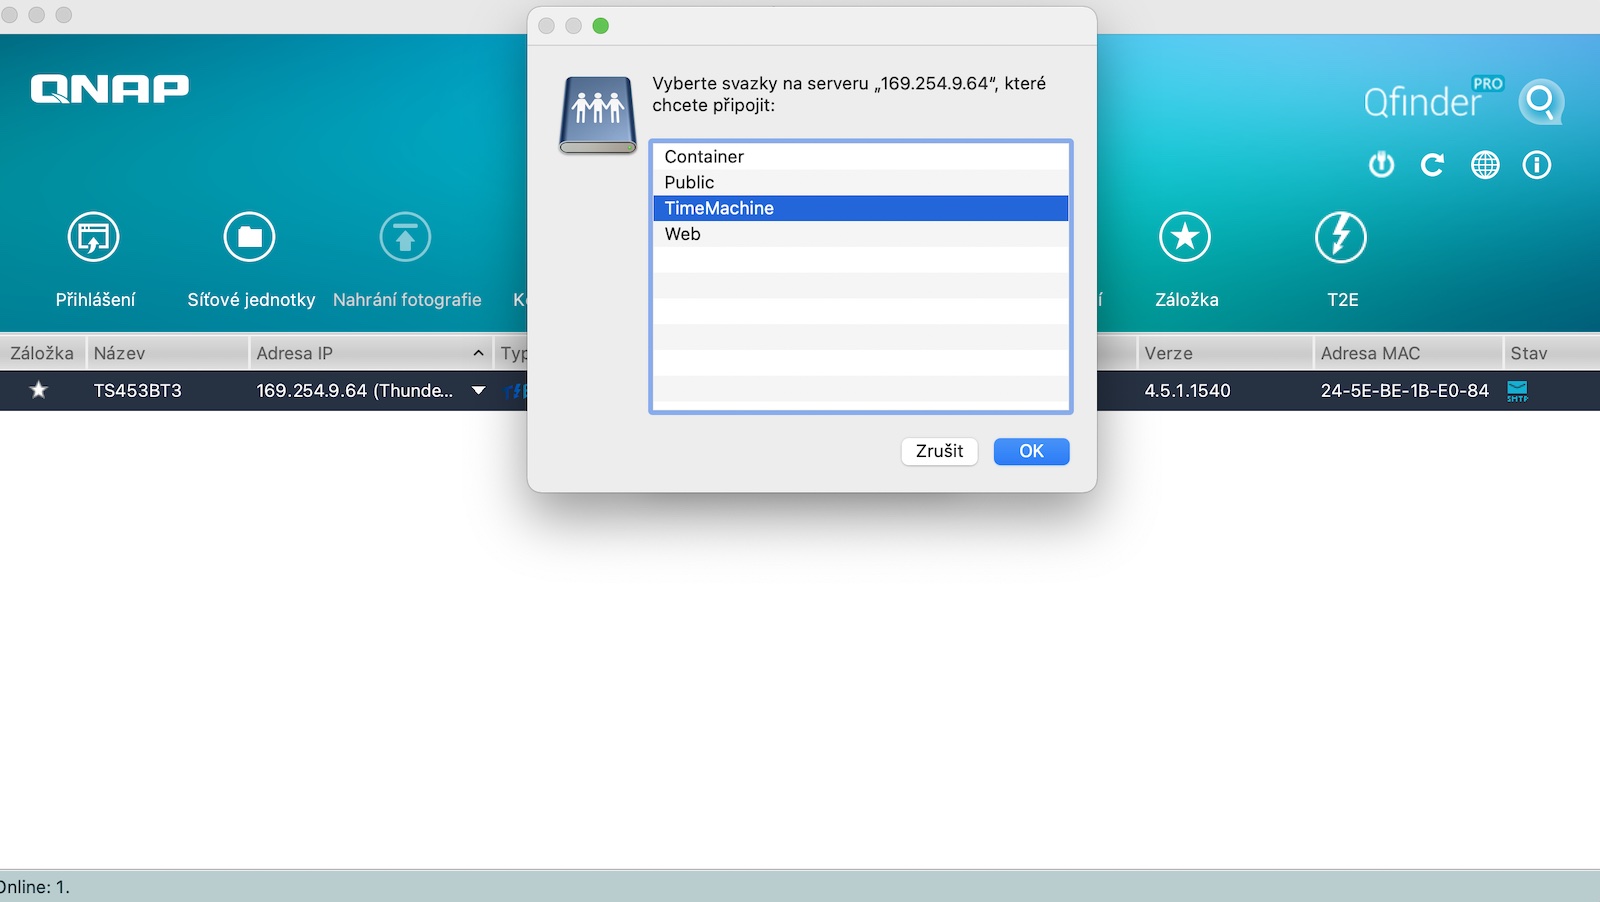
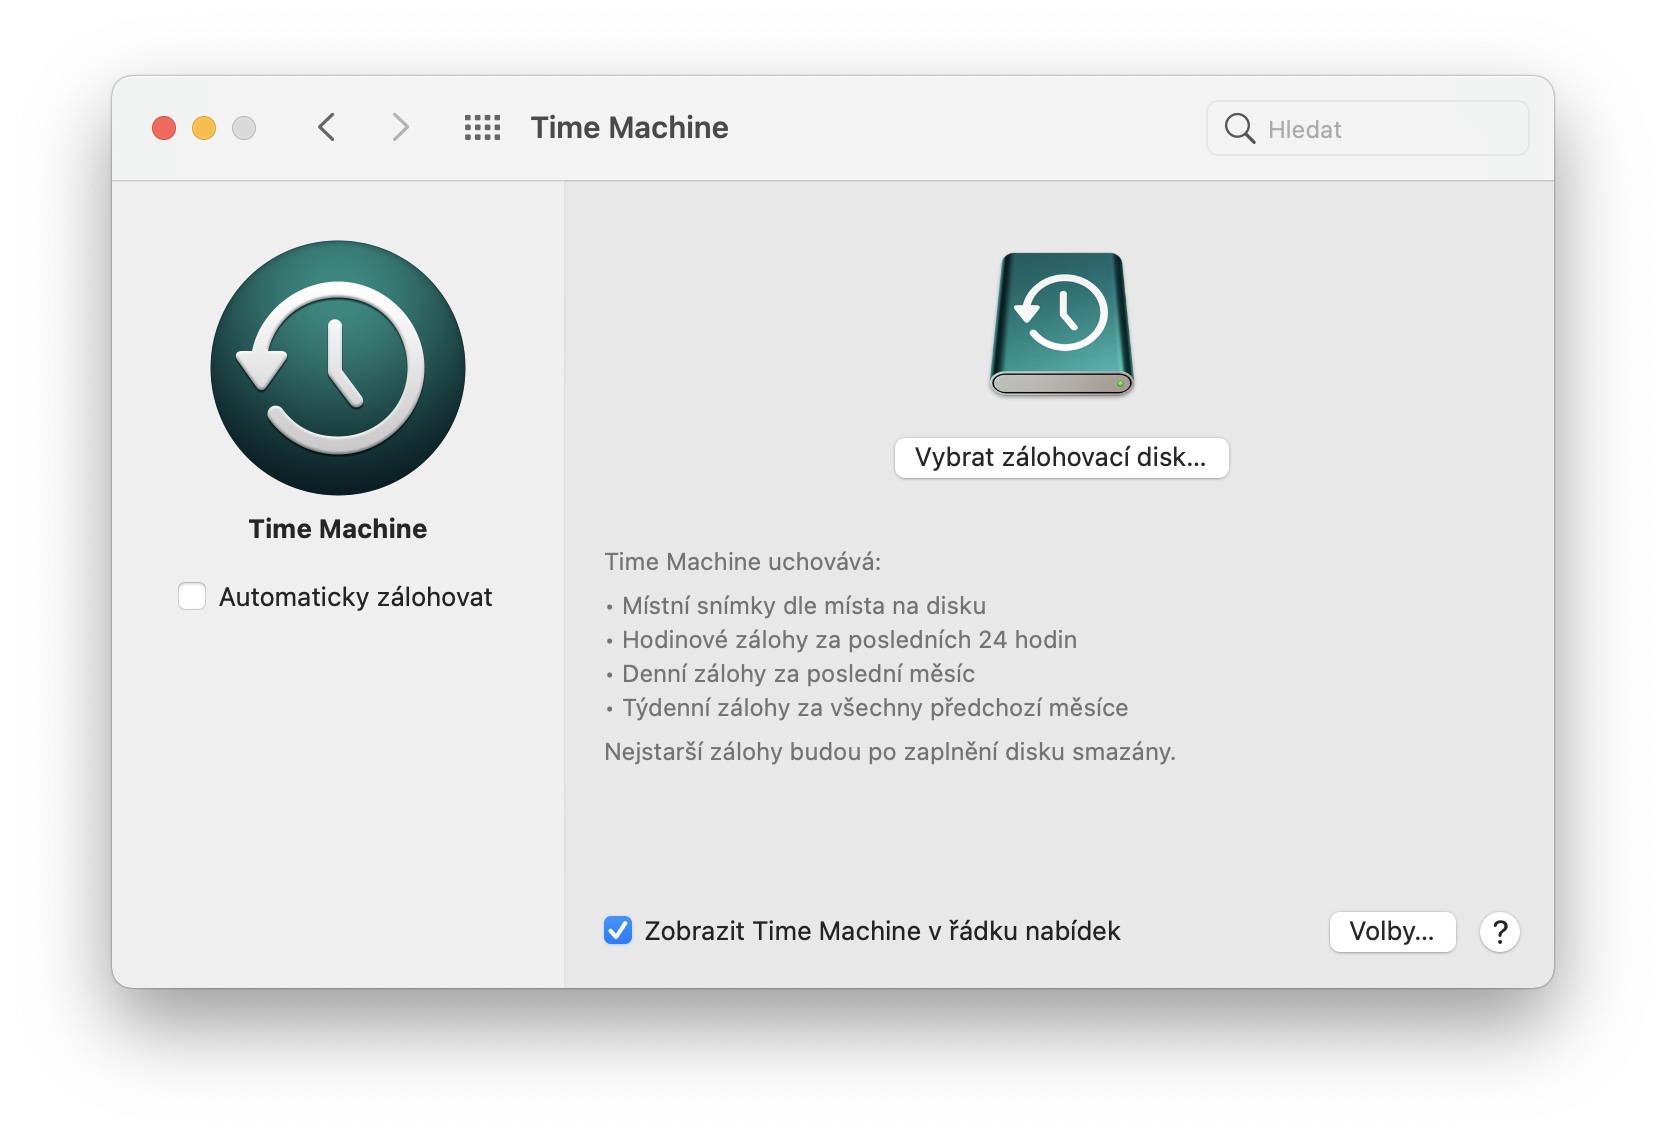
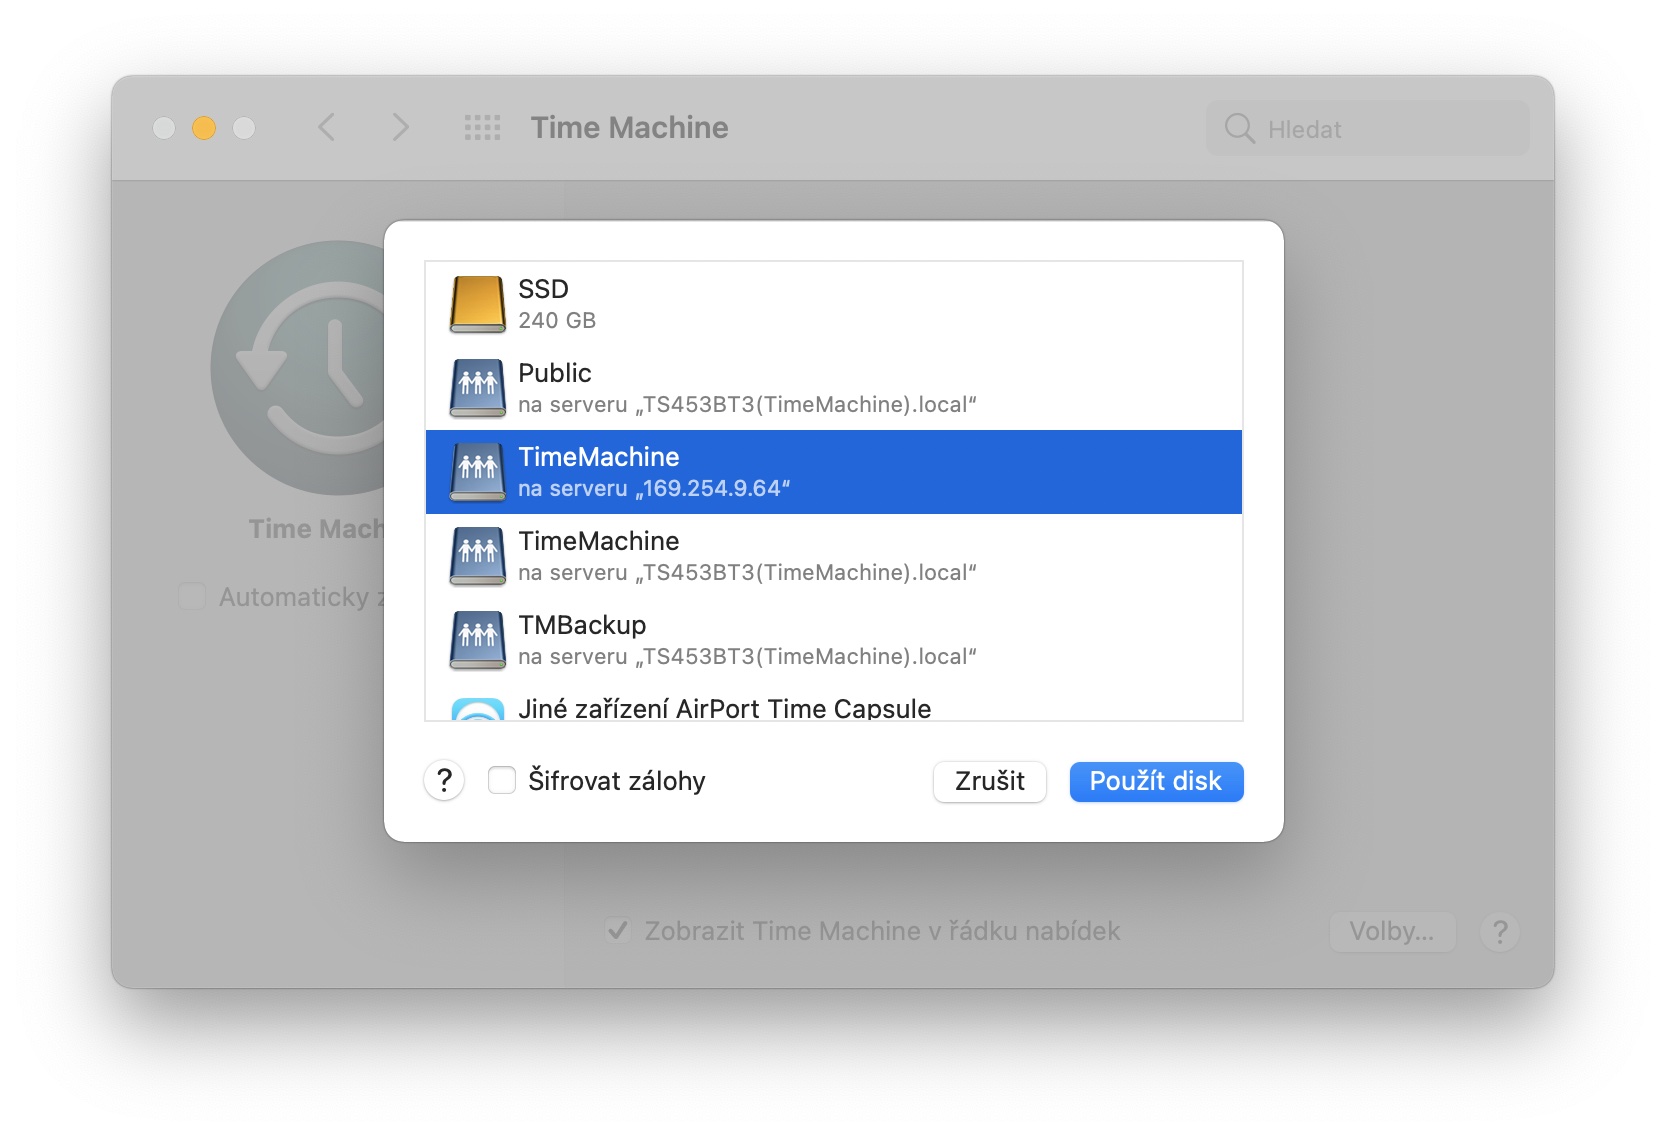
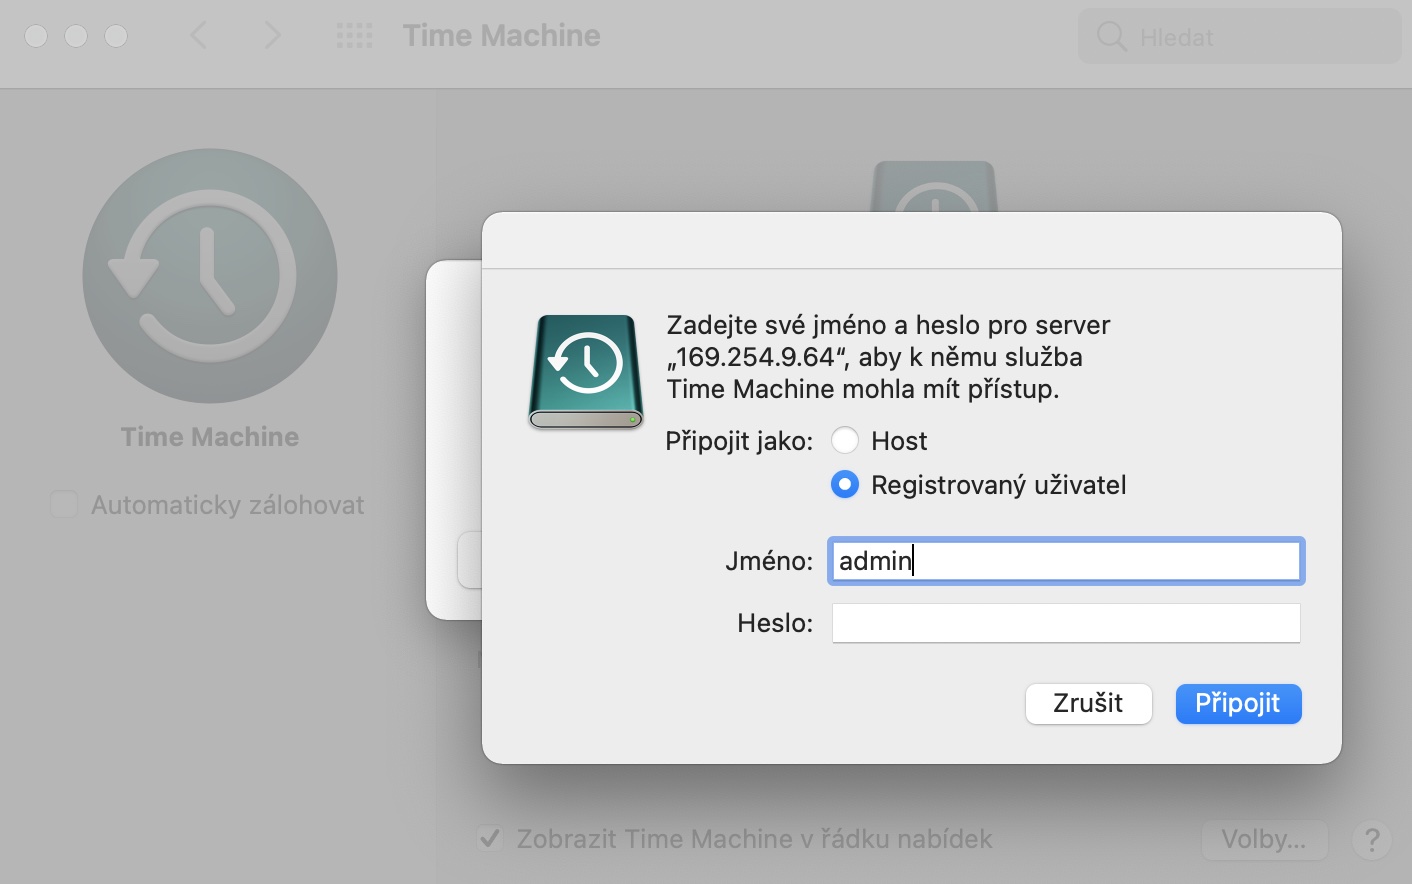
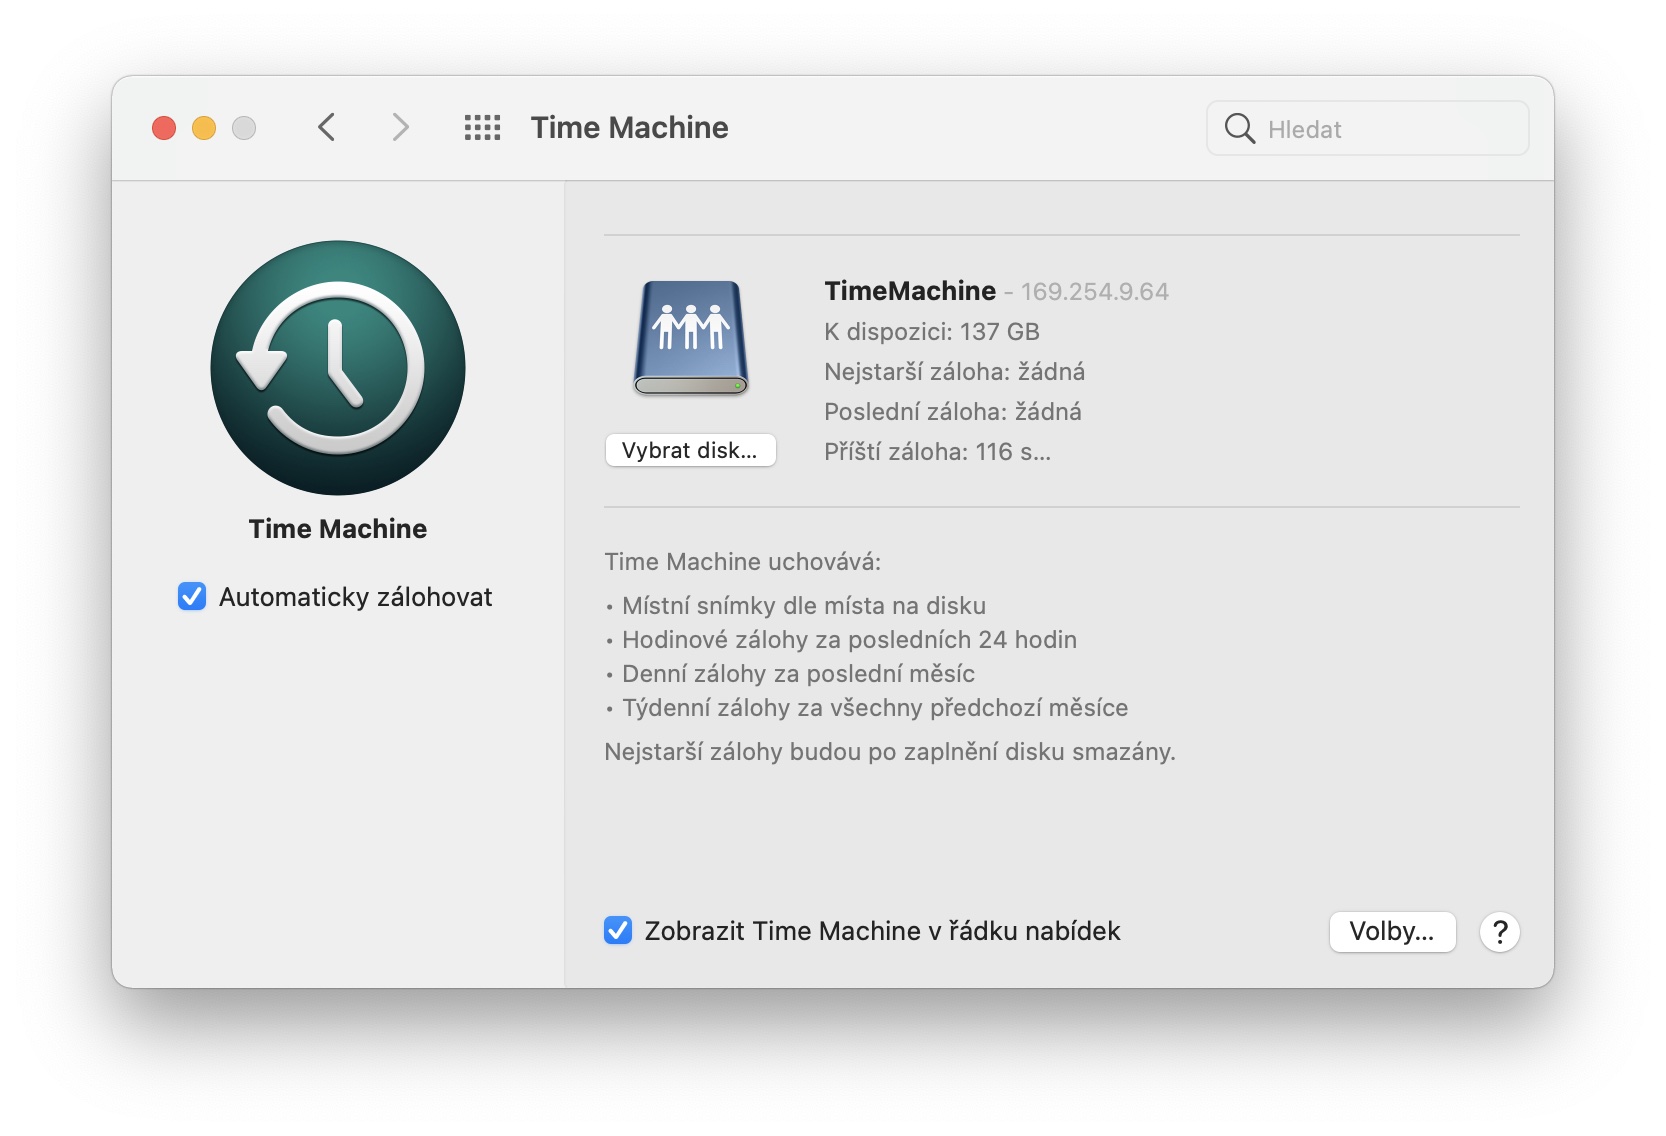
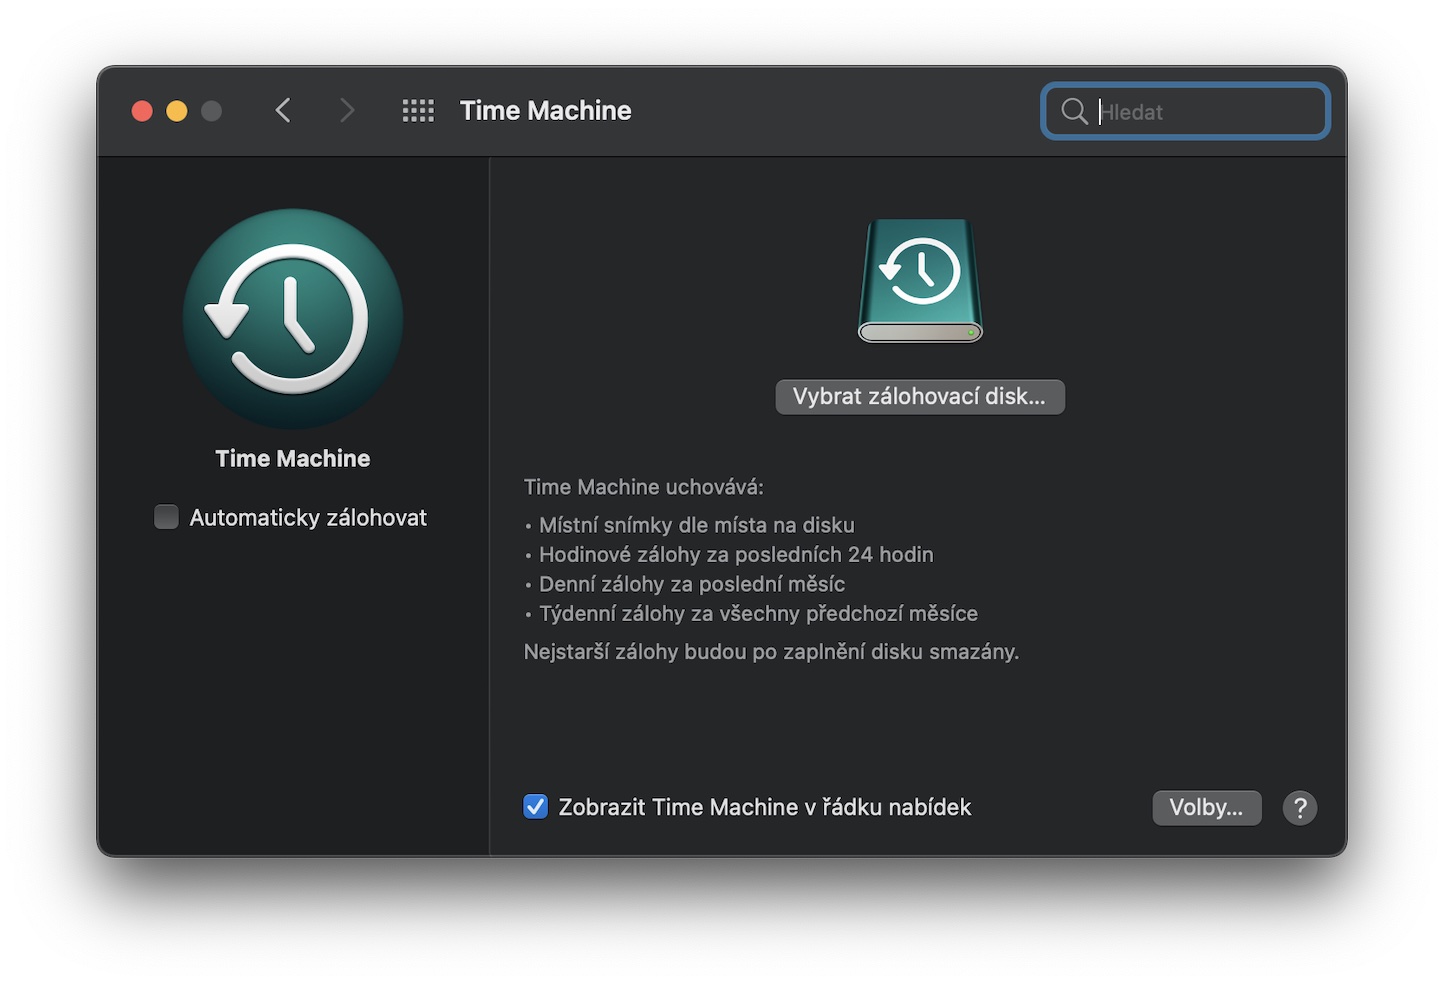
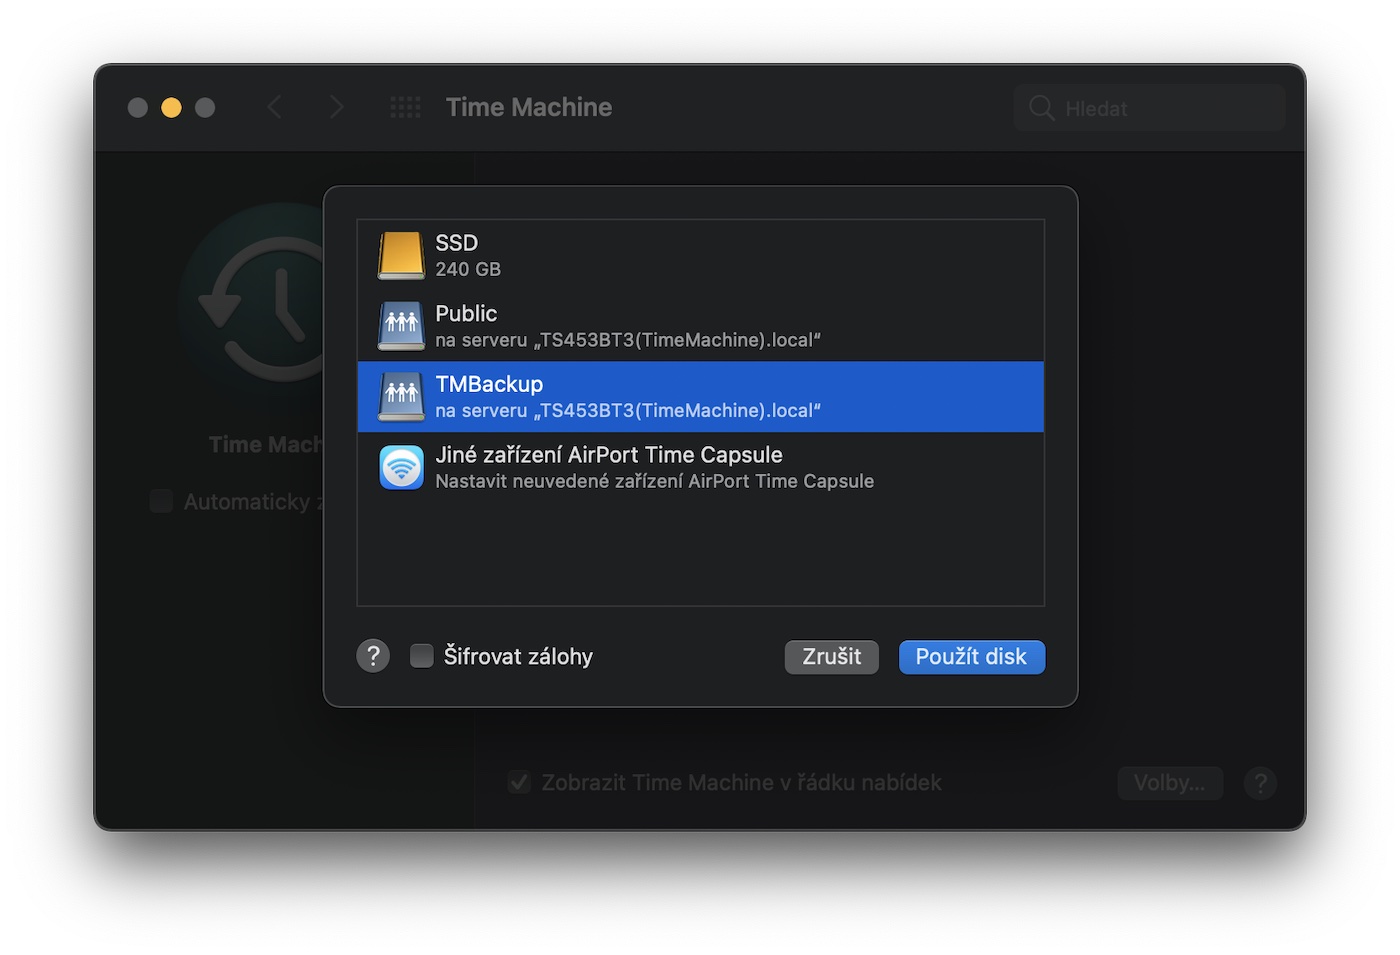
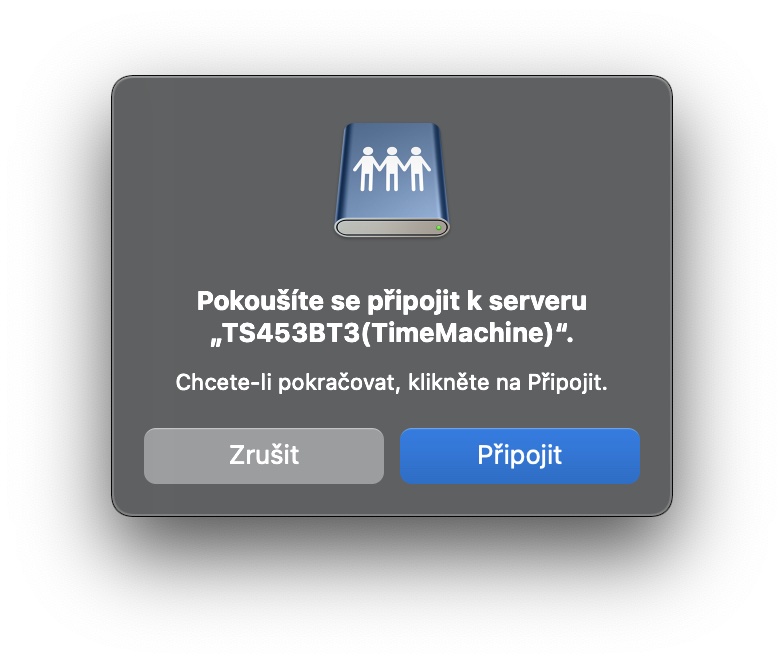
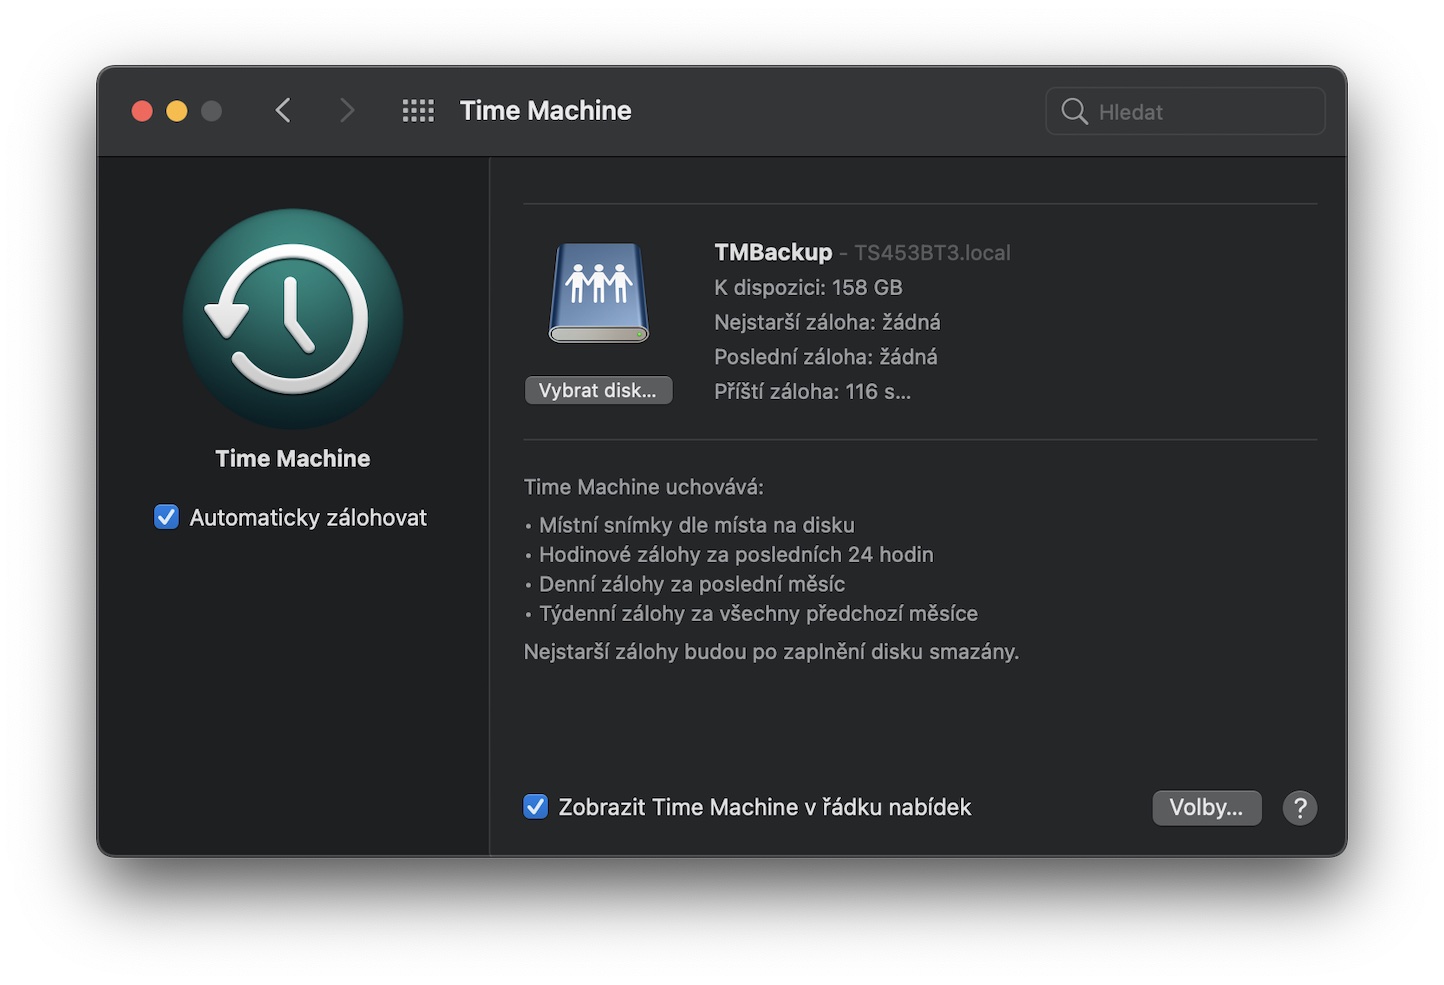
Before we start with the aforementioned settings, the newly created partition needs to be mapped by the system. The Qfinder Pro application can deal with this in a matter of seconds, when you just have to select an option at the top Network drives, login, select protocol SMB / CIFS and select our shared folder. And now we can move on to the most important thing. So let's open up System Preferences and we go to the category time Machine. Here, just tap on the option Select the backup disk, where of course we choose our disk, re-enter the credentials and we're done.
From now on, your Mac will automatically back up, so you can get back to your data in the event of an error. However, do not be alarmed by the fact that the initial backup often takes several hours. Time Machine first needs to save all files, documents and settings, which simply takes a while. Fortunately, the following updates take place much faster, when only new or changed files are backed up.
Backup via HBS 3
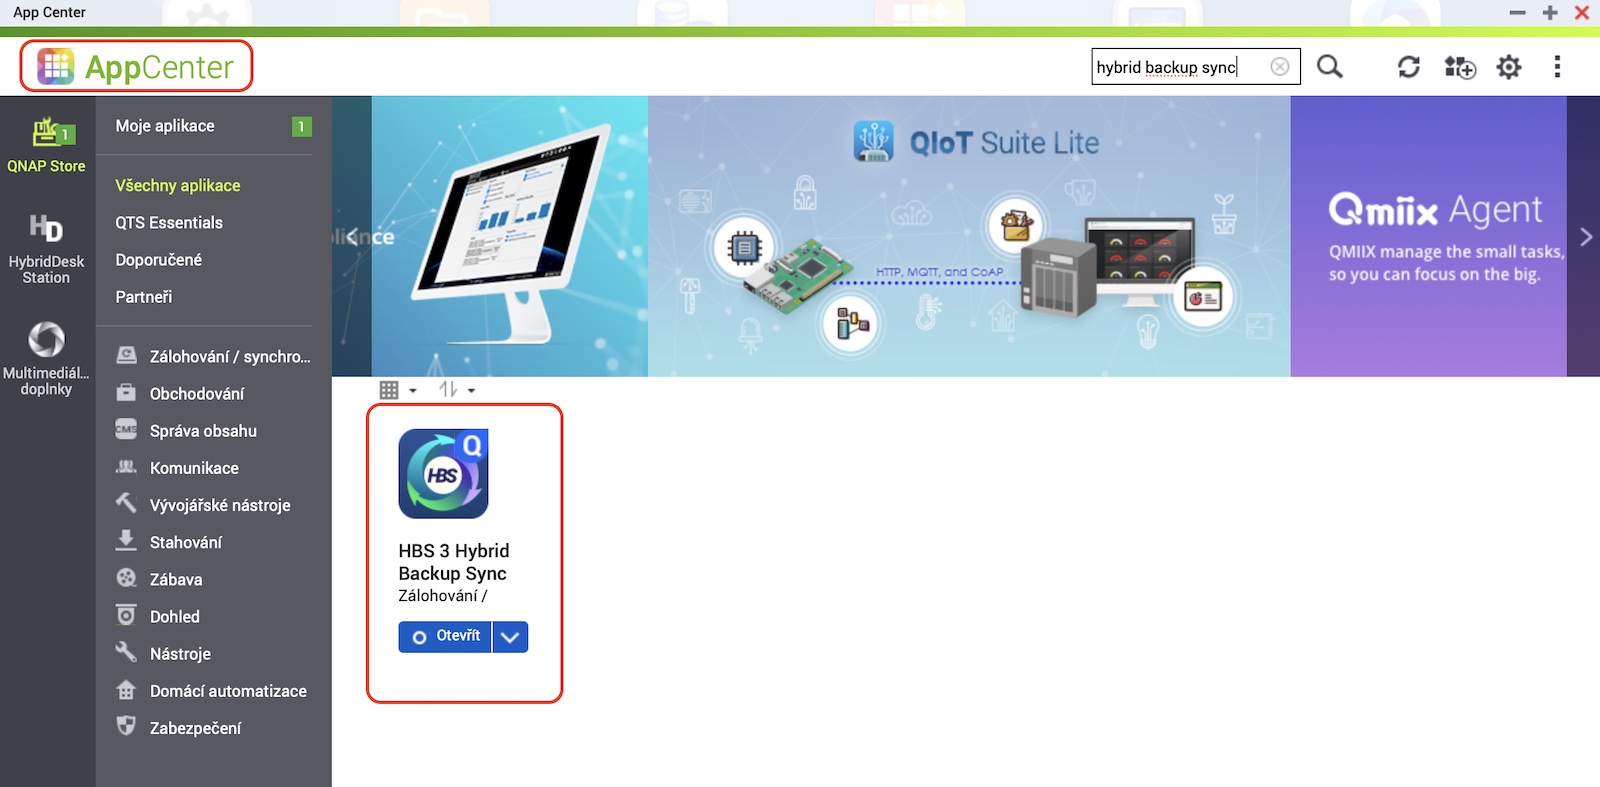
Another rather elegant option is offered for Mac backup through Time Machine. Specifically, it is the application Hybrid Backup Sync 3 directly from QNAP, which is available through App Center within QTS. When using this solution, we do not have to deal with the creation of user accounts and everything will be solved directly by this program for us. In addition, its use is, in my opinion, even easier.
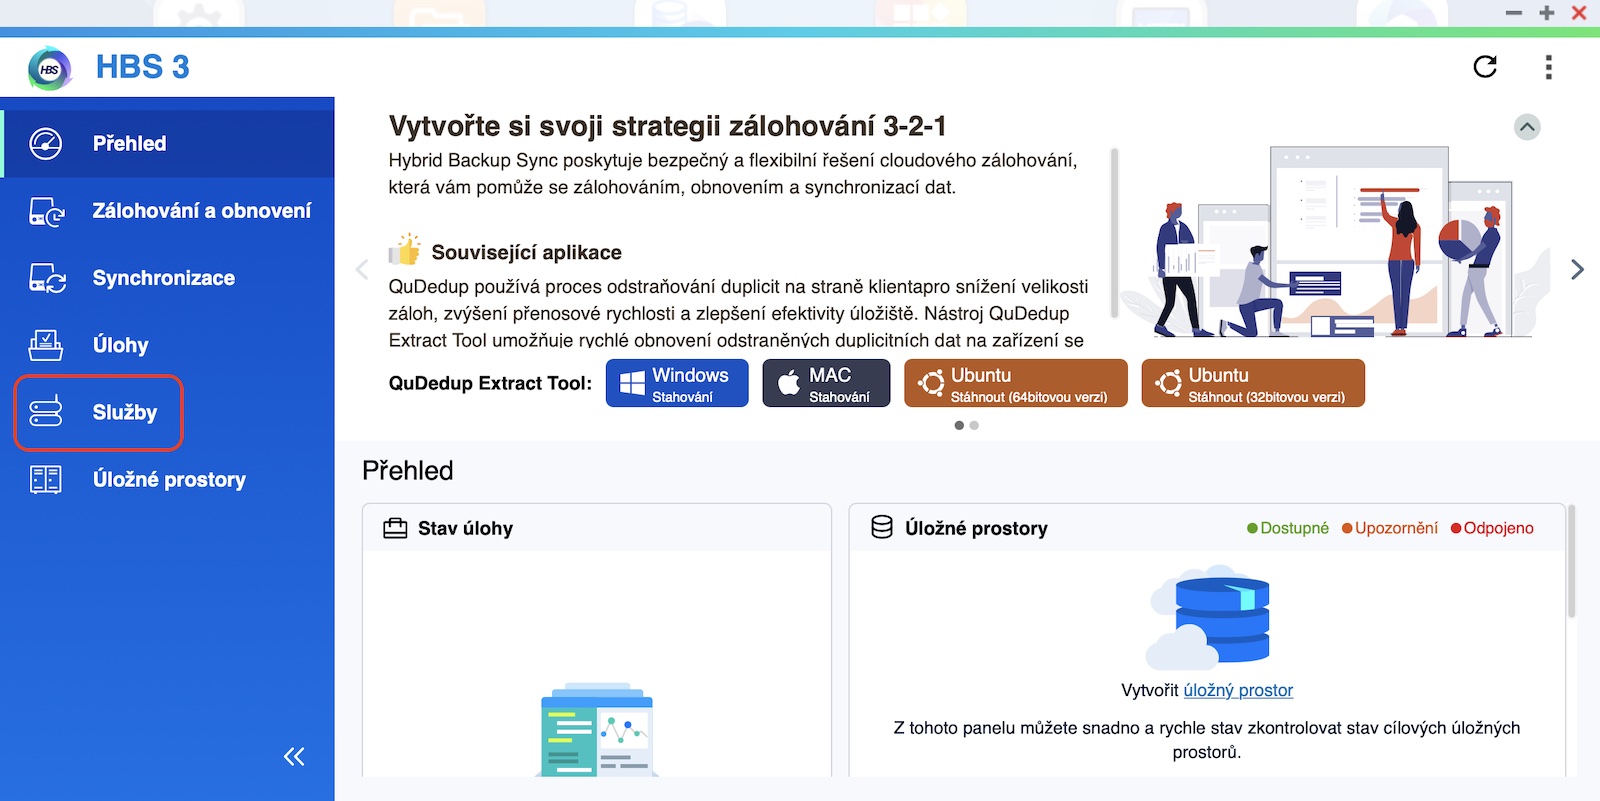
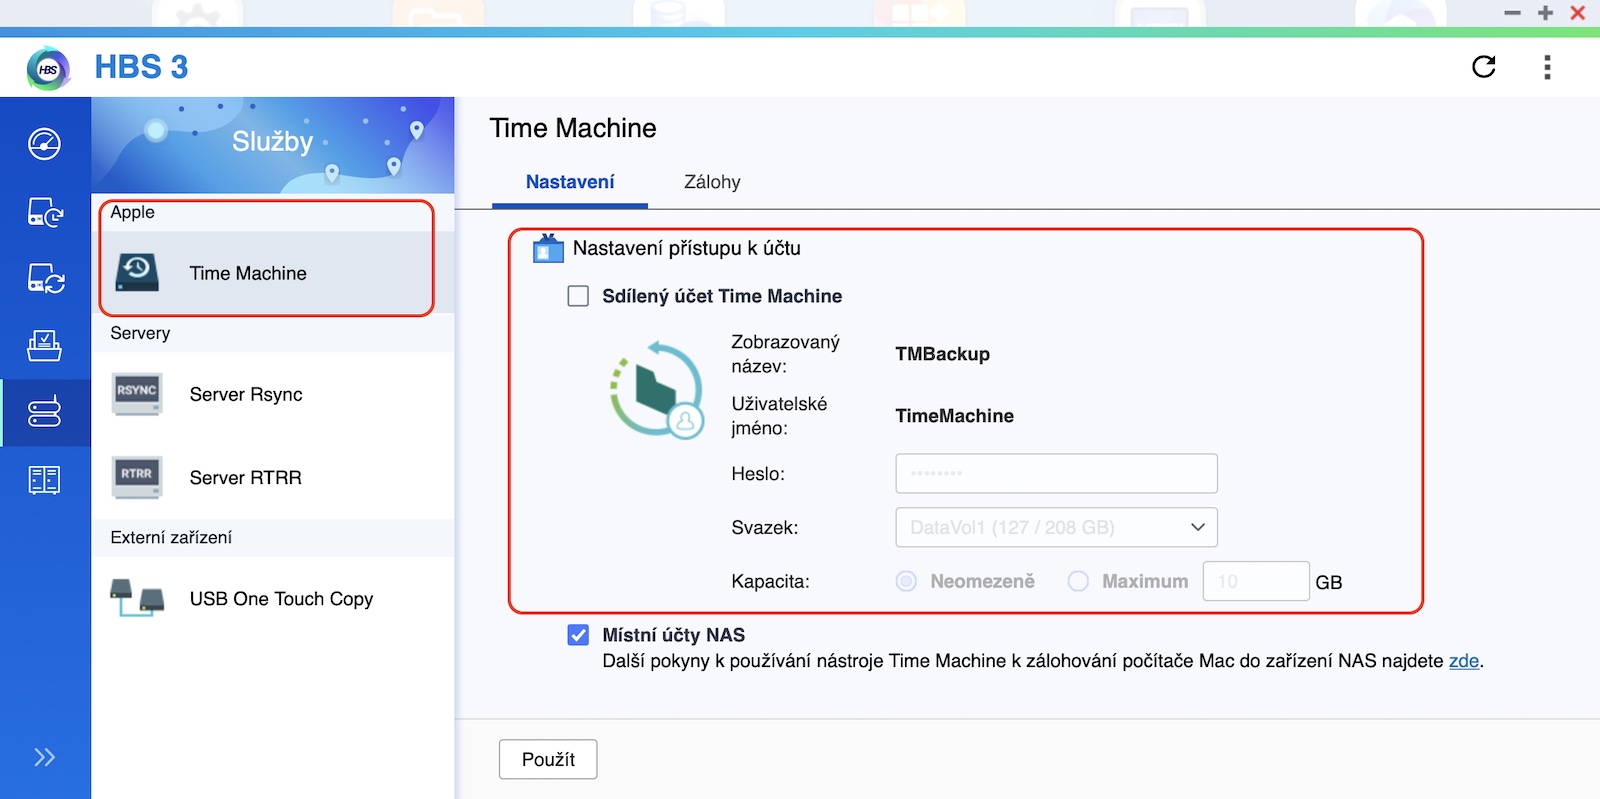
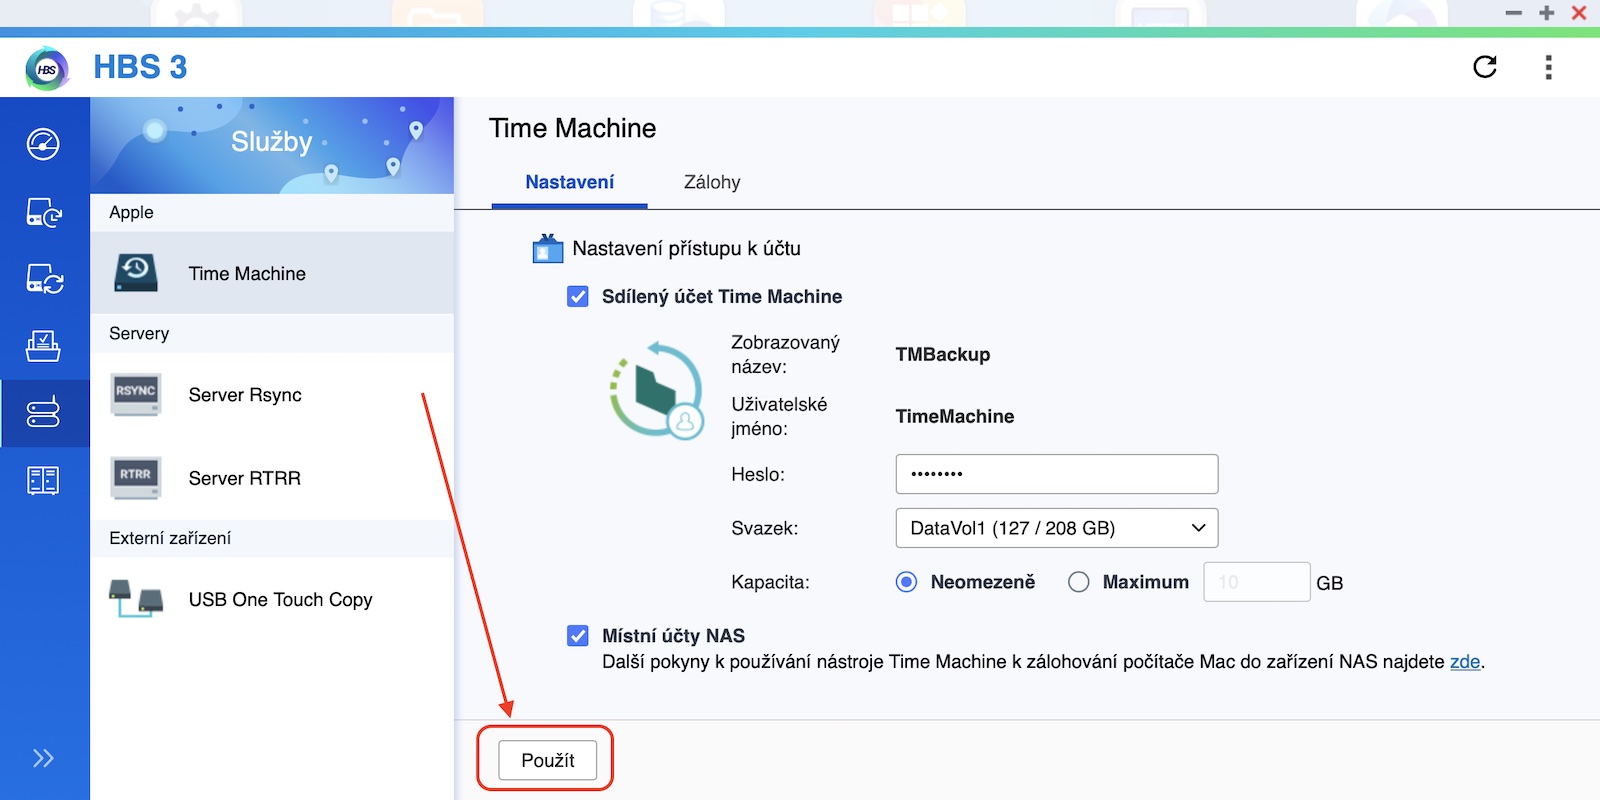
All we have to do is launch the application and select an option from the left panel Services. In this step, we have to choose the Apple category on the left time Machine and activate the option A shared Time Machine account. Now we just need to set the password, the storage pool and the options Capacity these are practically quotas. And we're done, we can go to Time Machine settings.
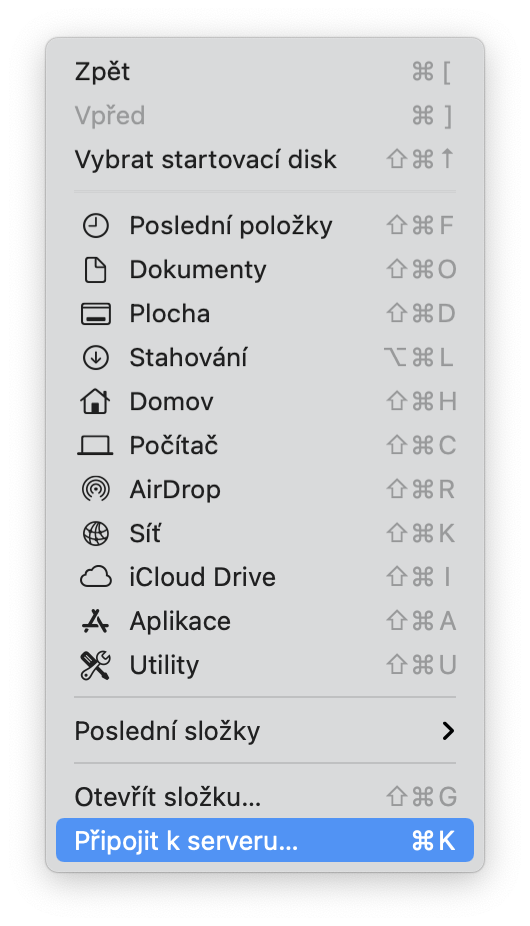
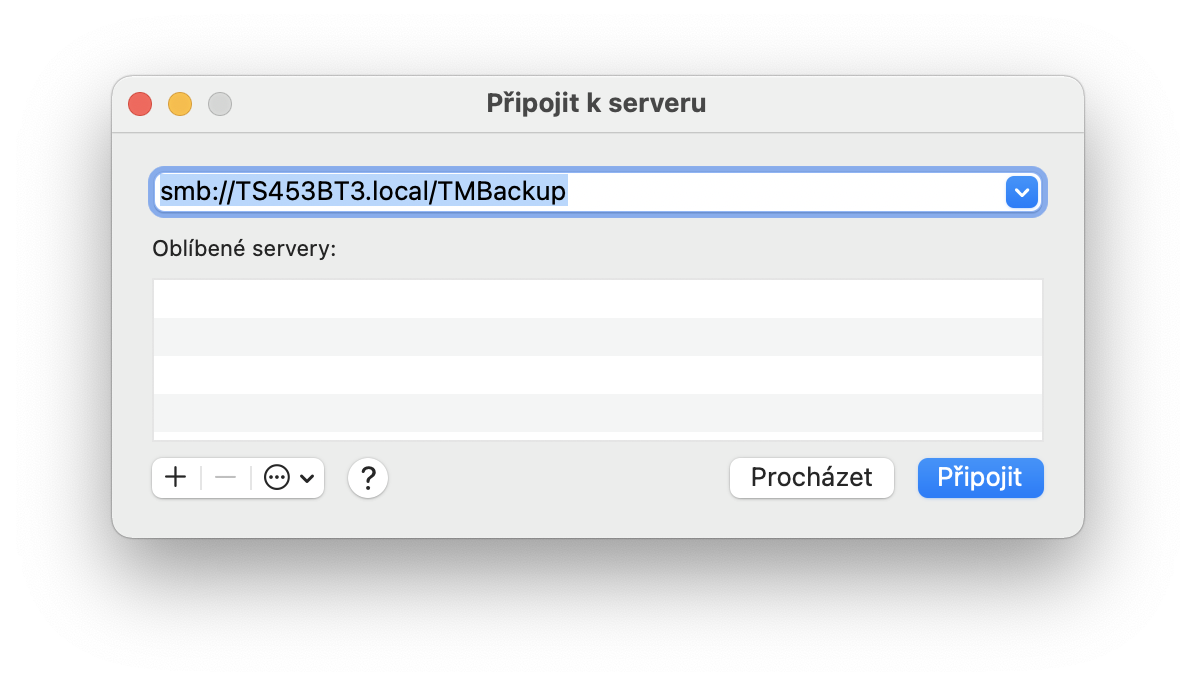
First, it is again necessary to map the relevant section. That's why we will open this time Finder and from the top menu bar, in the category Open, we select the option Connect to server… In this step it is necessary to connect to the disk. That's why we write smb://NAME.local or IP/TMBackup. Specifically, in our case, it is enough smb://TS453BT3.local/TMBackup. After that we can finally move to System preference do time Machine, where you just tap on Select a backup disk… and select the one we are now connected to. And the system will take care of the rest for us.
Is it worth it?
Definitely yes! Backing up your Mac using Time Machine is incredibly simple. You only need to spend a few minutes on the initial setup and the Mac will take care of practically everything for us. At the same time, it is necessary to draw attention to the fact that, in the case of apple laptops, the backup takes place only when charging, but you can do this in the mentioned preferences alter. If we now encounter a disk error and lose some files, we can have them restored in an instant through the native Time Machine application.
