Nowadays, almost every one of us has an e-mail box. In addition to the fact that you can communicate with your friends, family, superiors, subordinates and other people through e-mail, it is also necessary to own an e-mail box because of various Internet accounts. You simply cannot do without an email account these days. Of course, your mailbox can also be added to your iPhone or iPad. However, the truth is that many users simply do not know how to add a mailbox to iOS or iPadOS that is not part of the selection, for example a mailbox from Seznam, the Center, your own website, etc. Let's take a look together in this article method, you can add a mailbox to the iPhone, i.e. the iPad.
It could be interest you
How to add mail on iPhone
If you want to add a mailbox to your iPhone or iPad, it's not complicated. Slight complexities may only arise in the more advanced stage of setting up - but of course we will explain everything. So let's get straight to the point:
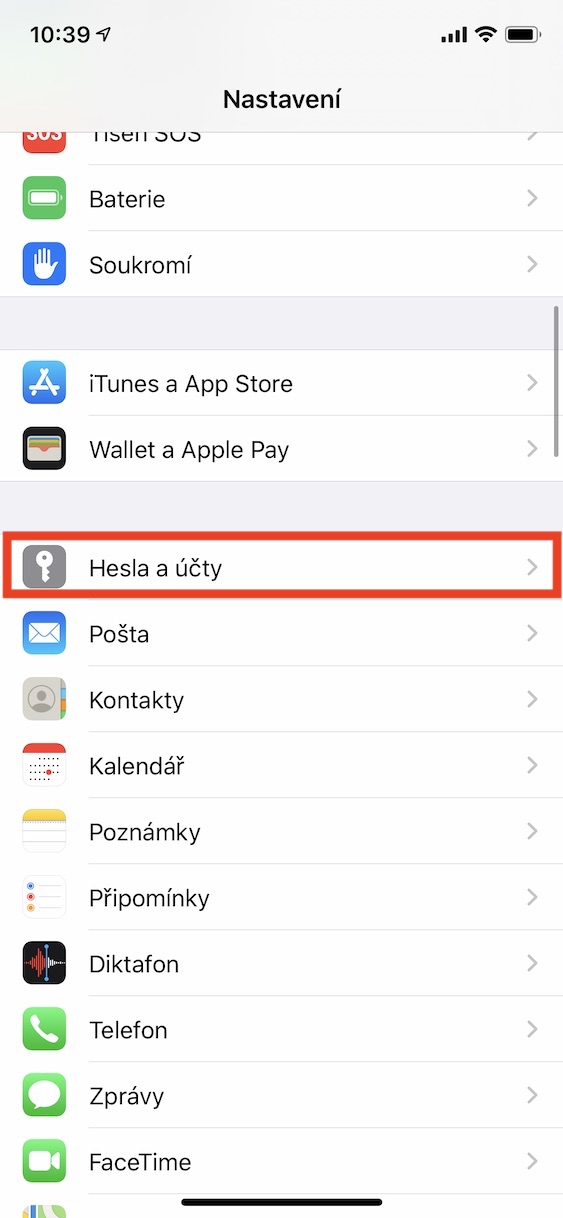
- First, you need to move to the native application within iOS or iPadOS Settings.
- Once you do so, scroll down a bit and tap on the option Passwords and accounts (in iOS 14 option Pošta).
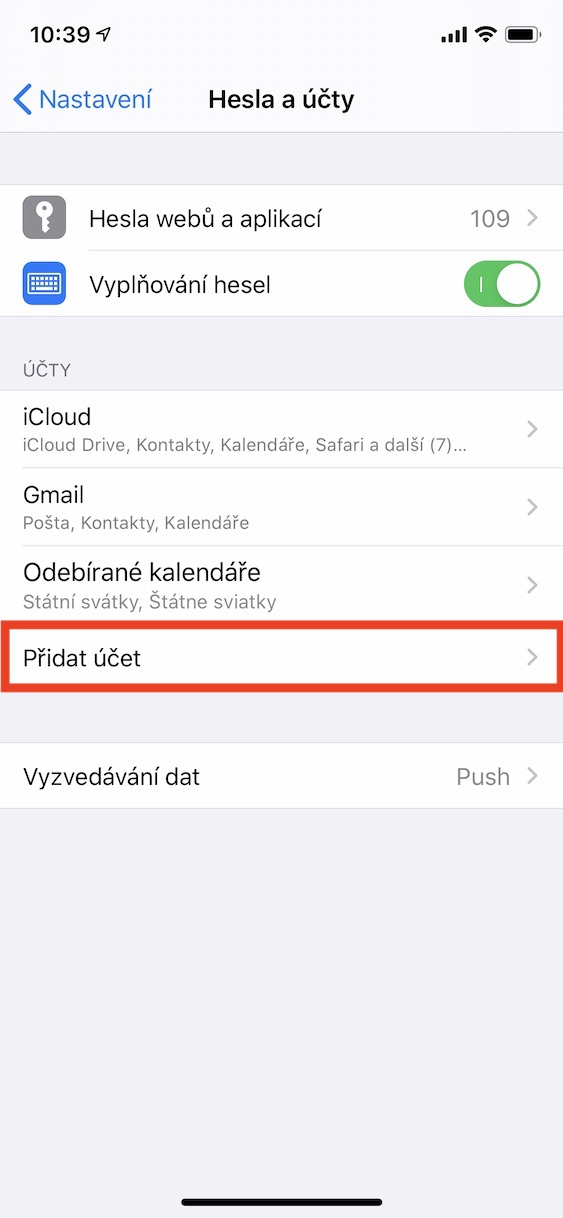
- Here then you need to tap on the option Add Account (in iOS 14 Accounts -> Add account).
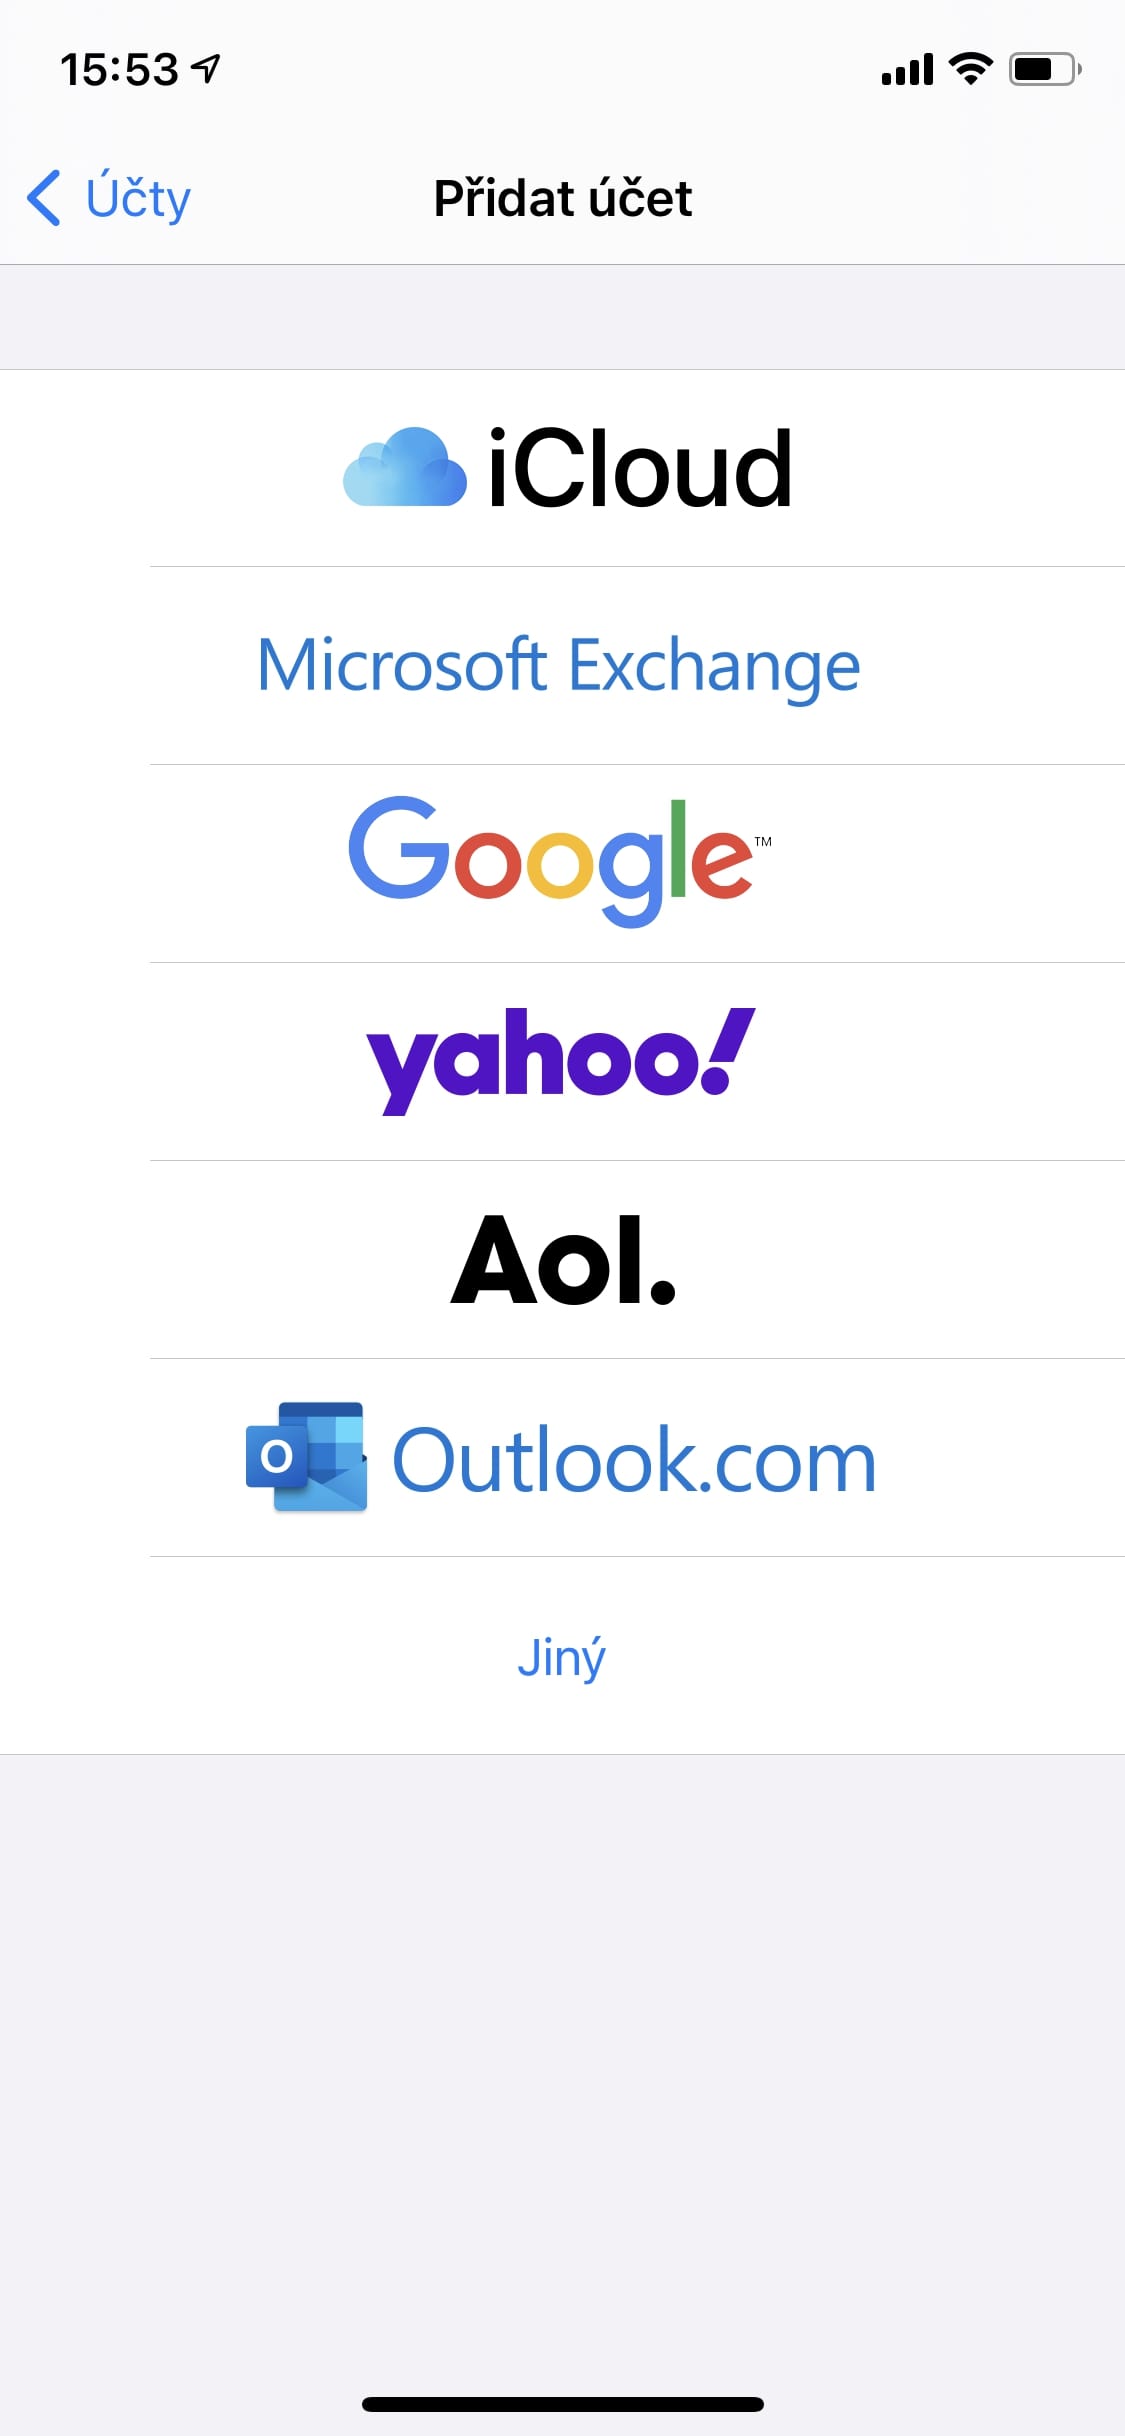
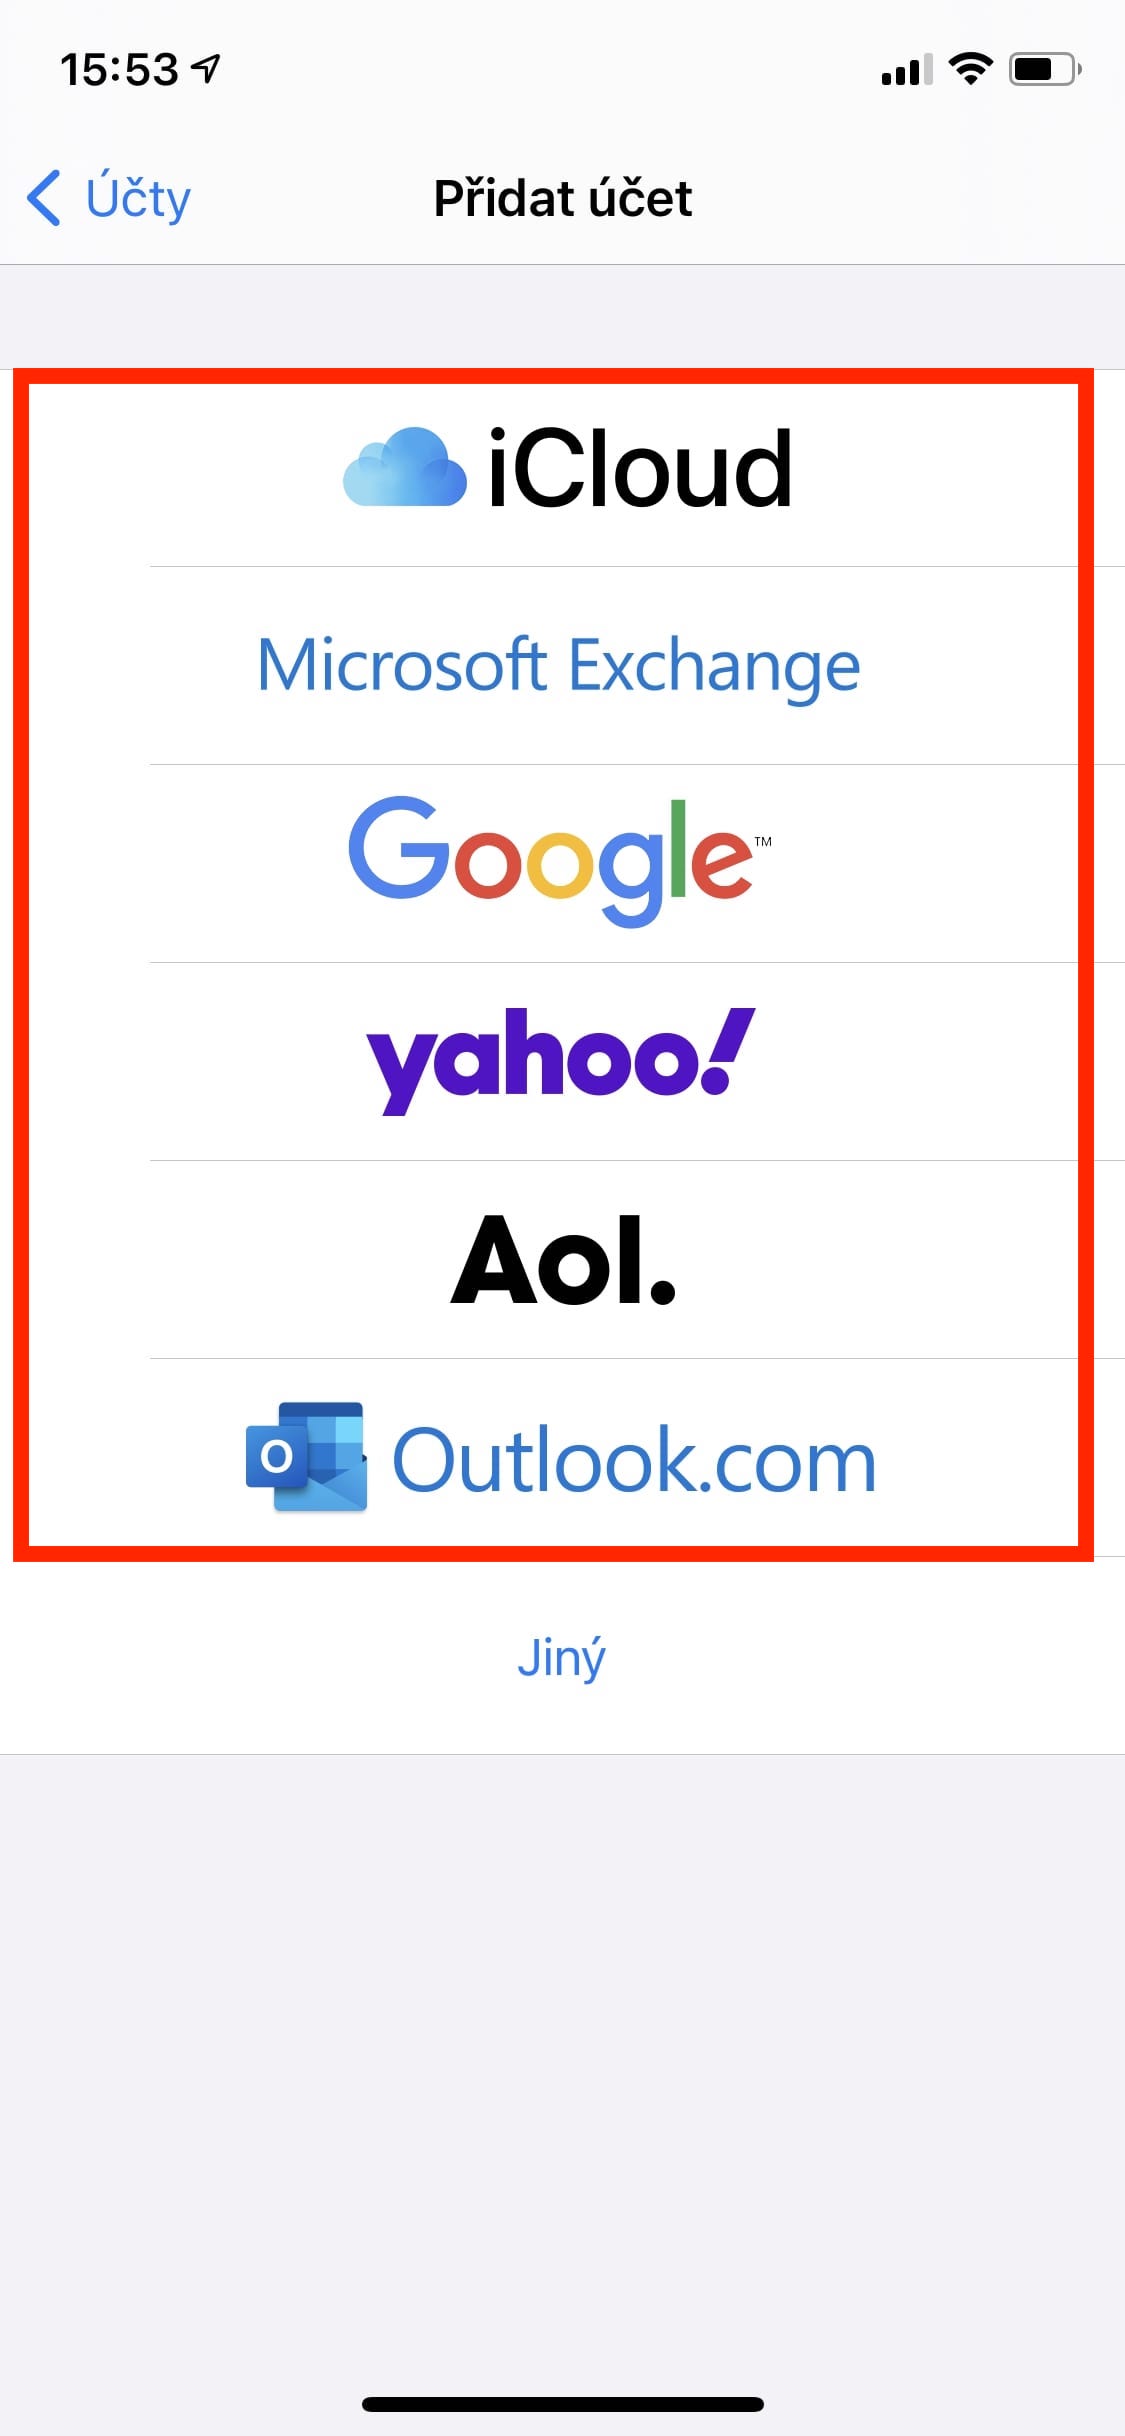
After clicking on the option mentioned above, a screen will appear with the logos of some companies that offer the option to set up an email. In this case, it is necessary to distinguish which company provides you with e-mail. Below you will find two distinct procedures, which differ depending on who your mailbox is managed by. Of course, use the procedure that applies to you.
The mailbox is operated by iCloud, Microsoft Exchange, Google, Yahoo, Aol or Outlook
If your mailbox is operated by one of the operators listed above, the whole process is much easier for you:
- In this case, just tap on your operator's logo.
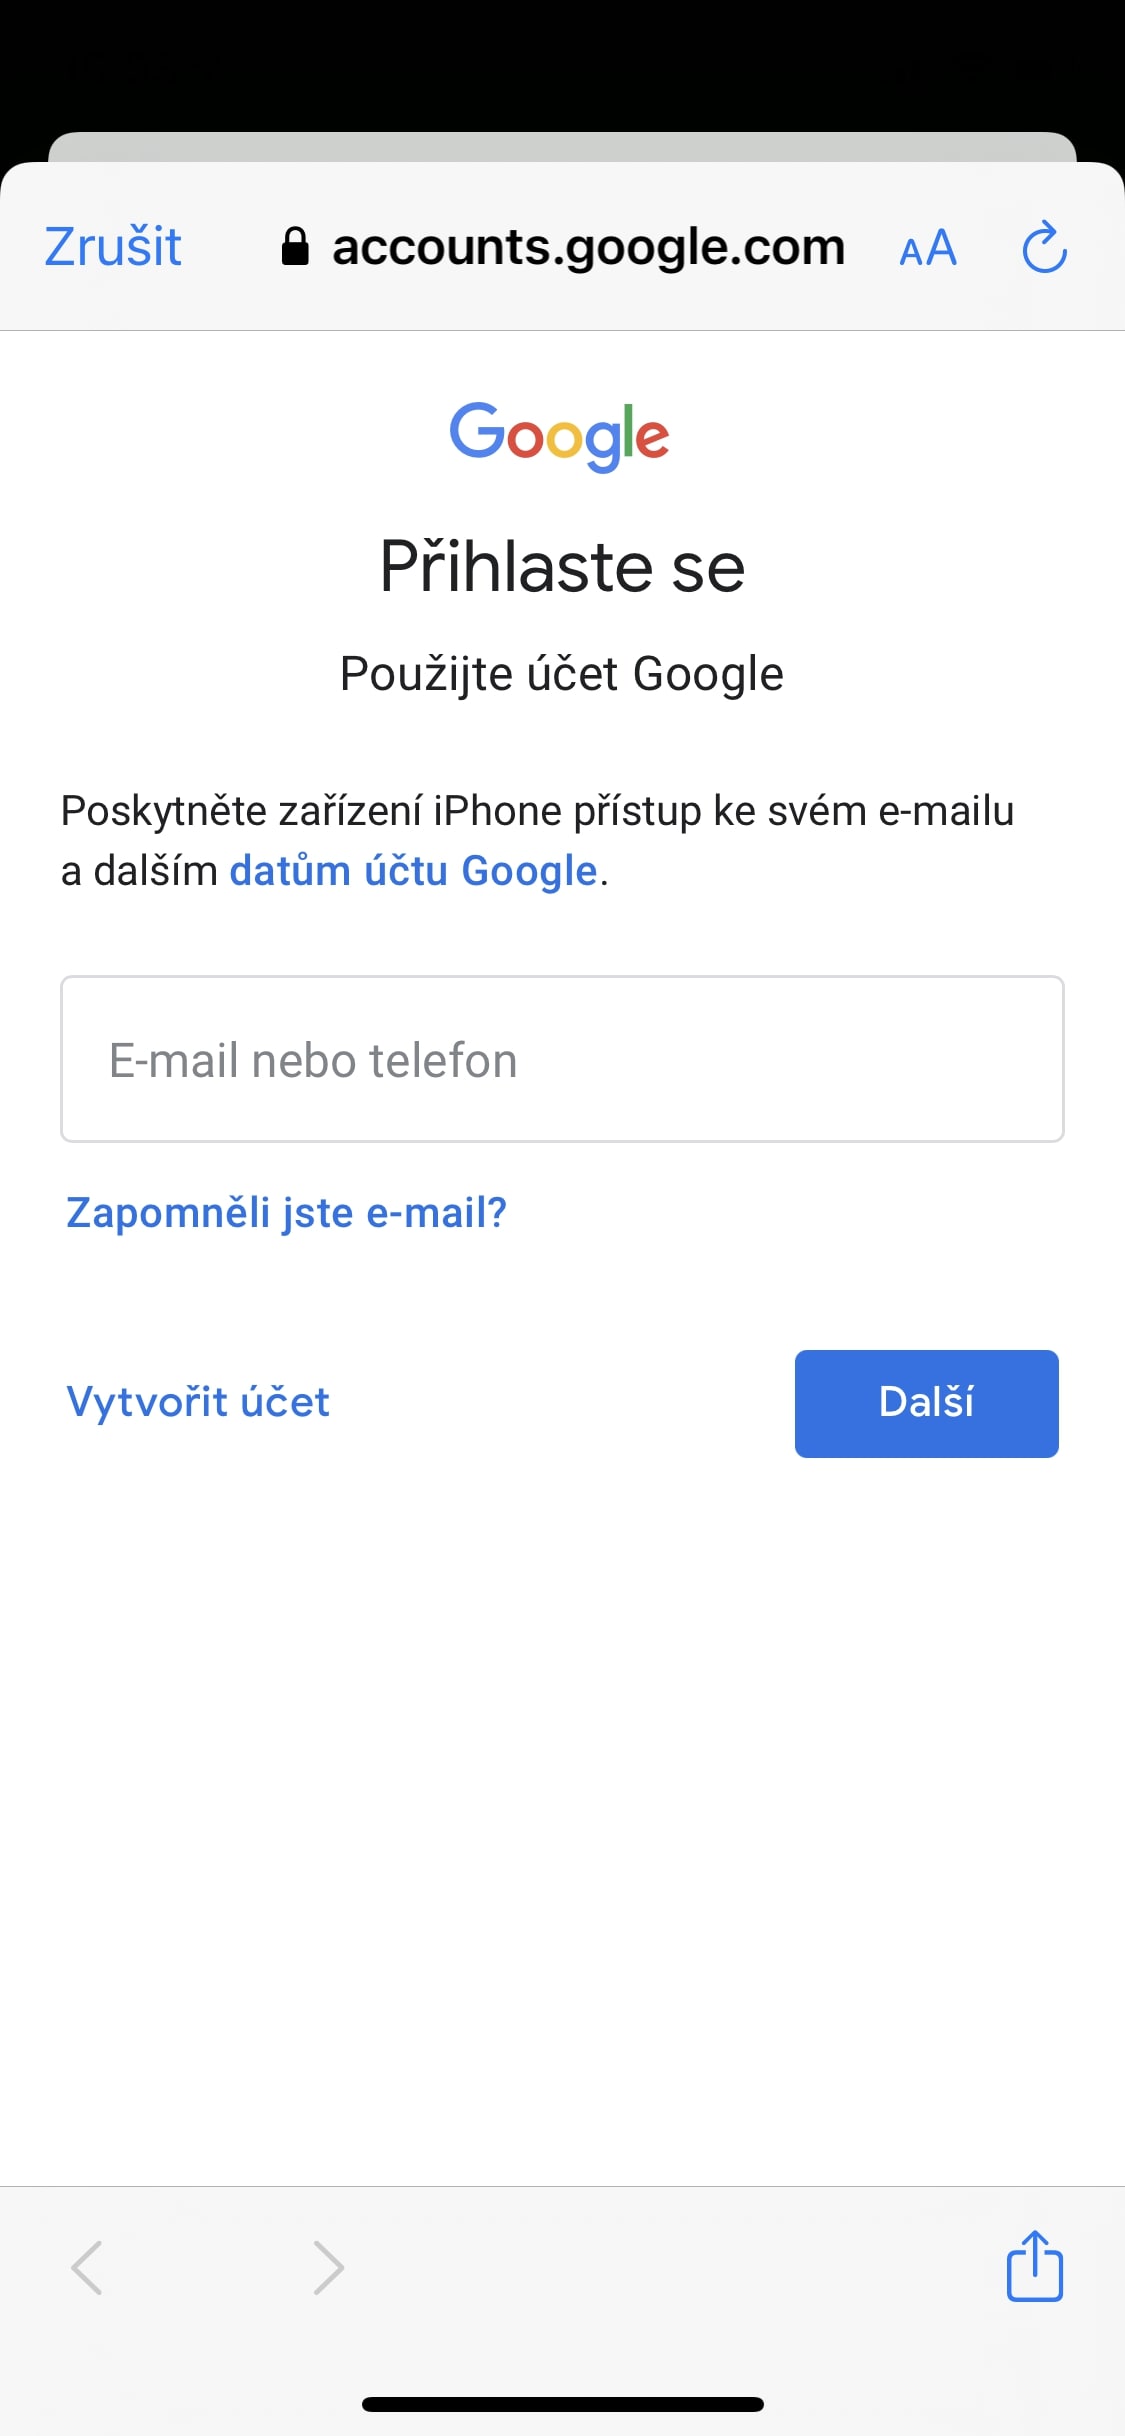
- Then another screen will appear where you enter your e-mail adress together with password.
- Finally, you just have to choose what you want to synchronize with the email address, and you're done.
- You can start using the mailbox set up in this way immediately.
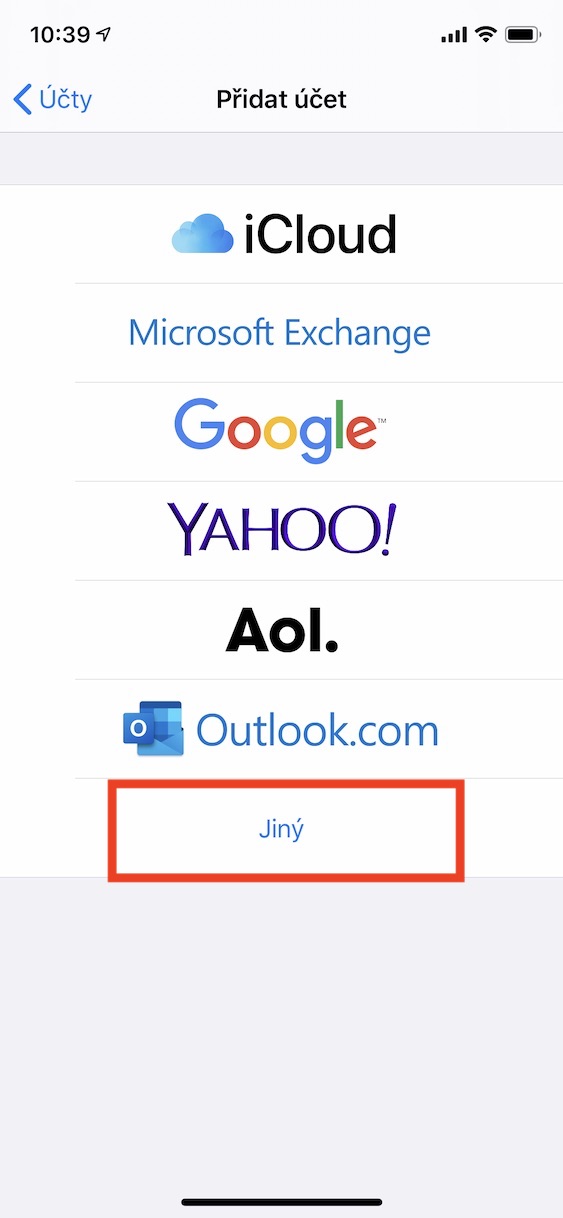
My mailbox provider is not listed
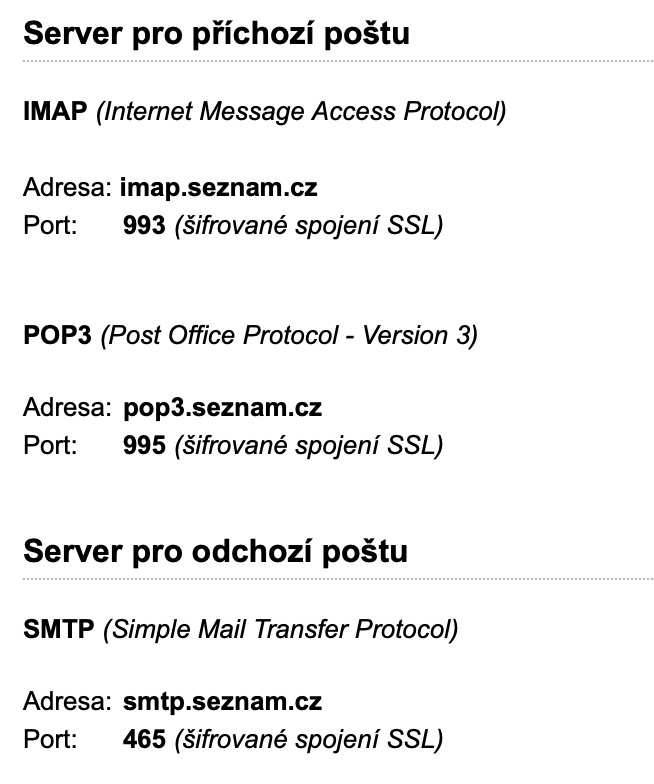
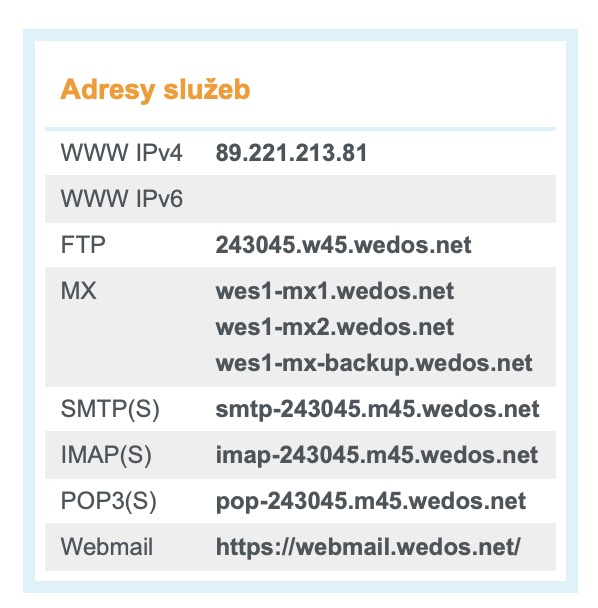
If your e-mail is managed by Seznam, the Center, or you have it managed under your own domain, your procedure is a bit more complicated, but certainly not impossible. In this case, it is necessary that you search for the outgoing mail server and the incoming mail server of your provider in advance. If your provider is a public company, for example Seznam, then just visit the service support and find the servers here, or you can ask the Google search engine "List e-mail server" and click on one of the results. If you have your own domain on which you run e-mails, you can find the incoming and outgoing mail server in the web hosting administration. If you do not have access to it, it is necessary that you contact the webmaster or the IT department of your company, who will provide you with the necessary information.
IMAP, POP3 and SMTP
As for the incoming mail server, an IMAP and POP3 server is usually available. Nowadays, you should always choose IMAP, as POP3 is very outdated. In the case of IMAP, all e-mails are stored on the server of the e-mail address provider, in the case of POP3, all e-mails are downloaded to your device. If you have a lot of e-mails, this can make the entire Mail application unusable, which will start to slow down significantly, and at the same time it will fill up the storage. As for the outgoing mail server, it is always necessary to find SMTP. Once you have found the addresses of the incoming and outgoing mail server, just proceed as follows:
- On your iPhone screen, tap the option at the bottom Other.
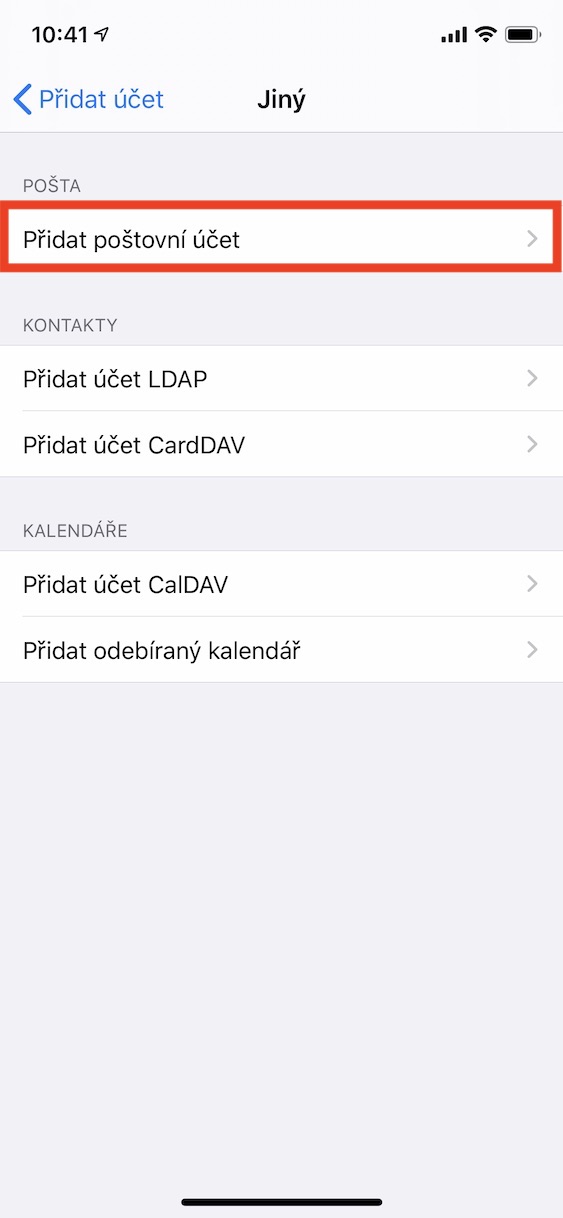
- Now at the top of the screen tap on Add an email account.
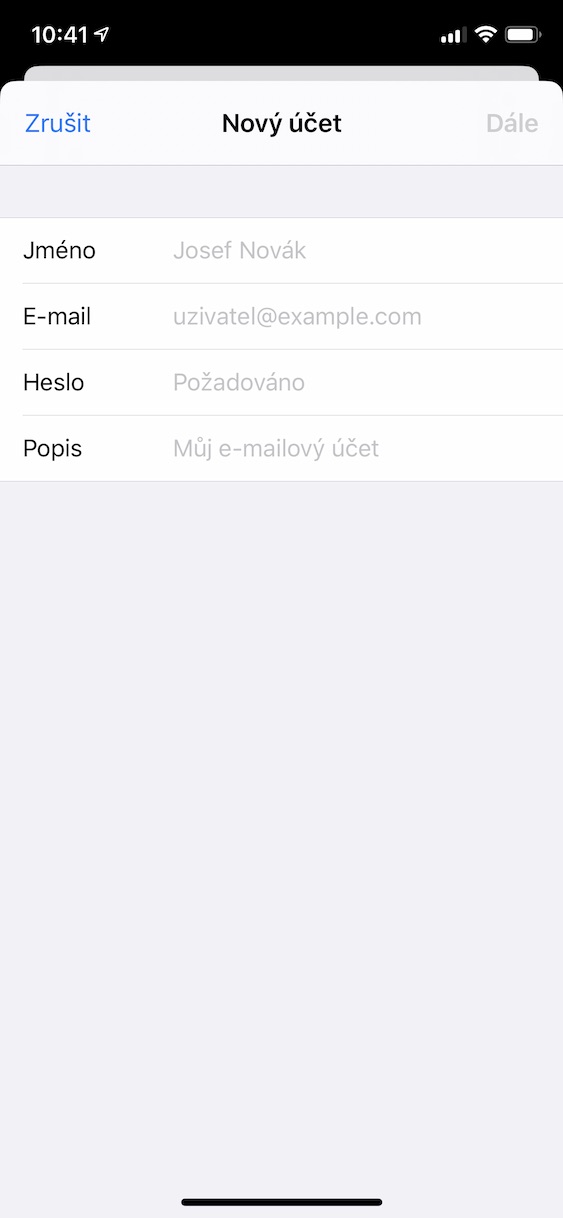
- A screen with text fields intended to be filled in:
- Name: the name of your mailbox, under which e-mails will be sent;
- Email: your email address in full;
- Password: password to your mailbox;
- Description: the name of the mailbox within the Mail application.
- Once you have filled in these fields, click on the top right Further.
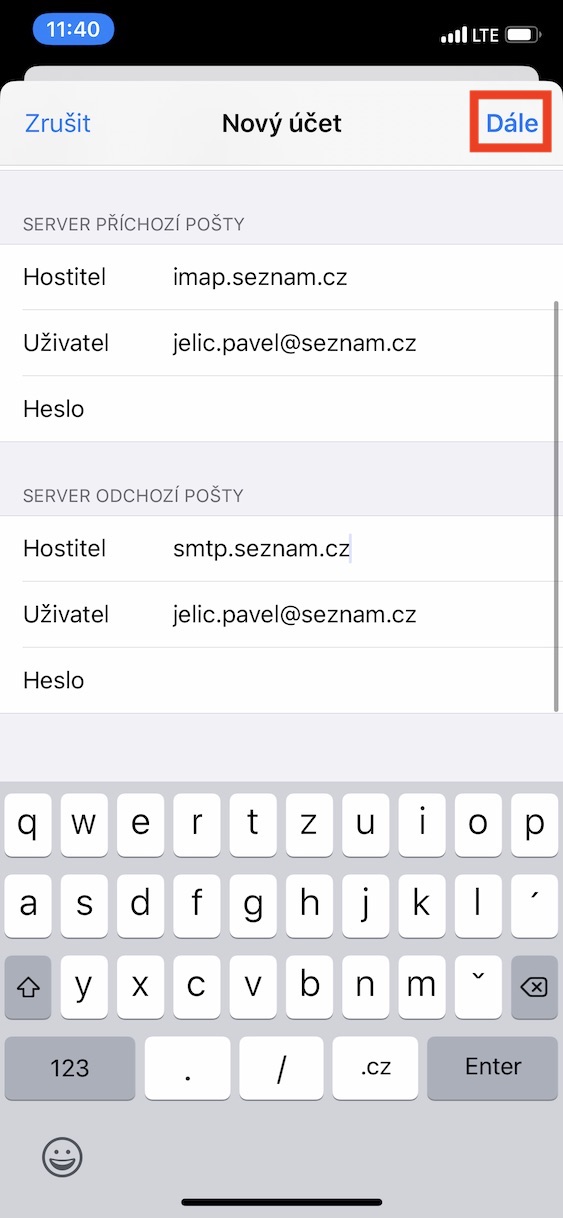
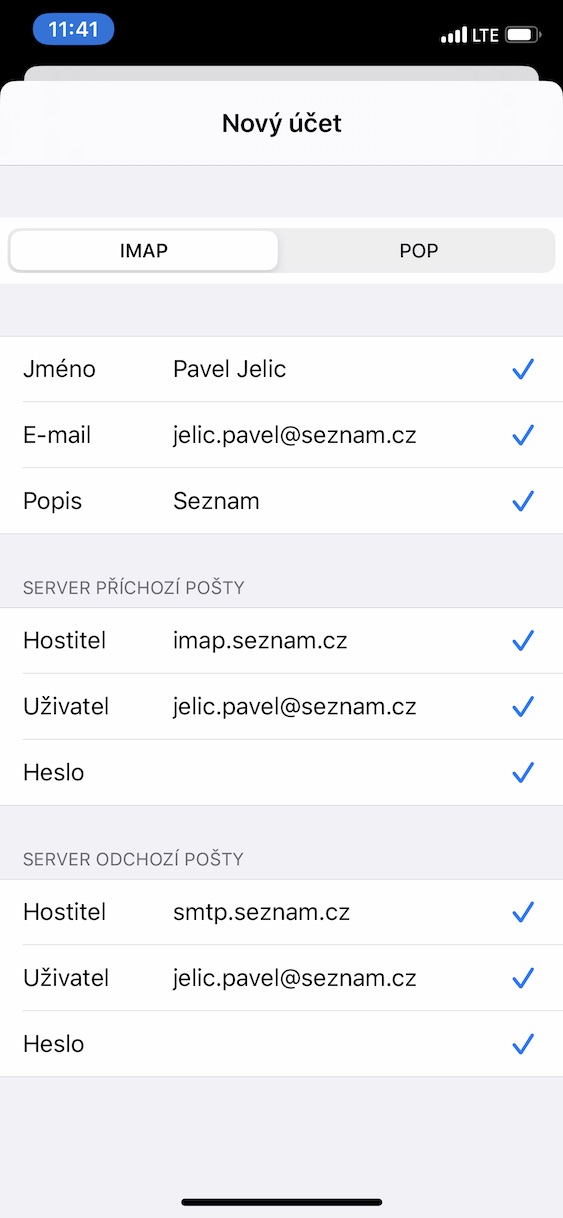
- After a while, another screen will appear that you need to fill out more information.
At the top, first choose, if possible, between the protocol IMAP or POP. Below is then necessary populate incoming and outgoing mail servers, which you found using the above procedure. At the incoming mail server consider choosing IMAP or POP. Below you can find the incoming and outgoing mail servers for Seznam.cz, you of course have to fill the servers from your provider:
Incoming mail server
IMAP
- Host: imap.seznam.cz
- User: your e-mail address (petr.novak@seznam.cz)
- Password: password for the e-mail box
POP
- Host: pop3.seznam.cz
- User: your e-mail address (petr.novak@seznam.cz)
- Password: password for the e-mail box
Outgoing mail server
- Host: smtp.seznam.cz
- User: your e-mail address (petr.novak@seznam.cz)
- Password: password for the e-mail box
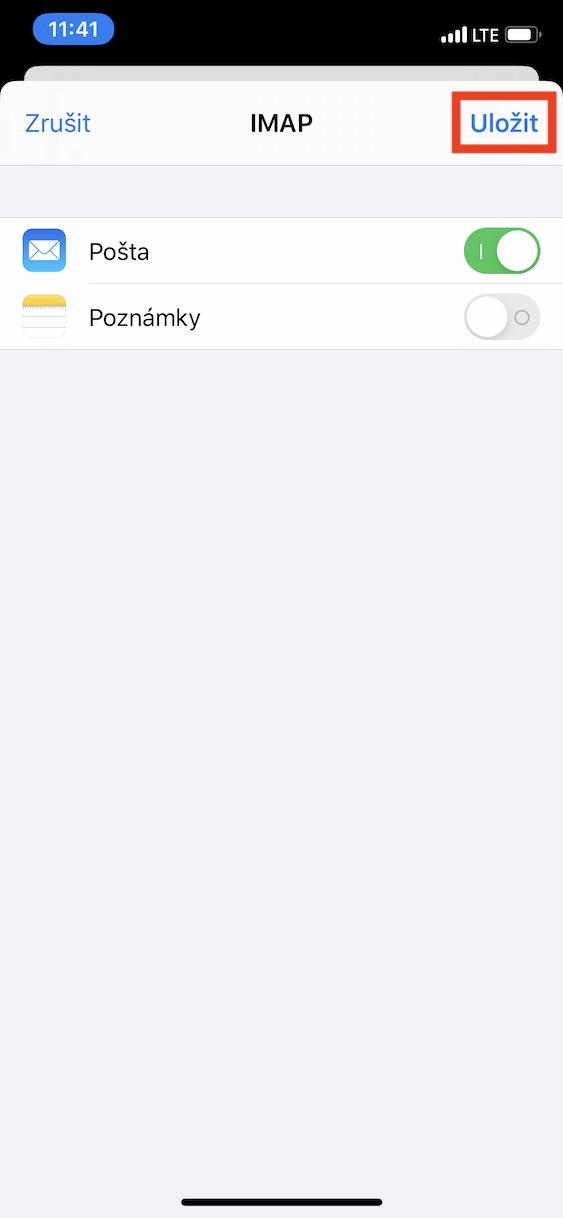
After filling out, click on the button in the upper right Further. Now you need to wait a few (tens) of seconds until the system contacts the servers. Once this whole process is done, all you have to do is choose if you want it in addition to e-mails to synchronize for example also calendar, notes and other data. Once you have everything selected, click on the top right Impose. Your email account will then appear directly in the Mail application and you can start using it immediately.




Thank you very much for the useful guide! He helped me a lot.
Using the email app from the list is terrible.
Have a nice day