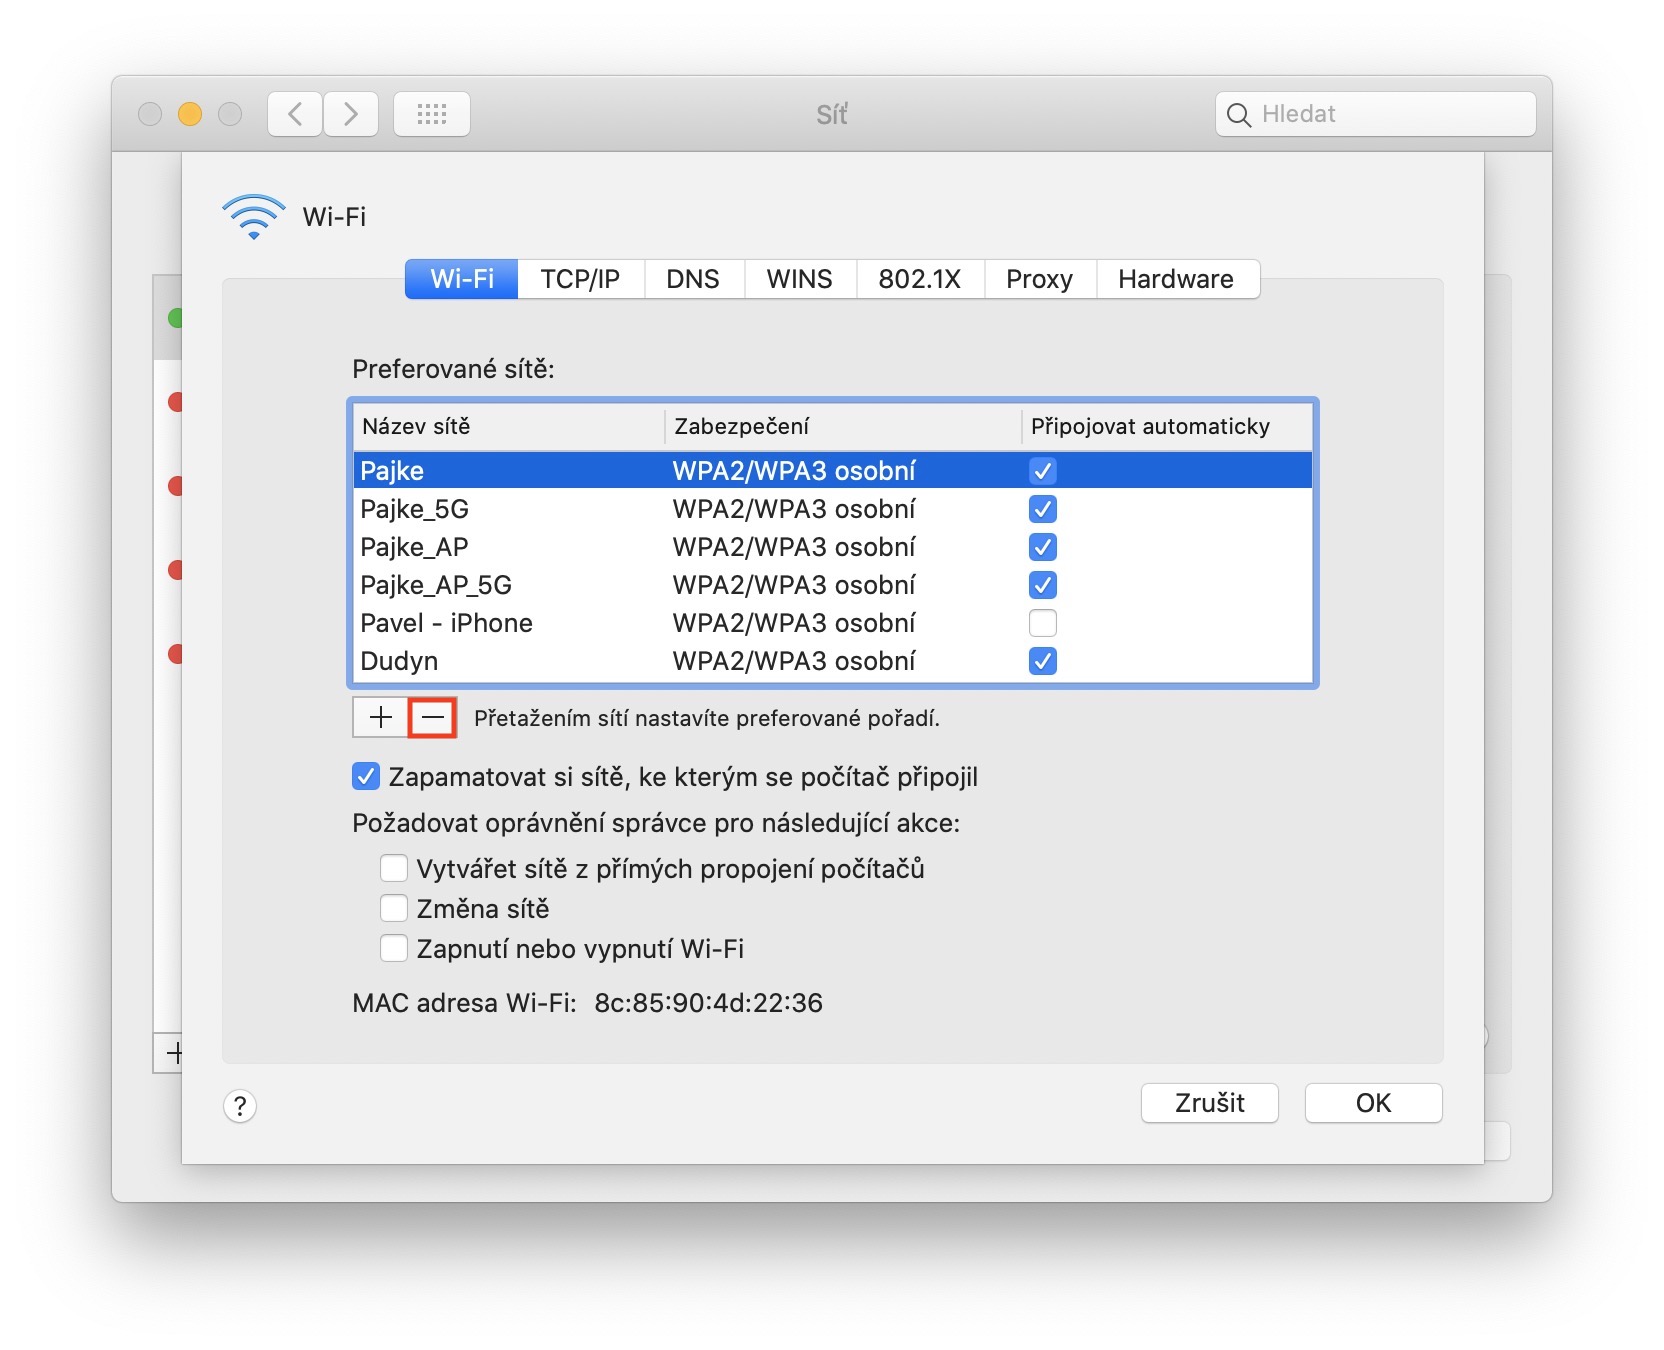
If you really take your MacBook with you everywhere, its memory contains all the Wi-Fi networks you've ever logged into. This means that if you return to a place again, the MacBook will recognize it and connect to the saved Wi-Fi network again, automatically without you having to click on that network or confirm it in any other way. However, in some cases, this setting may not be suitable and you might prefer that the MacBook forget about some Wi-Fi networks - for example, due to speed or other problems when you prefer to use a hotspot. Let's see together how you can remove certain Wi-Fi networks from the MacBook memory.
It could be interest you

How to remove Wi-Fi networks from MacBook memory
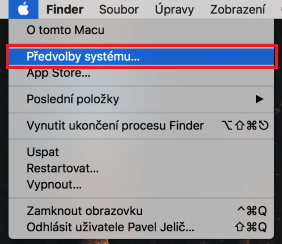
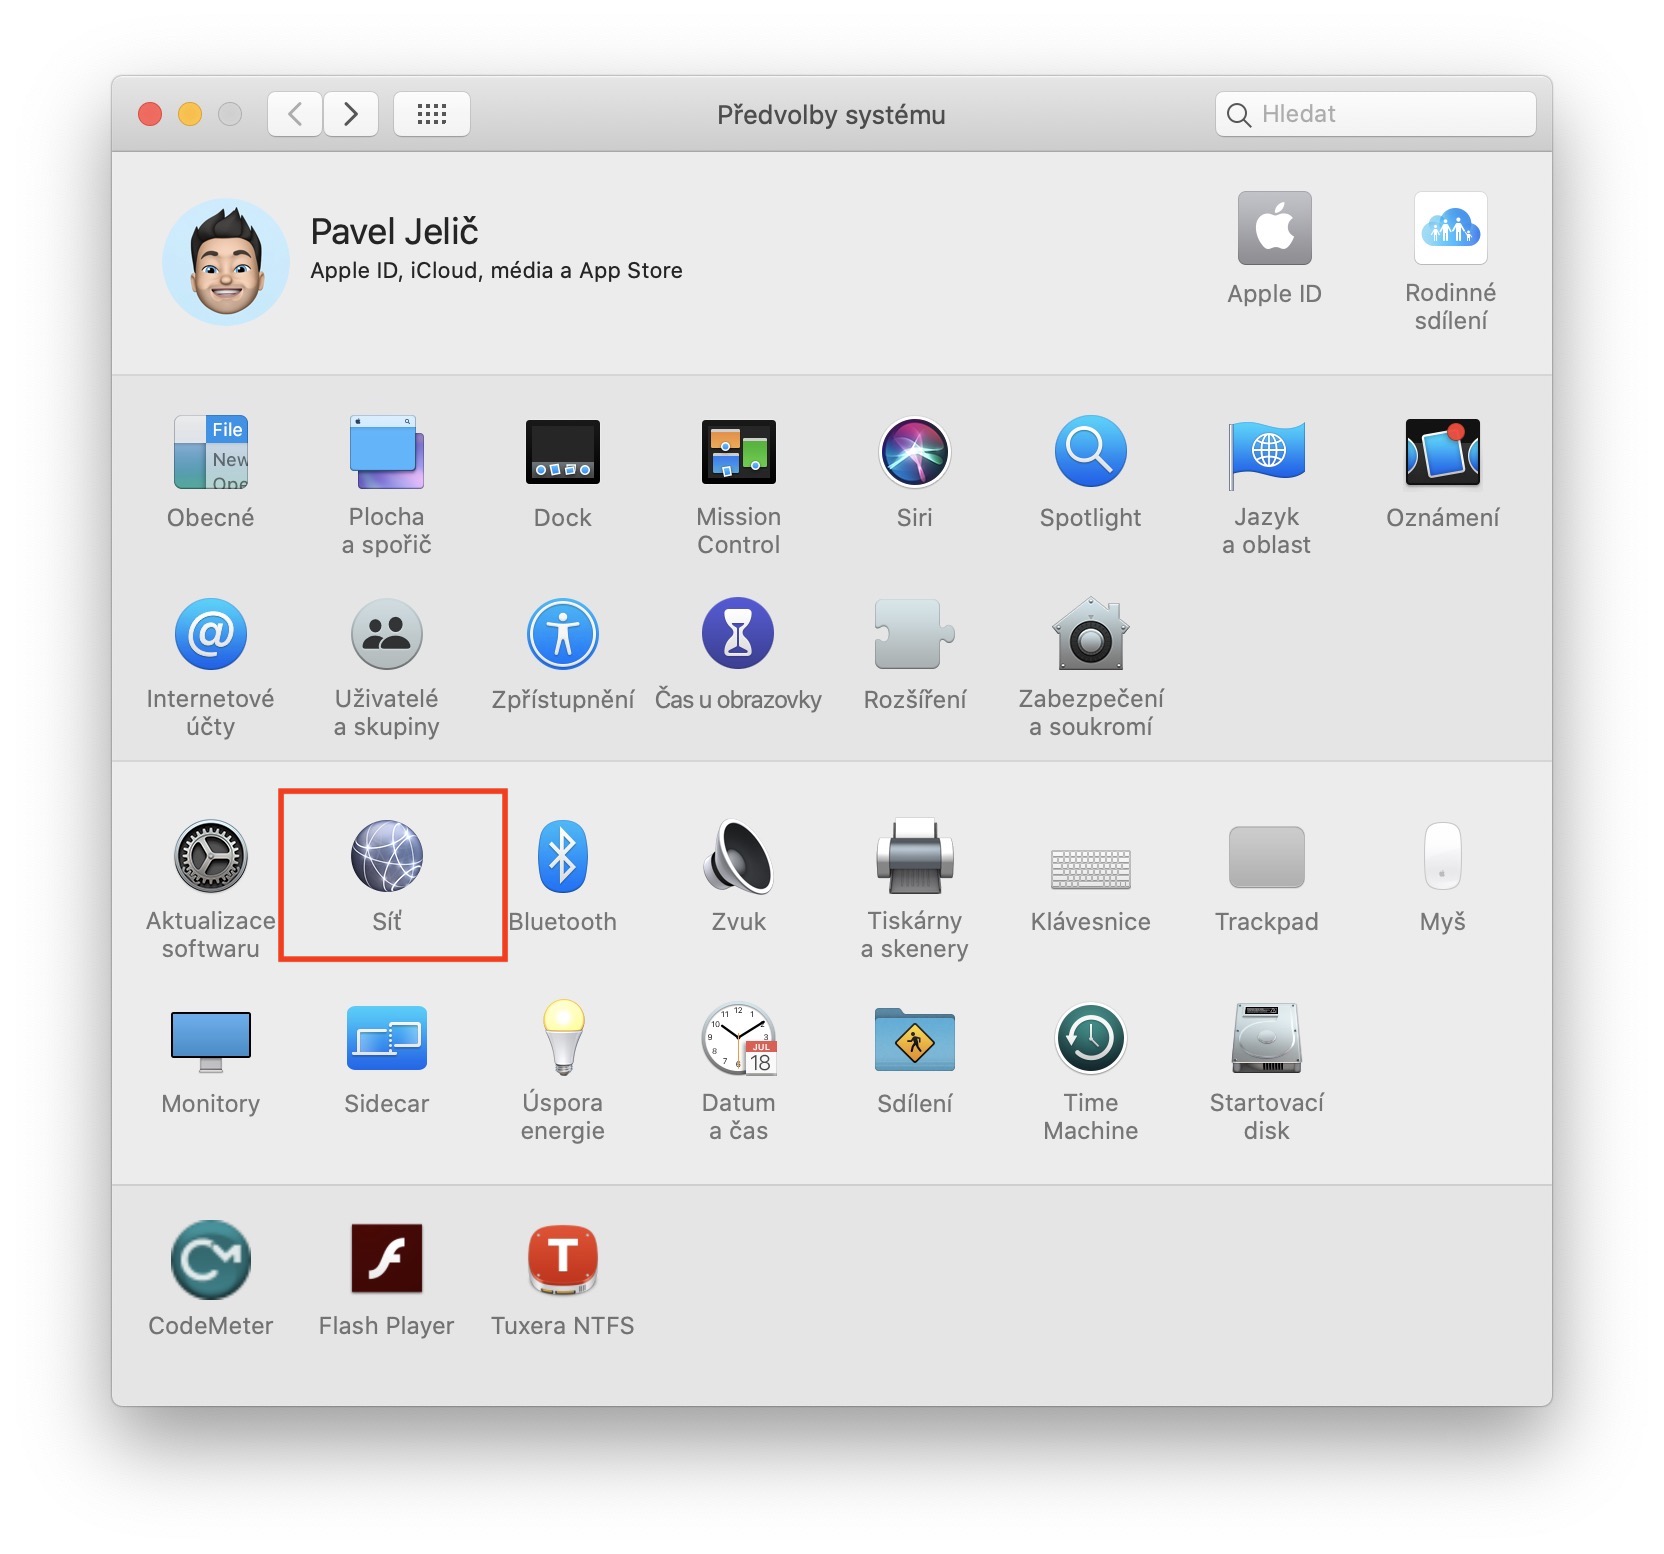
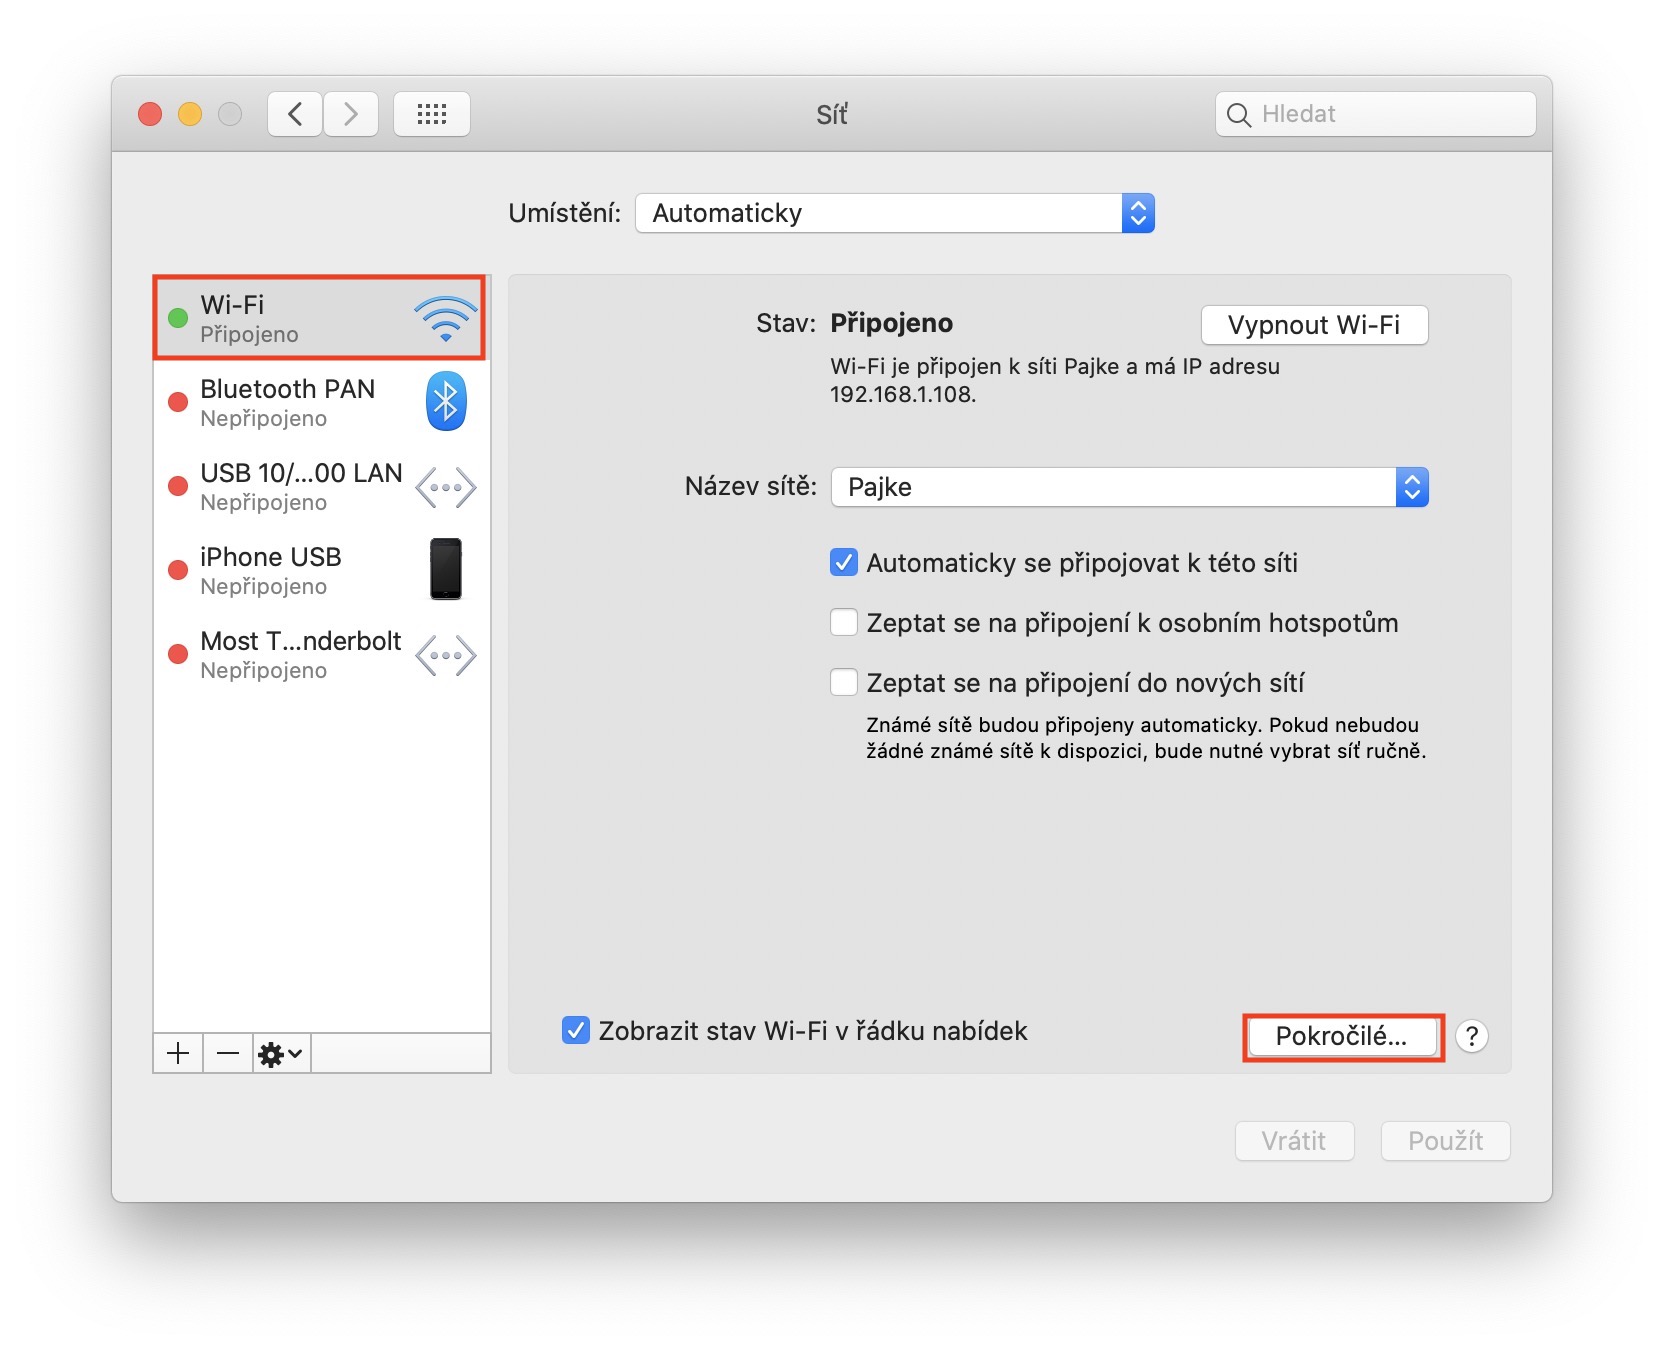
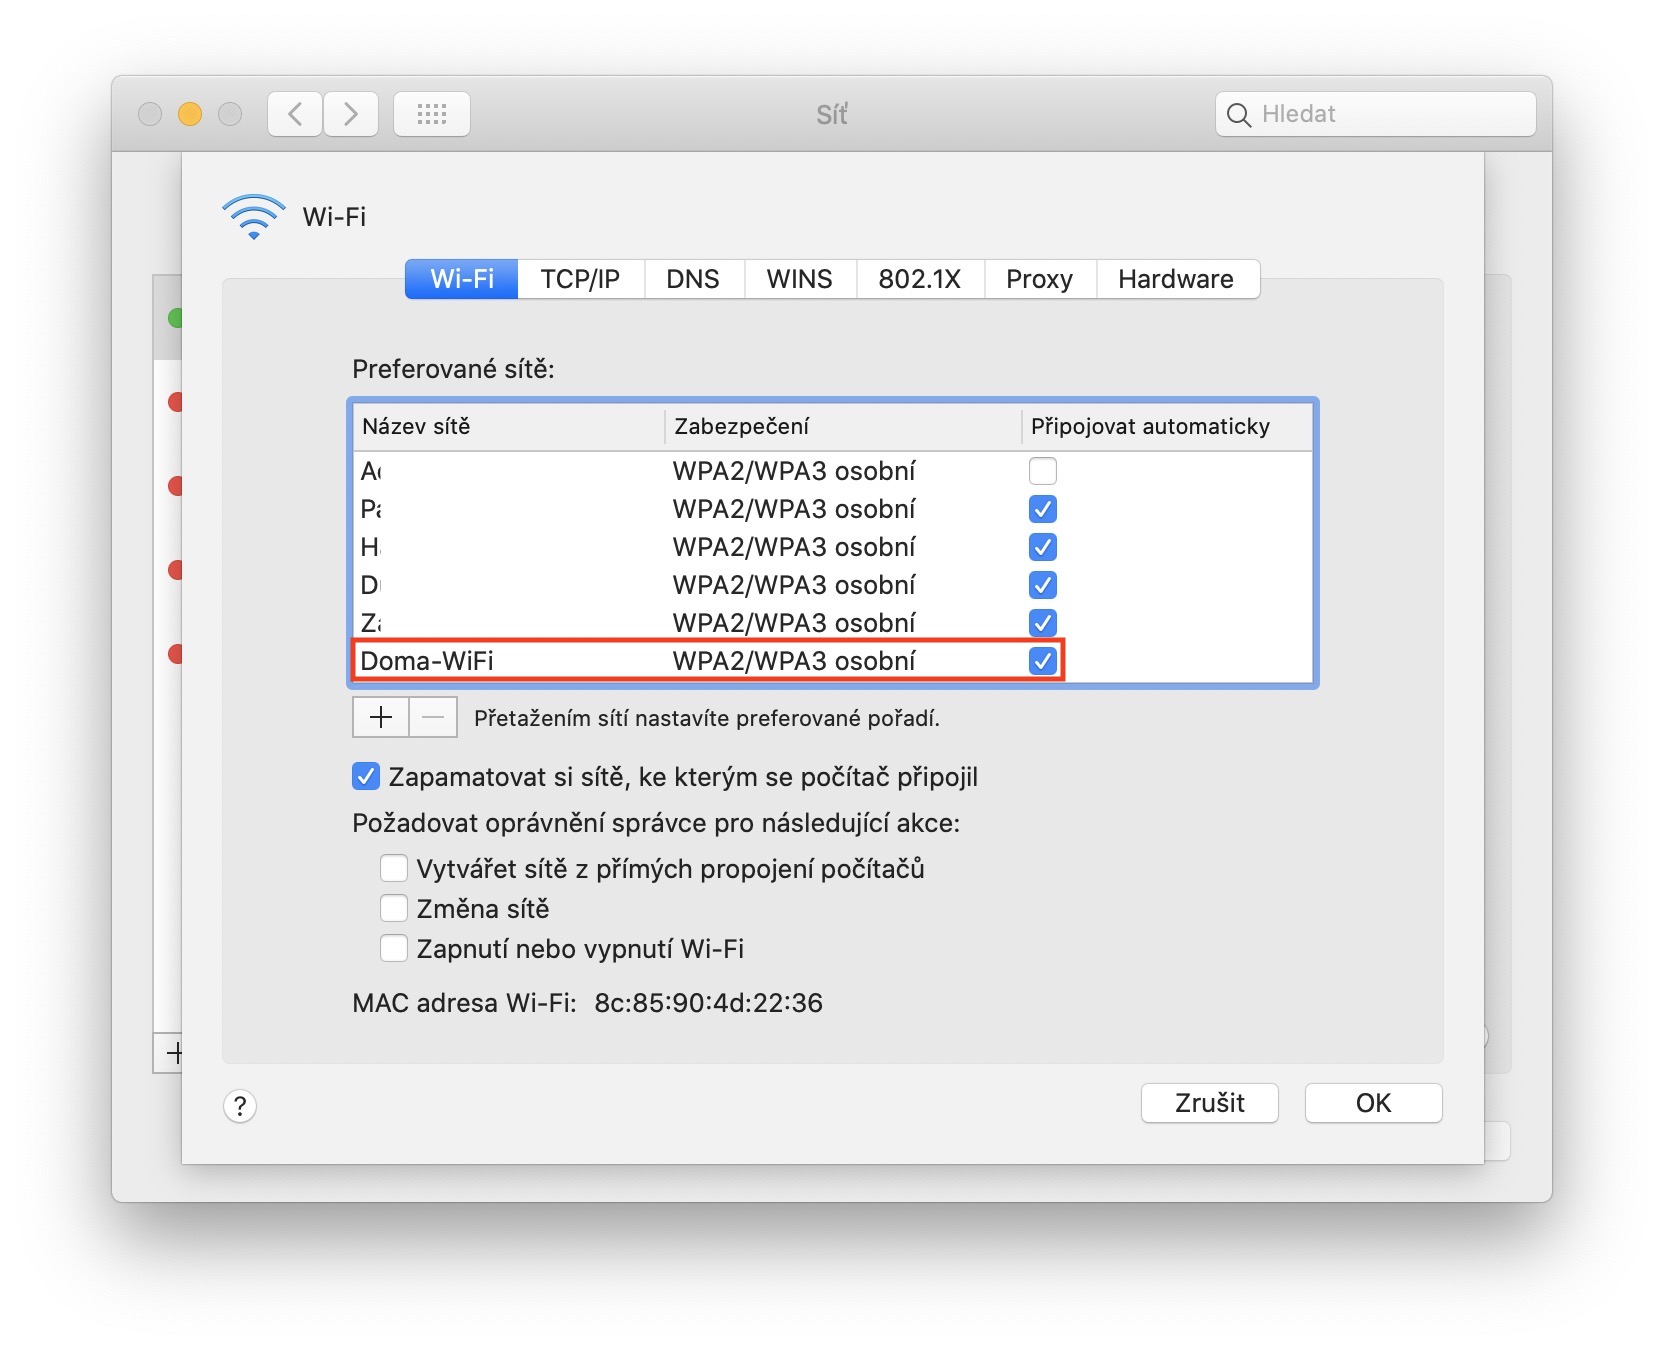
On your MacBook, in the upper left corner, click icon. A drop-down menu will appear to select an option System Preferences… Once you do that, a new window will appear with all the preferences where you are interested in the section Sew, which you click on. IN left menu then make sure you are in a category Wi-Fi. Now all you have to do is click the button in the lower right corner Advanced. Another window will open with a list of all the Wi-Fi networks that the MacBook remembers. If you want to remove a network, remove it mark and then click on "-" icon in the lower left corner.
Finally, I have one more small tip for you – if you have a problem with the MacBook automatically connecting to your neighbor's (friend's) network at home, for example, you can simply change the priority of connecting to the Wi-Fi network. Just use the procedure above to move to the list of all networks. Here, in addition to deleting, you can simply drag and drop networks between each other. The one at the top has a higher priority to connect than the one below.
