Have you ever wanted to set the Mail app on Mac to automatically move emails from a certain user to the trash or to another folder? Or do you want to set yourself which e-mails should be marked as important? Or maybe you want to automatically forward selected incoming mails to the selected e-mail address? If you answered yes to the previous questions and countless other similar ones, then this article will undoubtedly be useful for you. We will show you how you can set up and use rules in the Mail application on Mac.
It could be interest you

Where are the rules settings located?
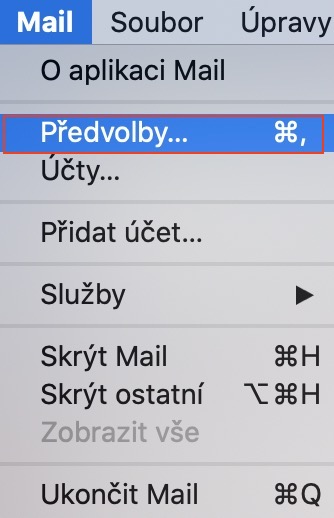
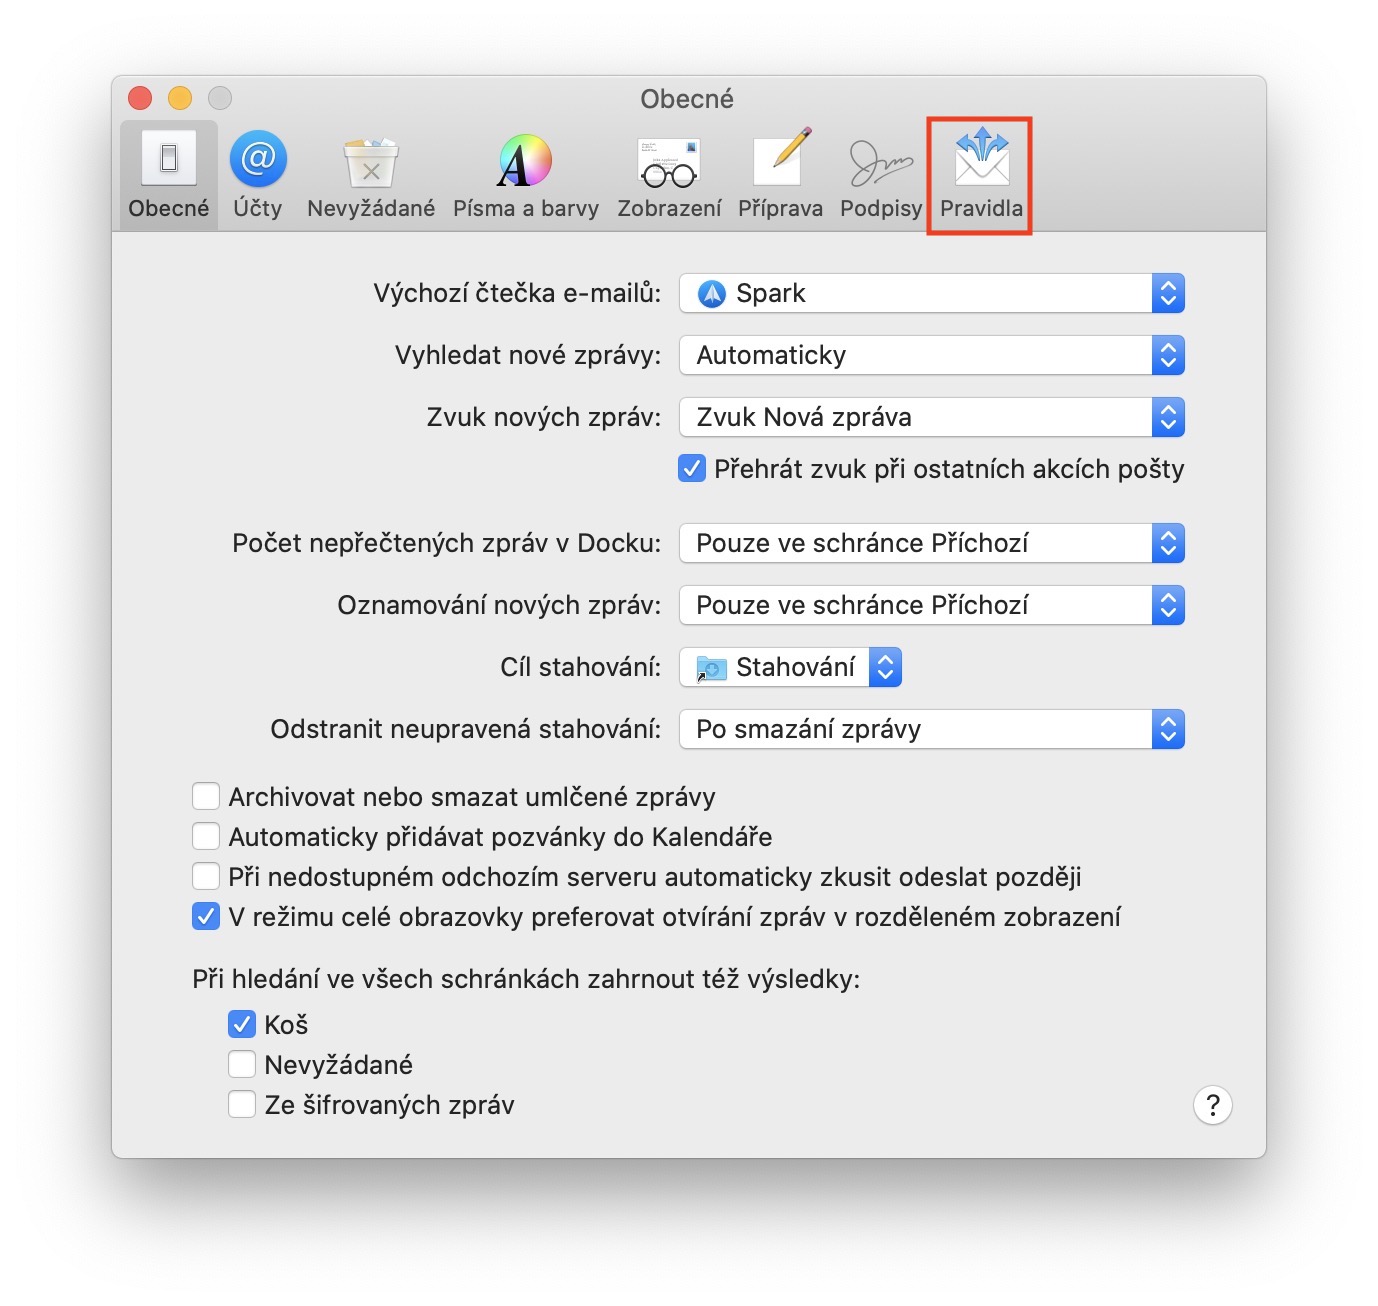
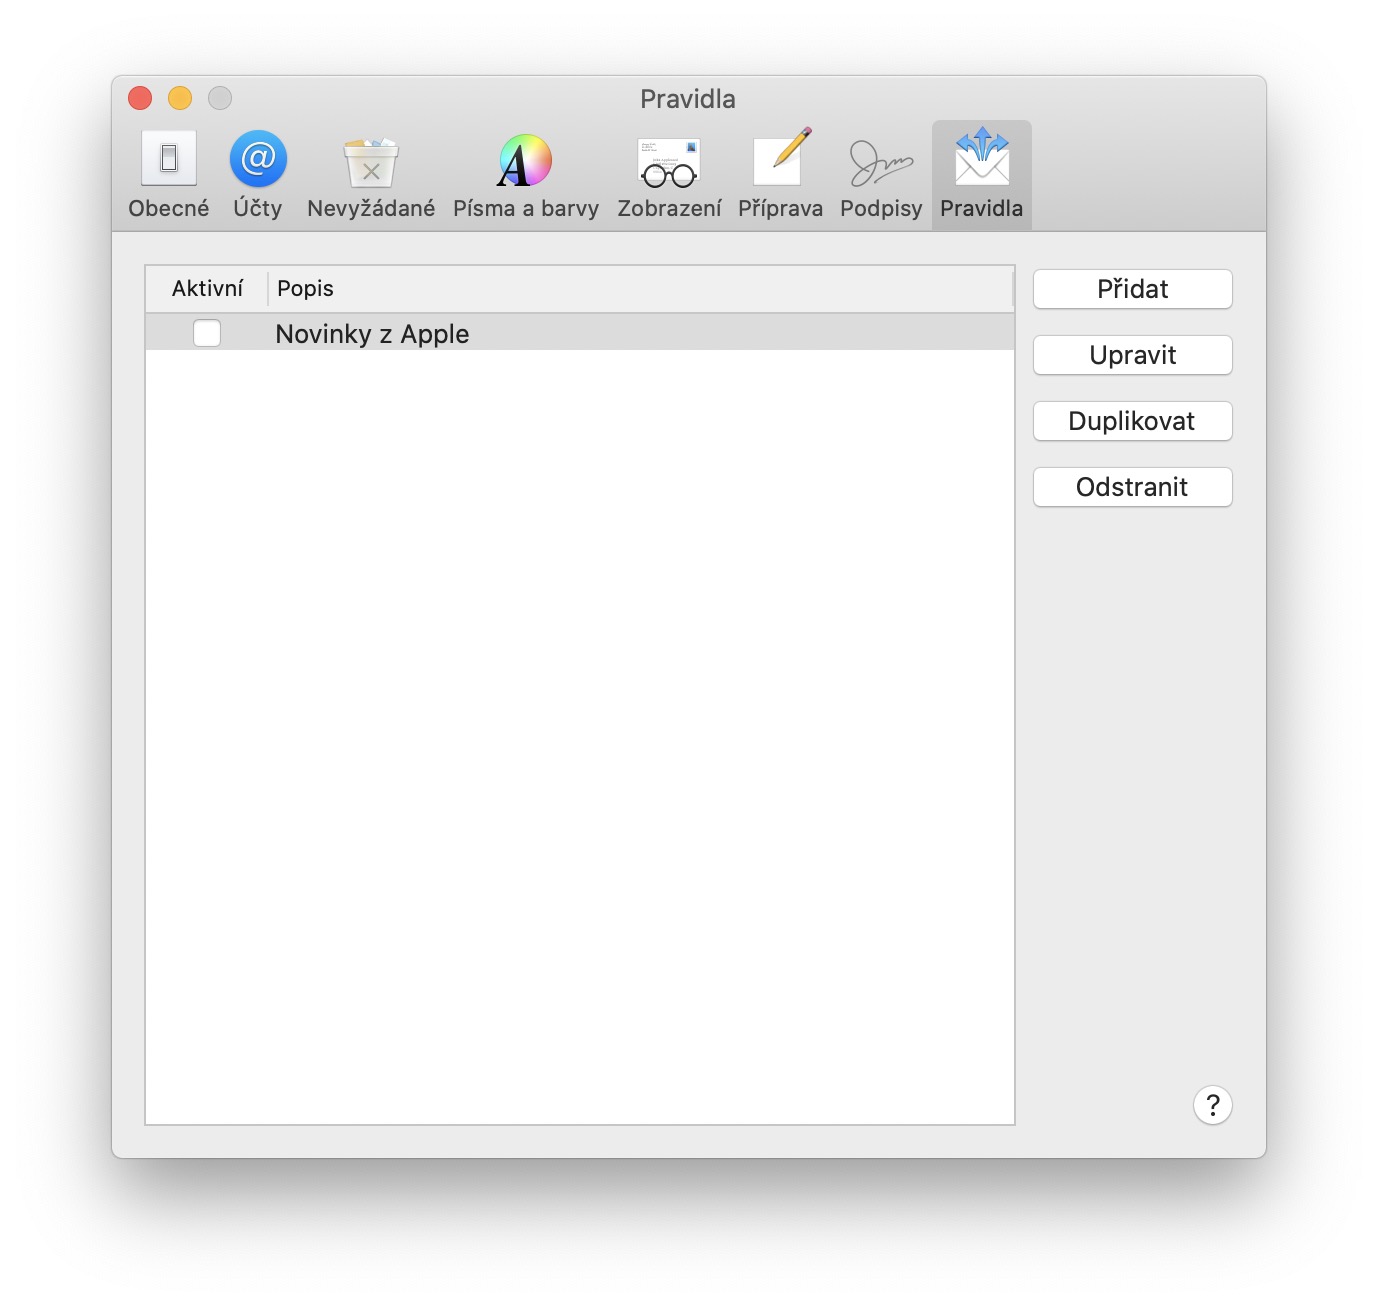
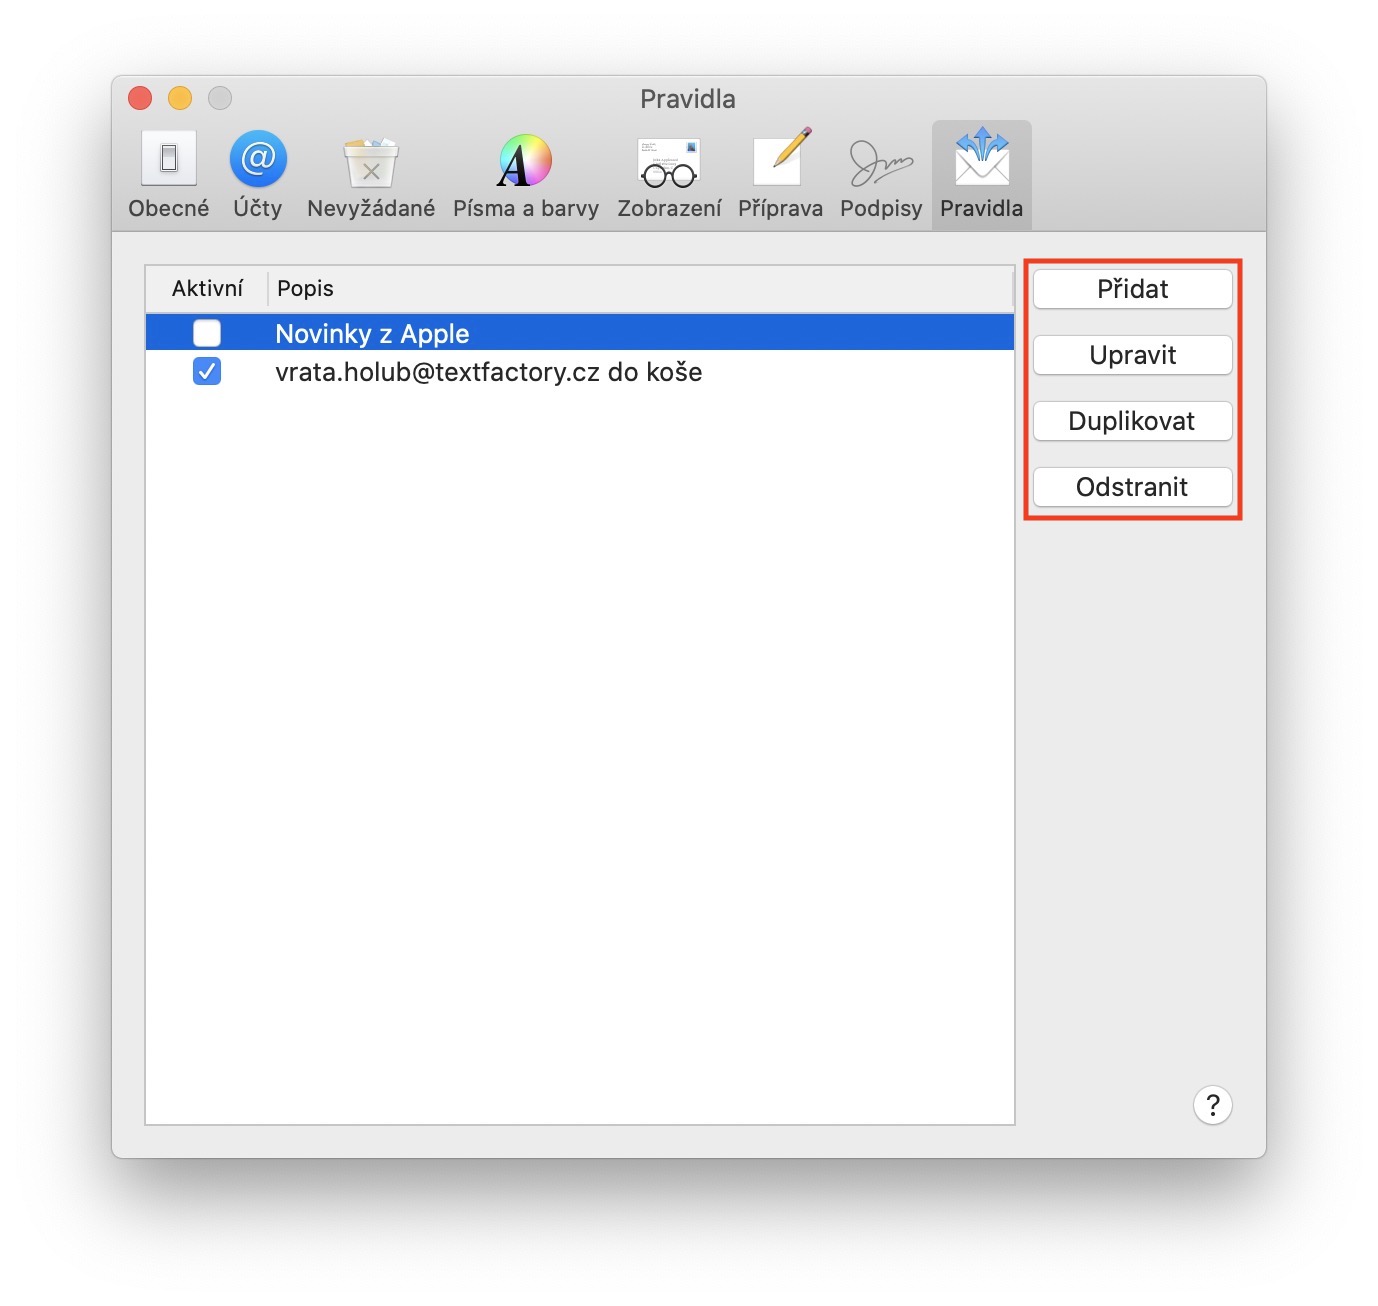
If you want to move to the rules settings, first open the application Email and move into hers active window. Once you have done so, in the upper left corner of the screen, click on the tab in the top bar Mail Then select an option from the drop-down menu Preferences… and in the new window that appears, move to the section Rules. This is where all the "magic" you need to set up and use the rules occurs.
Setting rules and options
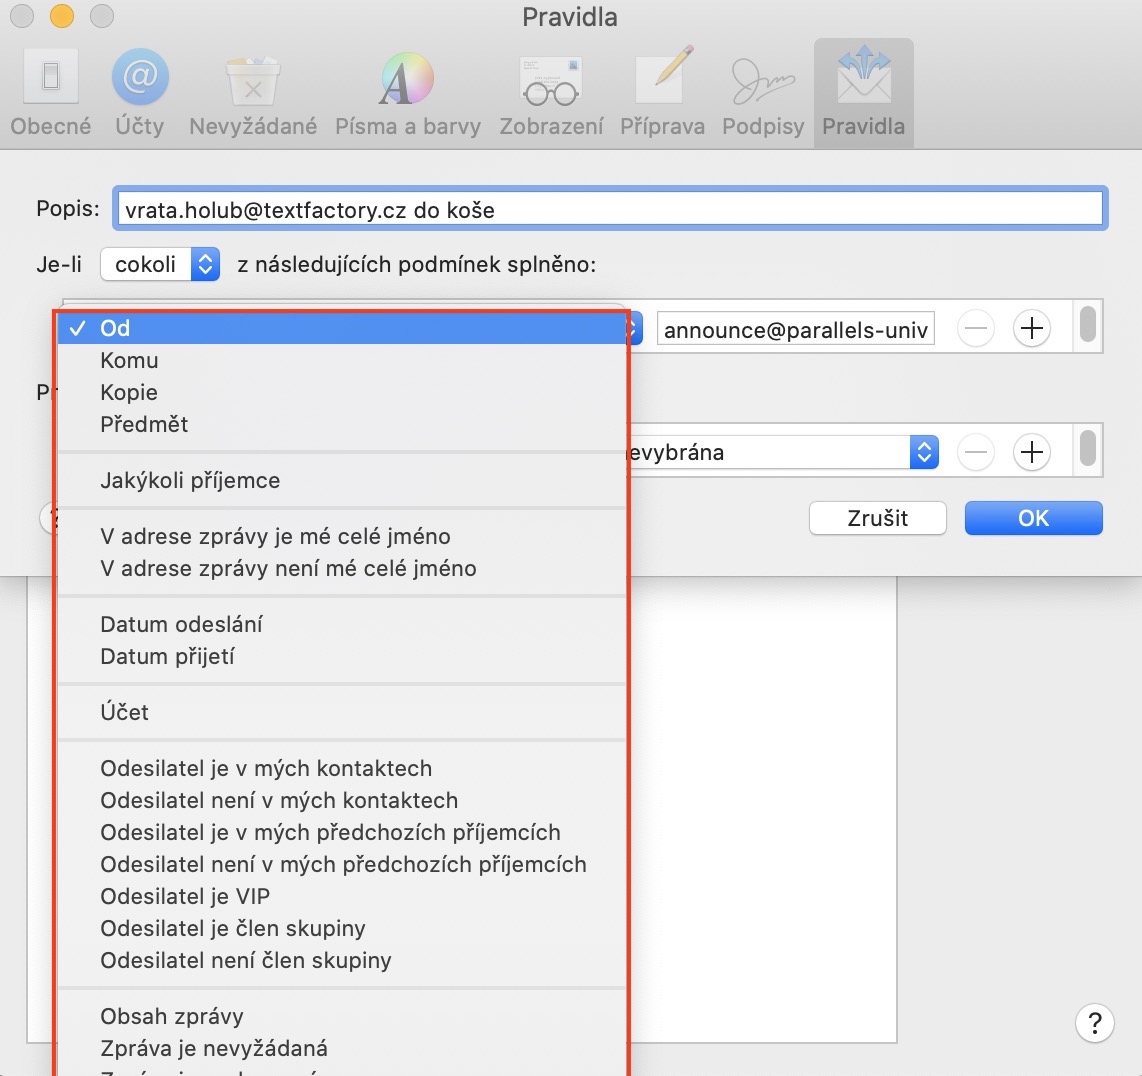
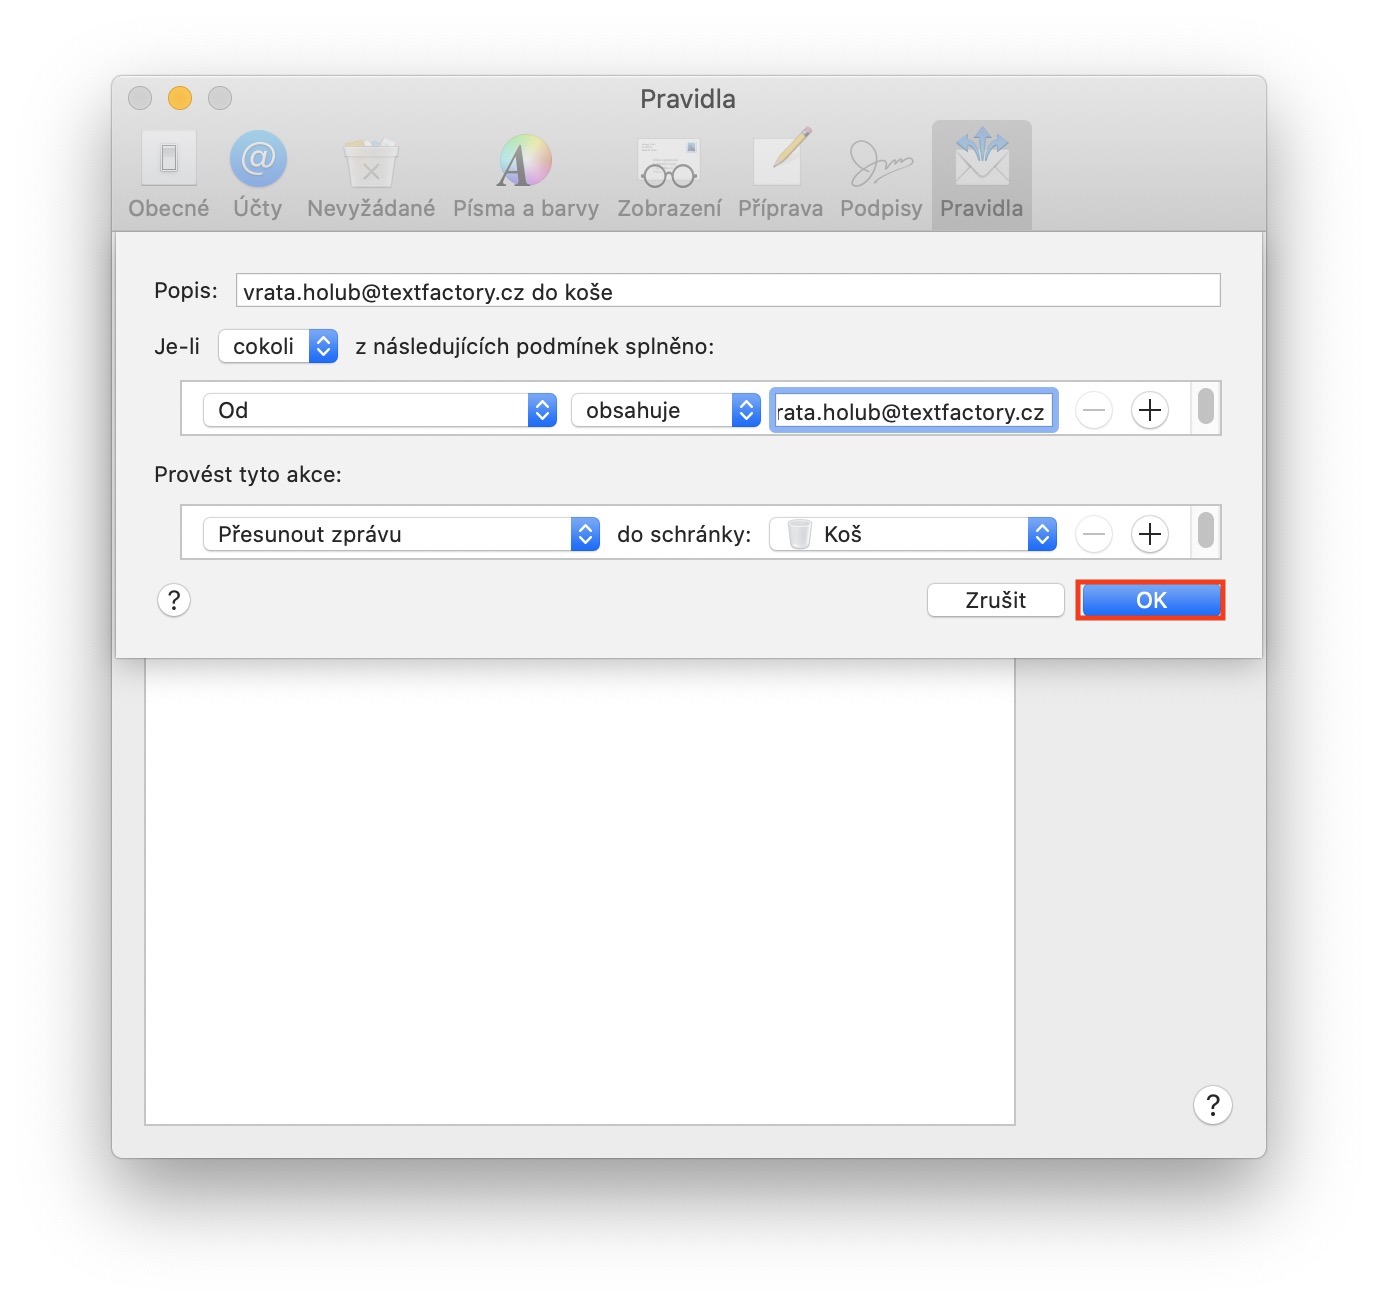
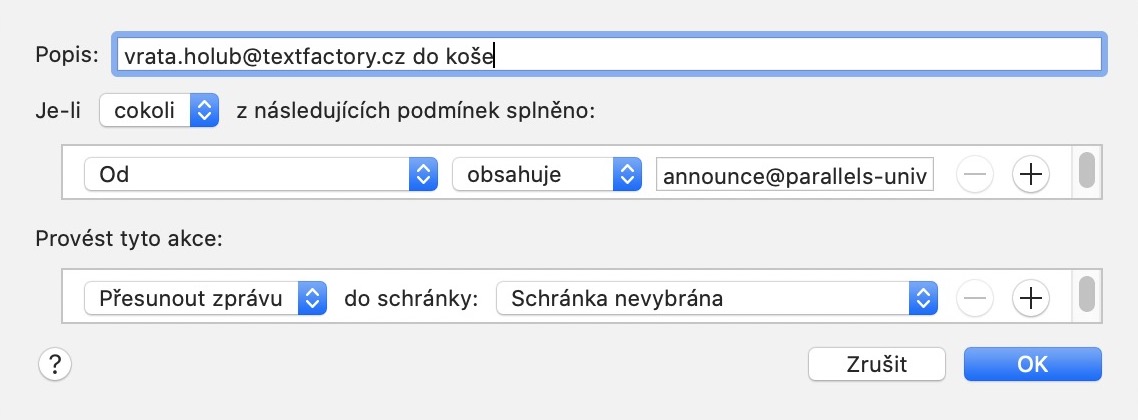
If you want to set a new rule, there is nothing easier than clicking on the option in the right part of the window Add. As soon as you click on this option, another small window will appear in which you can easily set the rule. Set yourself up first description, so that you can easily distinguish the rule from others. Then comes the classic setting conditions in the form "when a certain condition occurs, do this". As the first option, set whether a certain action should be performed only when they are fulfilled all conditions (there may be more of them), or it is enough that it is fulfilled only one from the conditions set below.
Conditions
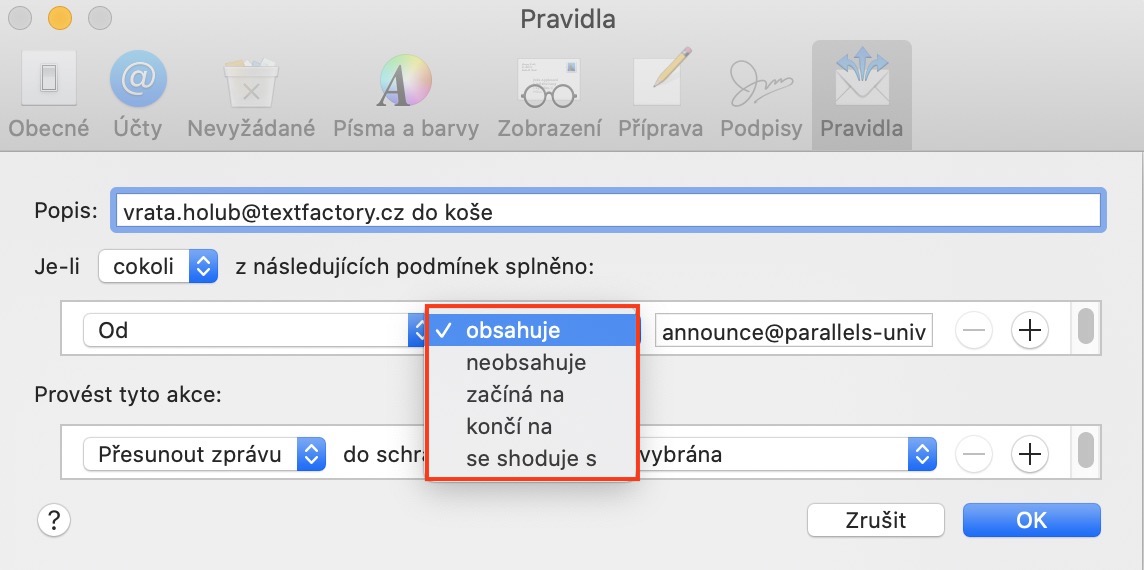
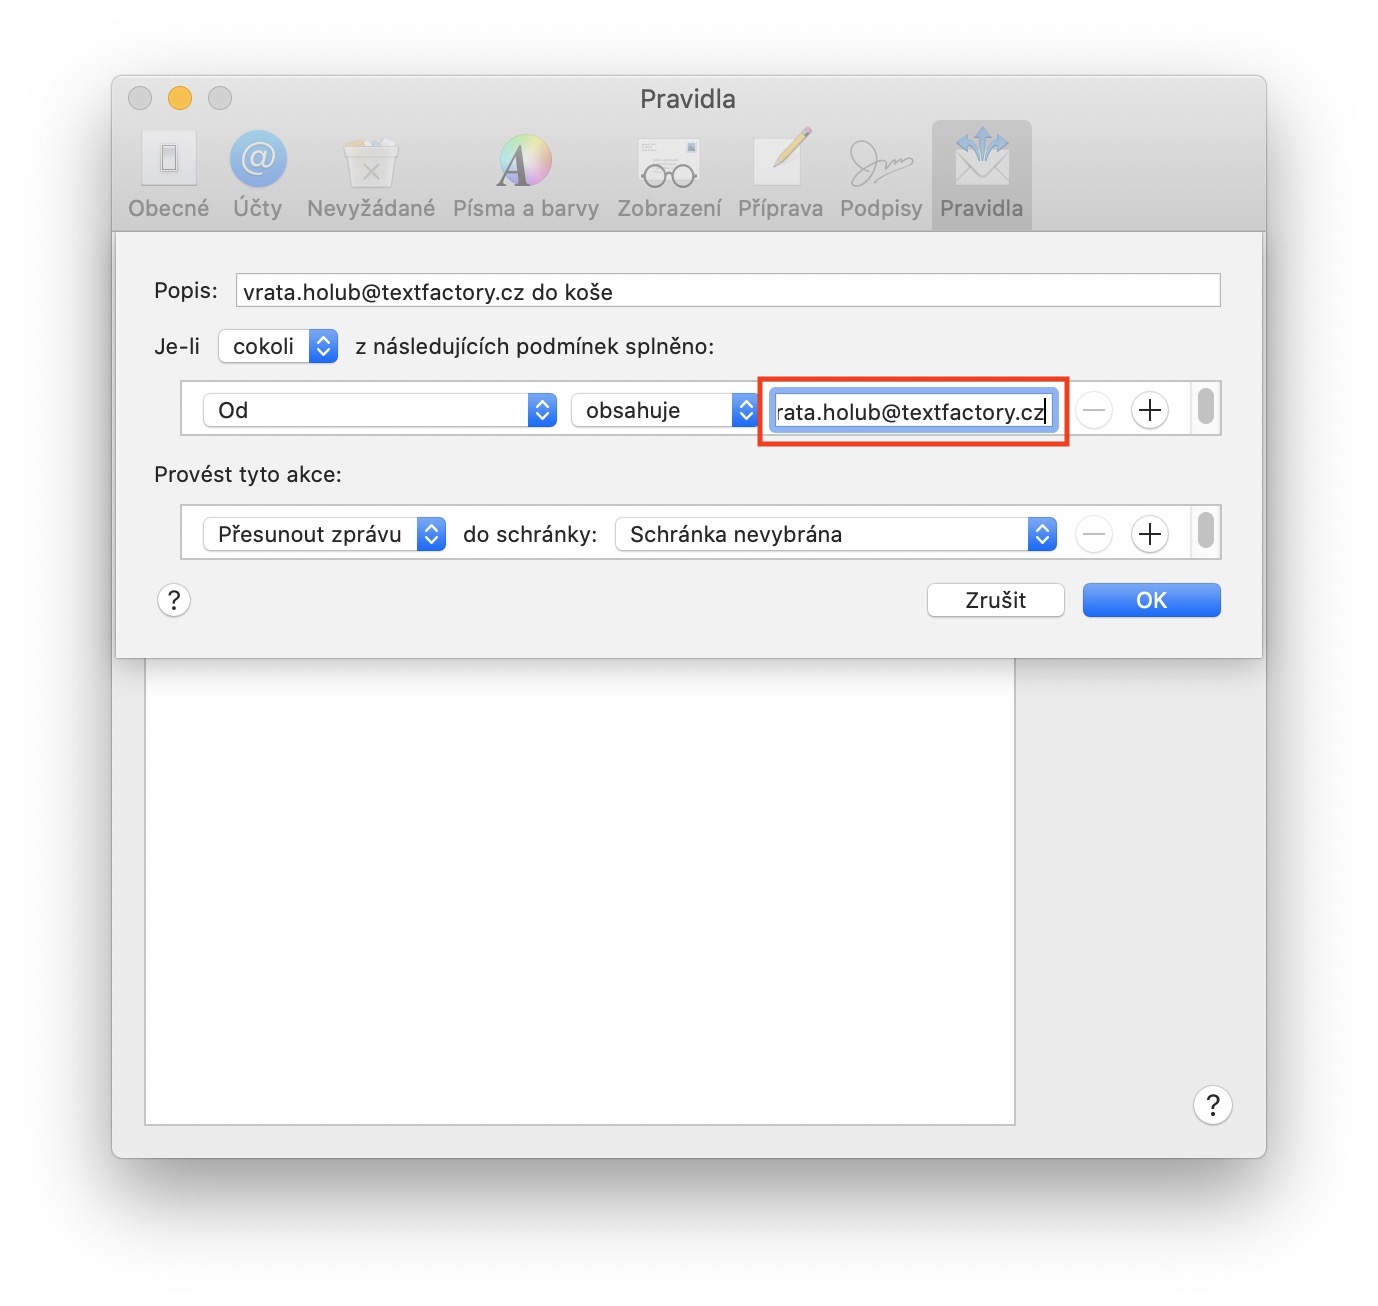
After that comes the setting of the conditions itself. IN the first drop-down menu take your pick the condition from which the display of other drop-down menus will depend. For example, we will set up a rule that guarantees that all incoming emails from an email address vrata.holub@textfactory.cz will be moved to the trash. In the first drop-down menu, we choose the option od. In the second menu, we select an option contains (for example, if we wanted to move all e-mails to the trash except those from vrata.holub@textfactory.cz, we would choose does not contain, etc.). Just type in the last text field the email itself, in my case that is vrata.holub@textfactory.cz. If you want to add another rule, click on the + icon. With this we have the condition set, now we need to set what should happen if it is fulfilled.
Actions after fulfillment
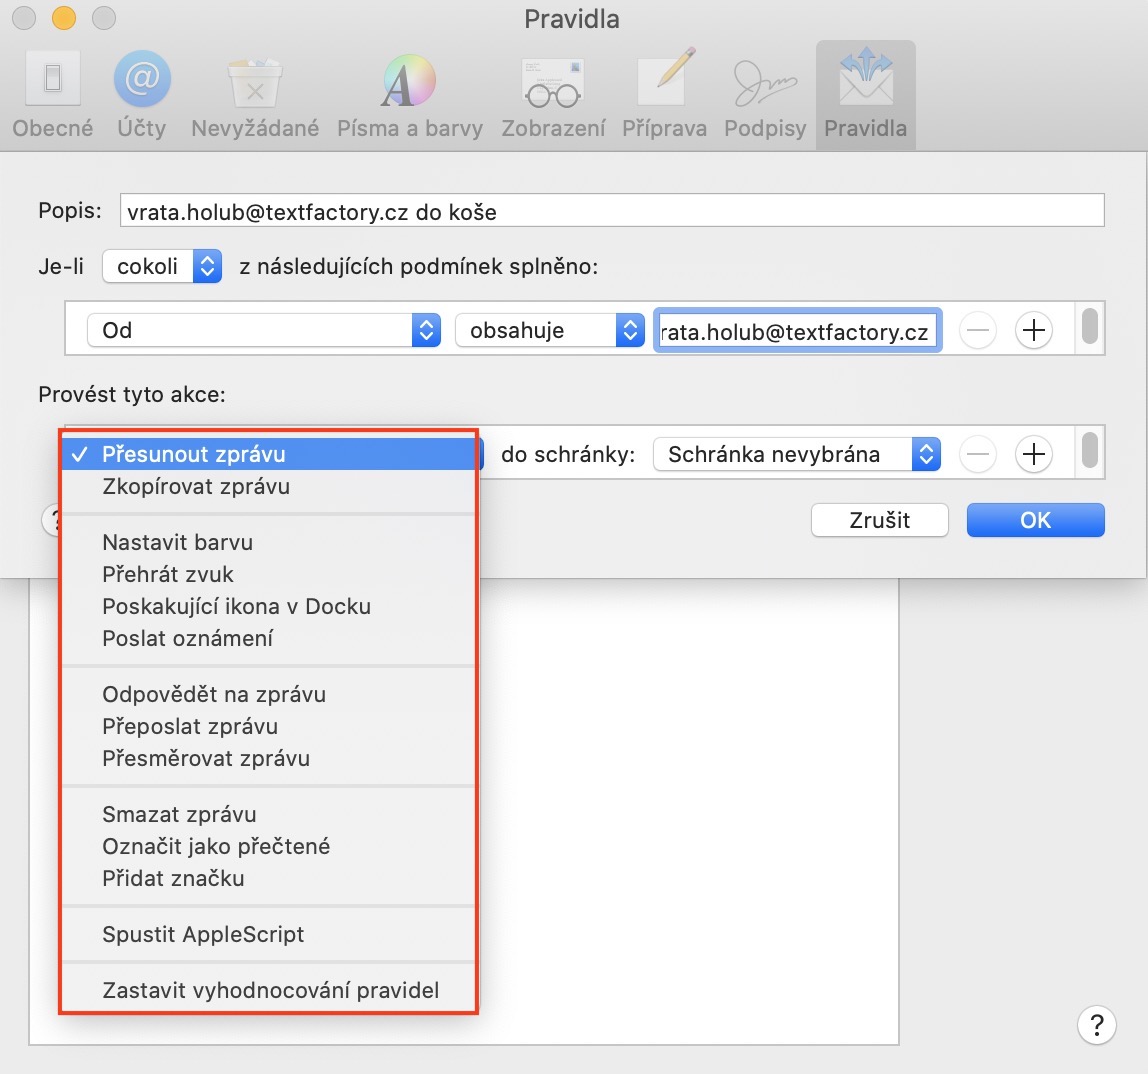
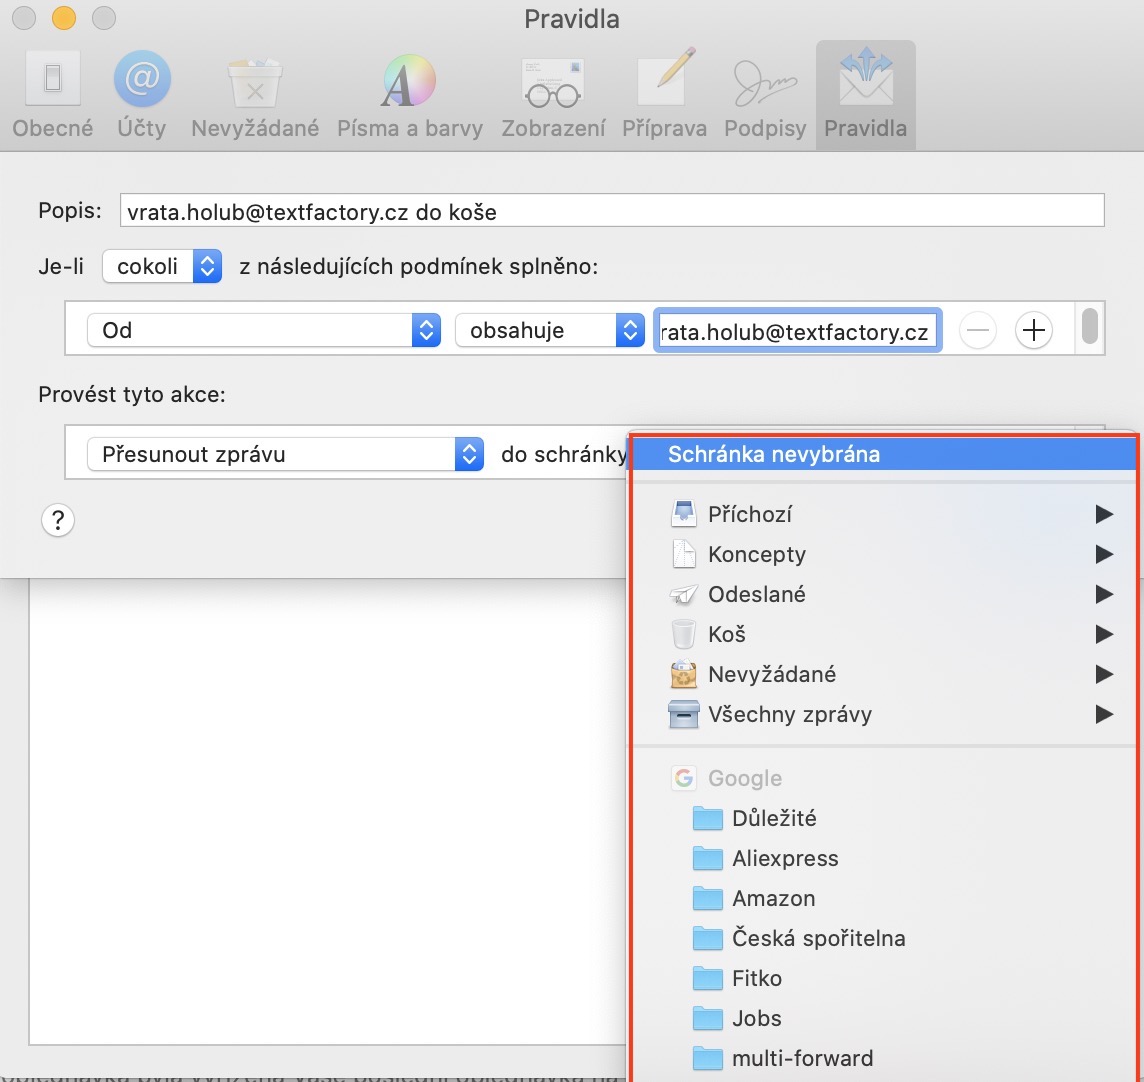
Below, below the text Perform these actions, we can now simply set what should happen after the above conditions are met. In my case, I want to make emails that meet the condition moved to the trash. So in the first drop down menu I select the option Move the message and select in the second drop-down menu Basket. If you want to create additional actions that will be performed after the conditions are met, just click on again the + icon. Once you have the conditions together with the actions set, just tap on OKAY. The created rule will then appear in the list of all active rules. From here you can rules too duplicate, edit or delete.
There are countless different conditions and actions to take when met. If I were to list all the examples in this article, the article would be so long that none of you would read it. So definitely check out all the rules and events separately. It can be said that in Mail you can easily set all the rules you can think of - both simple ones and more complex ones with nested conditions.
