Nowadays, it is completely normal for every member of the family to have their own computer. If you want to transfer a folder or perhaps files between these computers, you probably do it using a flash drive. So you drag and drop files onto the flash drive, eject it from your device, then plug it into the destination and move the files. Of course, this file transfer option works, but it's nothing fast. It's much easier to transfer files between computers using folder sharing. If you want to activate and set up sharing of selected folders on your Mac, then continue to. reading this article.
It could be interest you
How to share files and folders with other computers on your home network on your Mac
If you want to start sharing selected folders on your Mac or MacBook, you must first activate the sharing function itself. You can achieve this as follows:
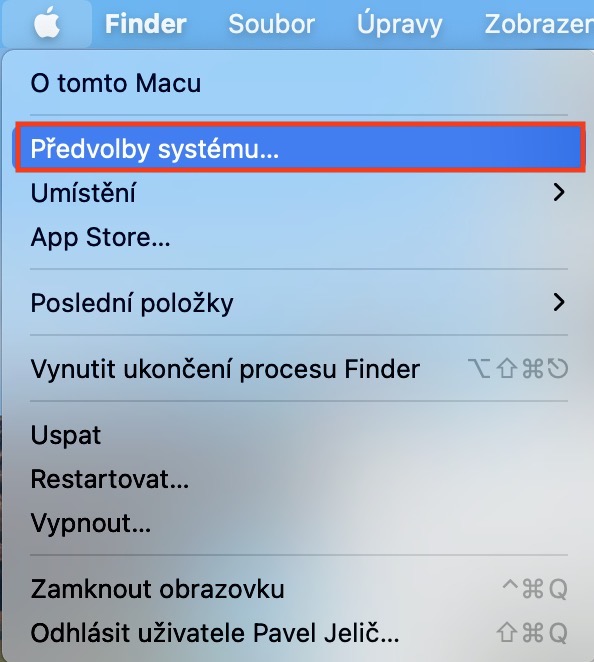
- On your macOS device, move your cursor to the top left corner of the screen and tap on icon .
- Once you do so, select an option from the menu that appears System Preferences…
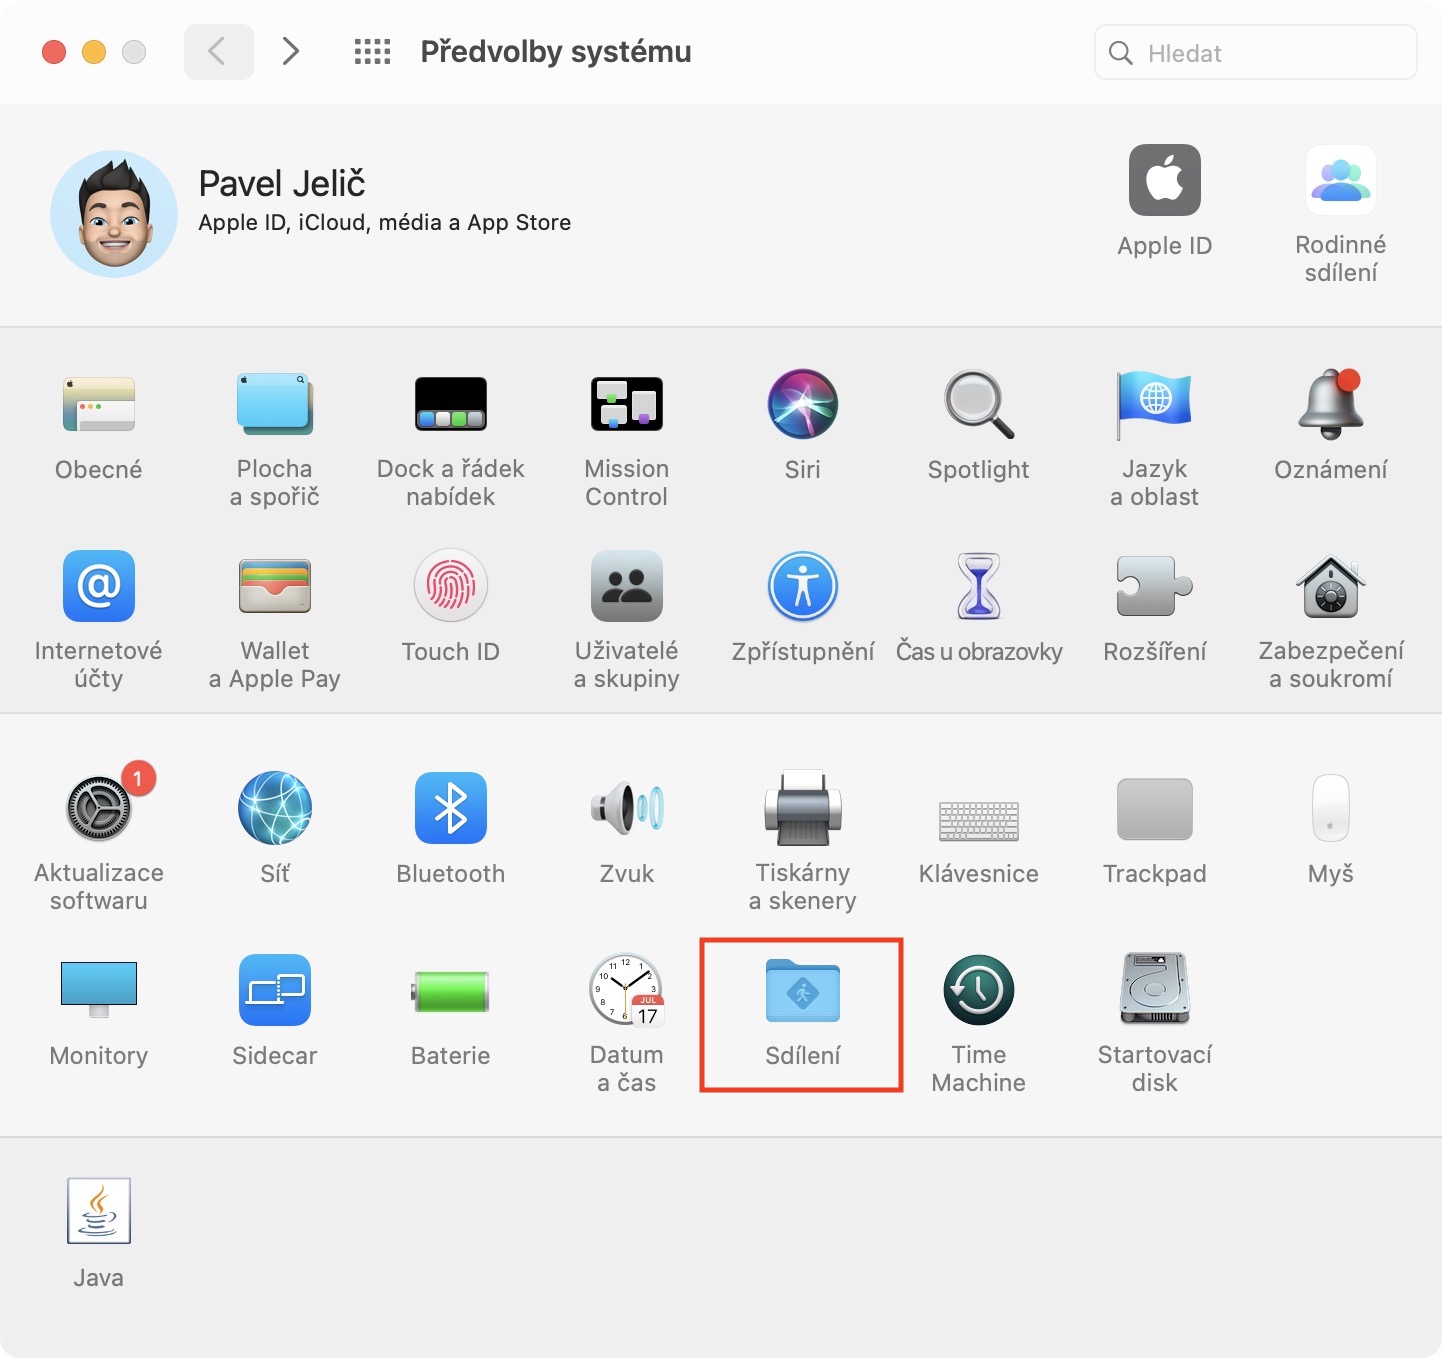
- This will open a new window with all available sections for editing system preferences.
- You are interested in the section in this window sharing, which you tap.
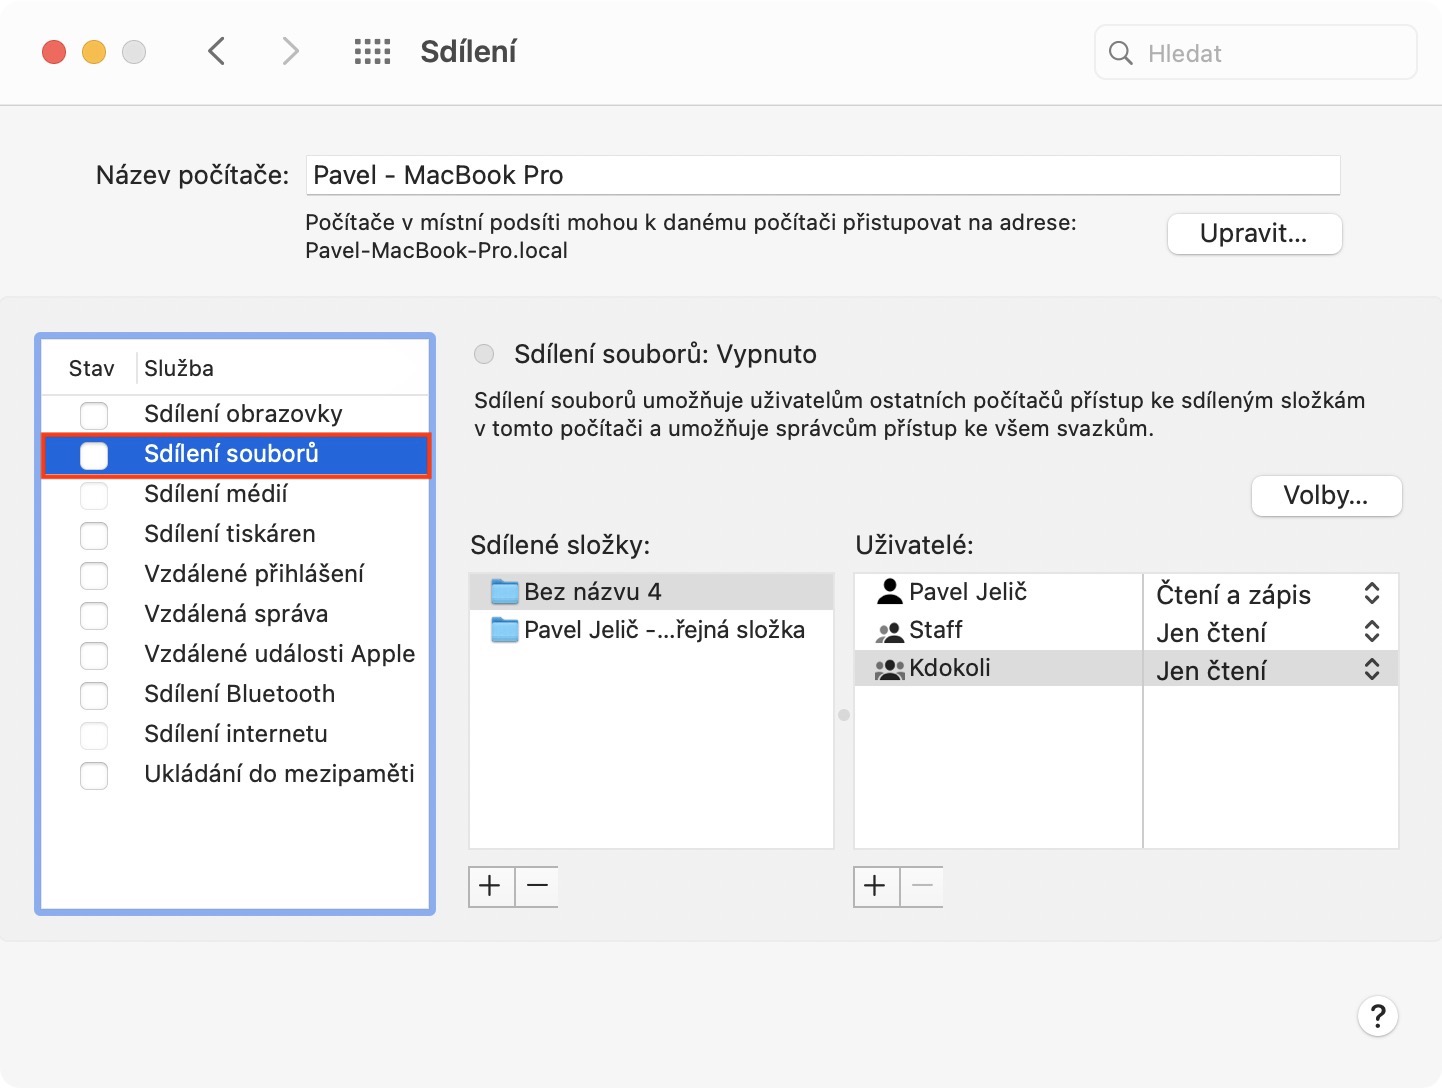
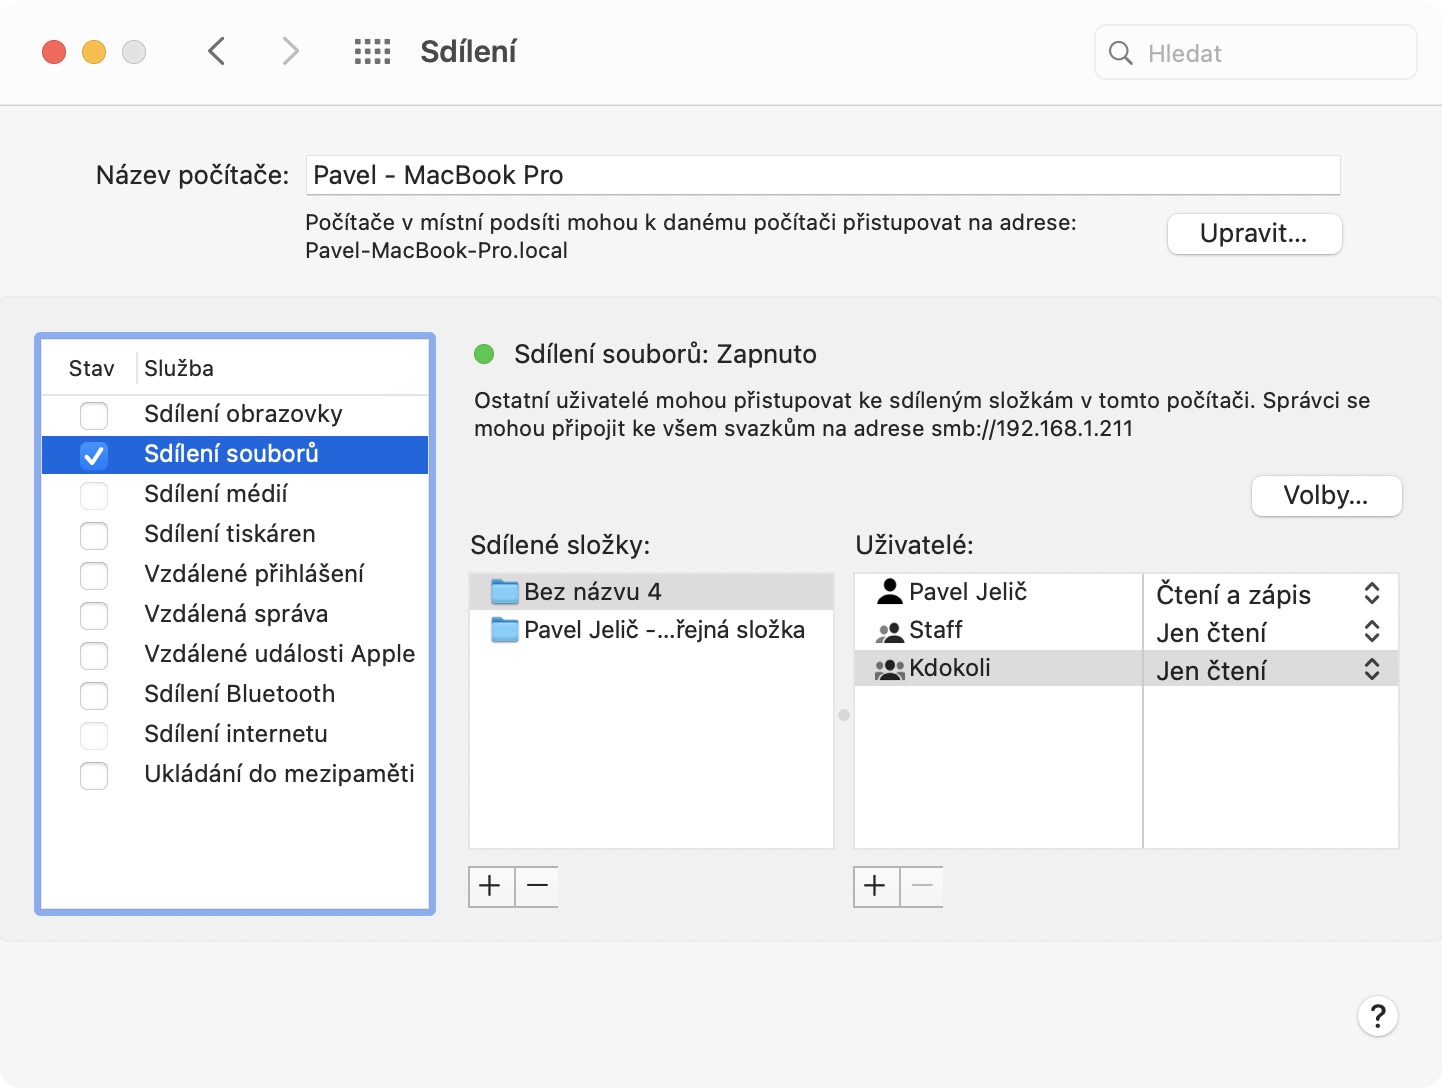
- In the next window, find the option in the left menu File sharing a tick at her box.
You have successfully activated folder sharing. Activating the feature isn't all you need to do to share, though.
Sharing the folder itself
Now you still need to set up which folders will be shared from your computer within the LAN. You can achieve this as follows:
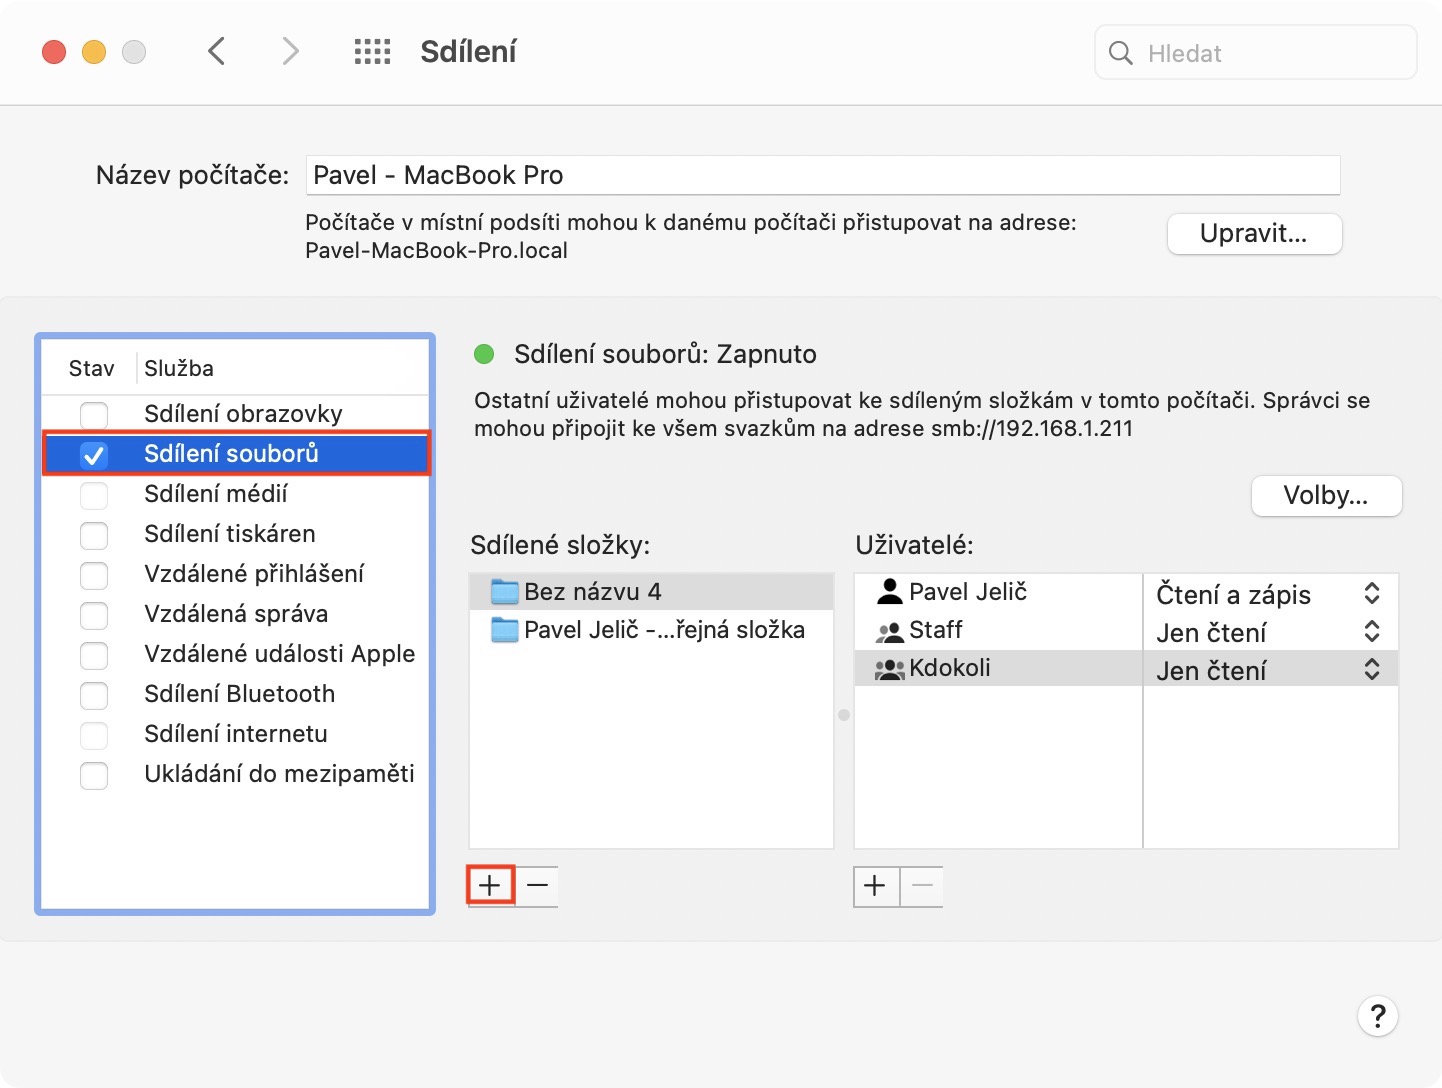
- In window Sharing left click on the option File sharing.
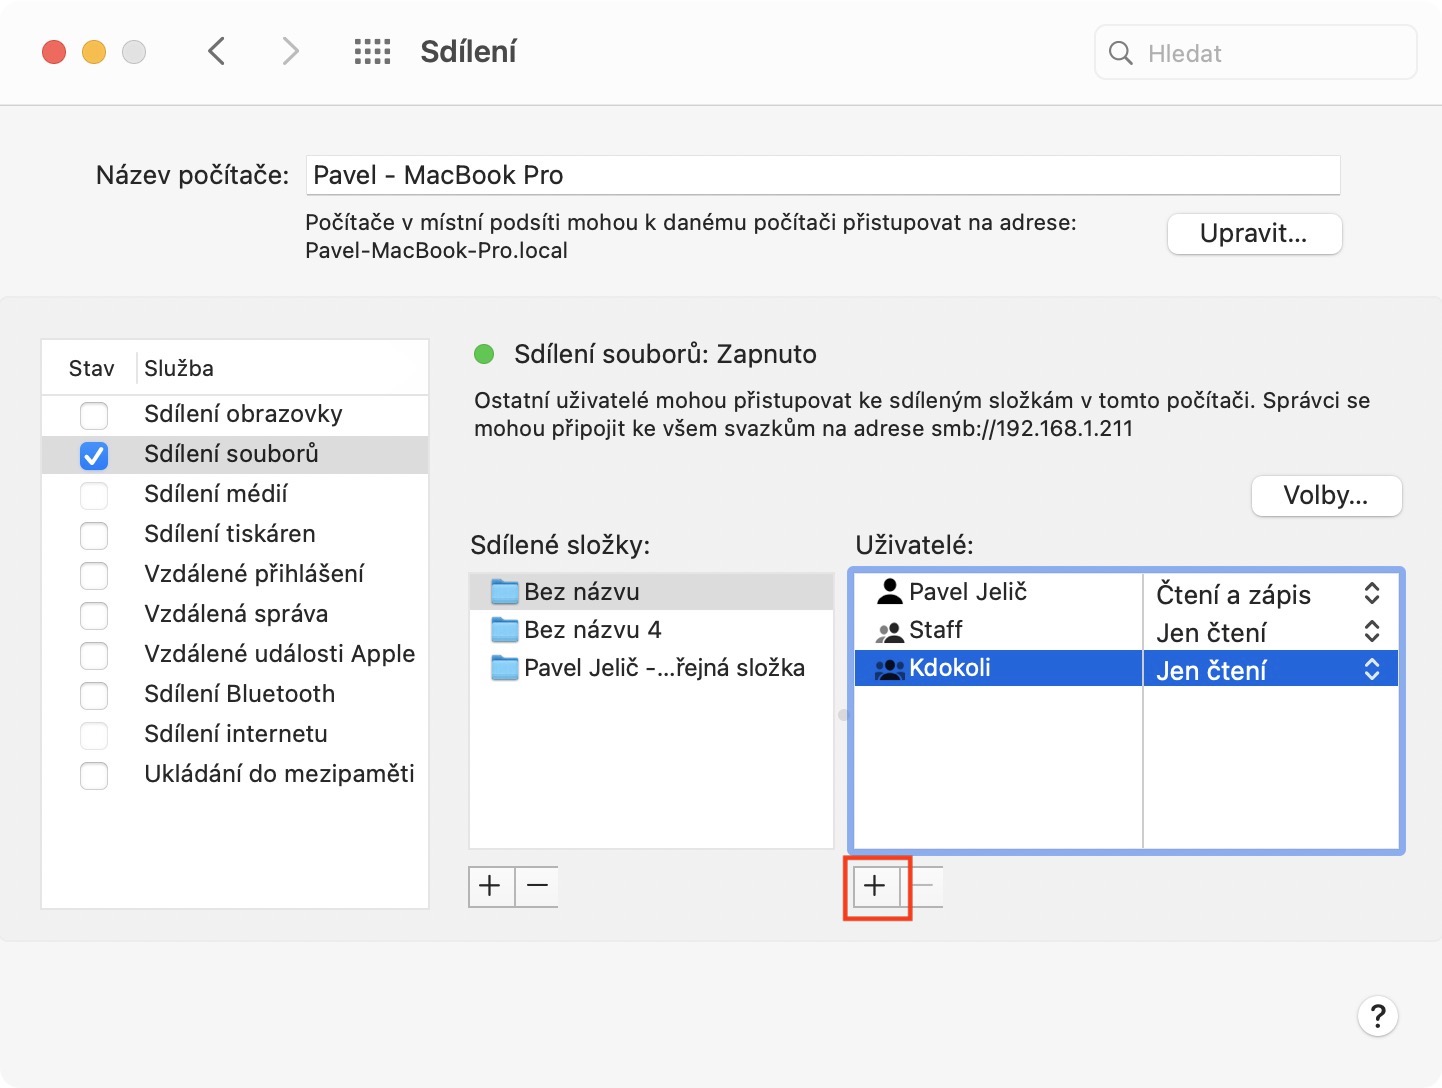
- Here, then under the Folder Sharing window, click on the + icon.
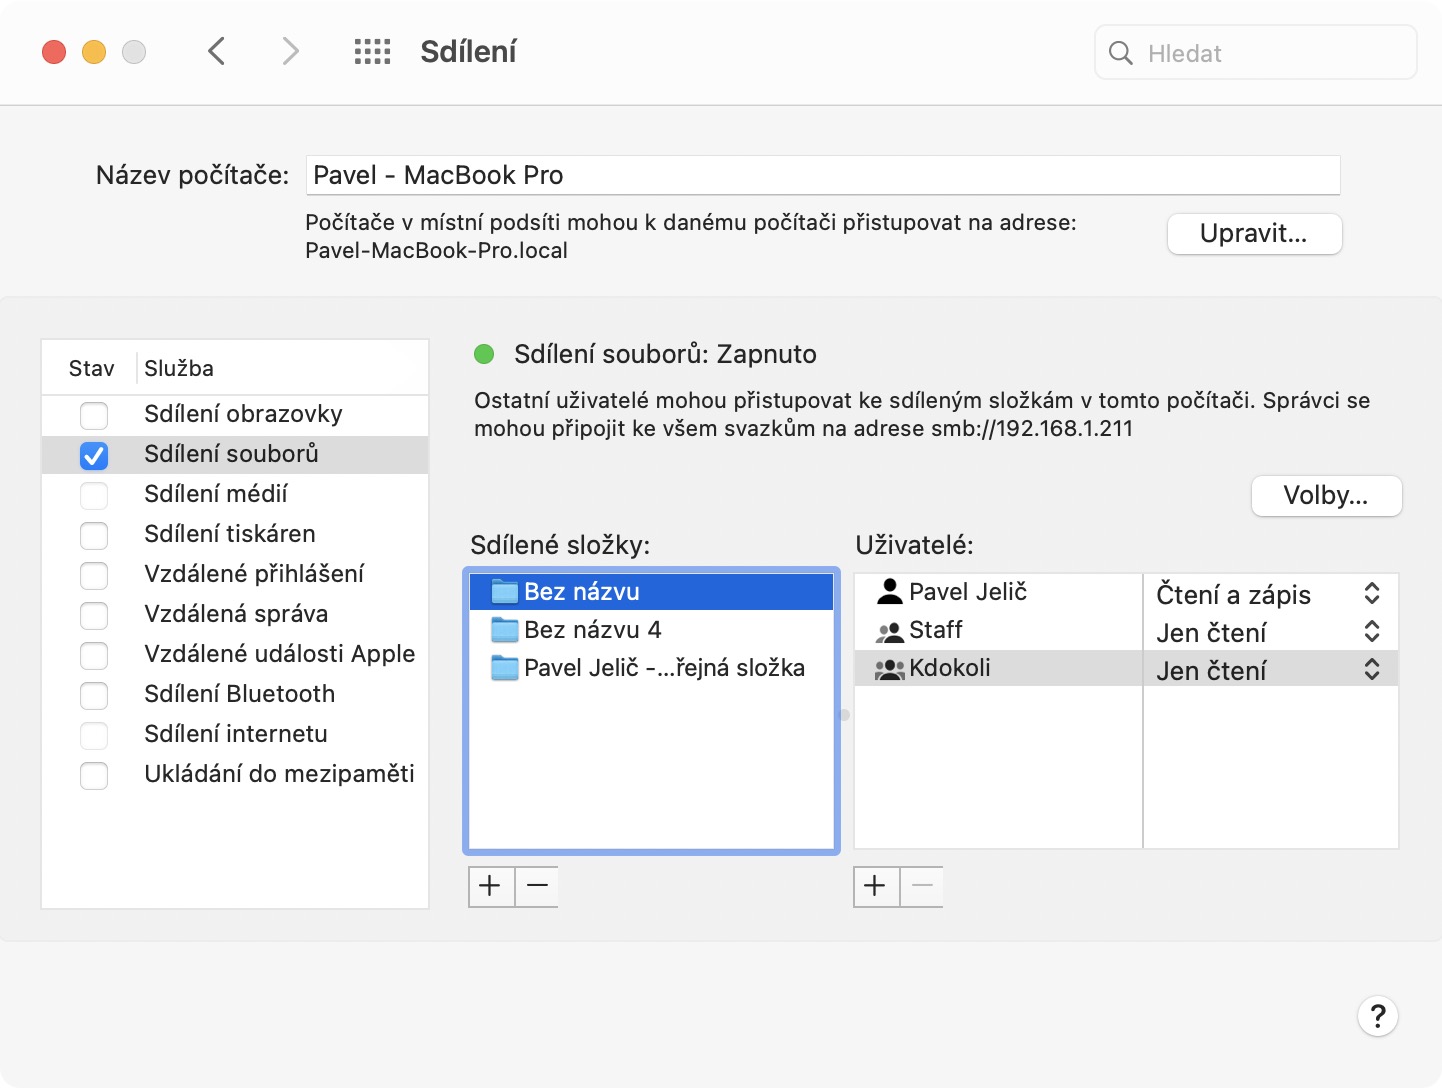
- Now choose here folder, which you want to share possibly in advance create a new one, and tap on Add.
- You have successfully started sharing a specific folder.
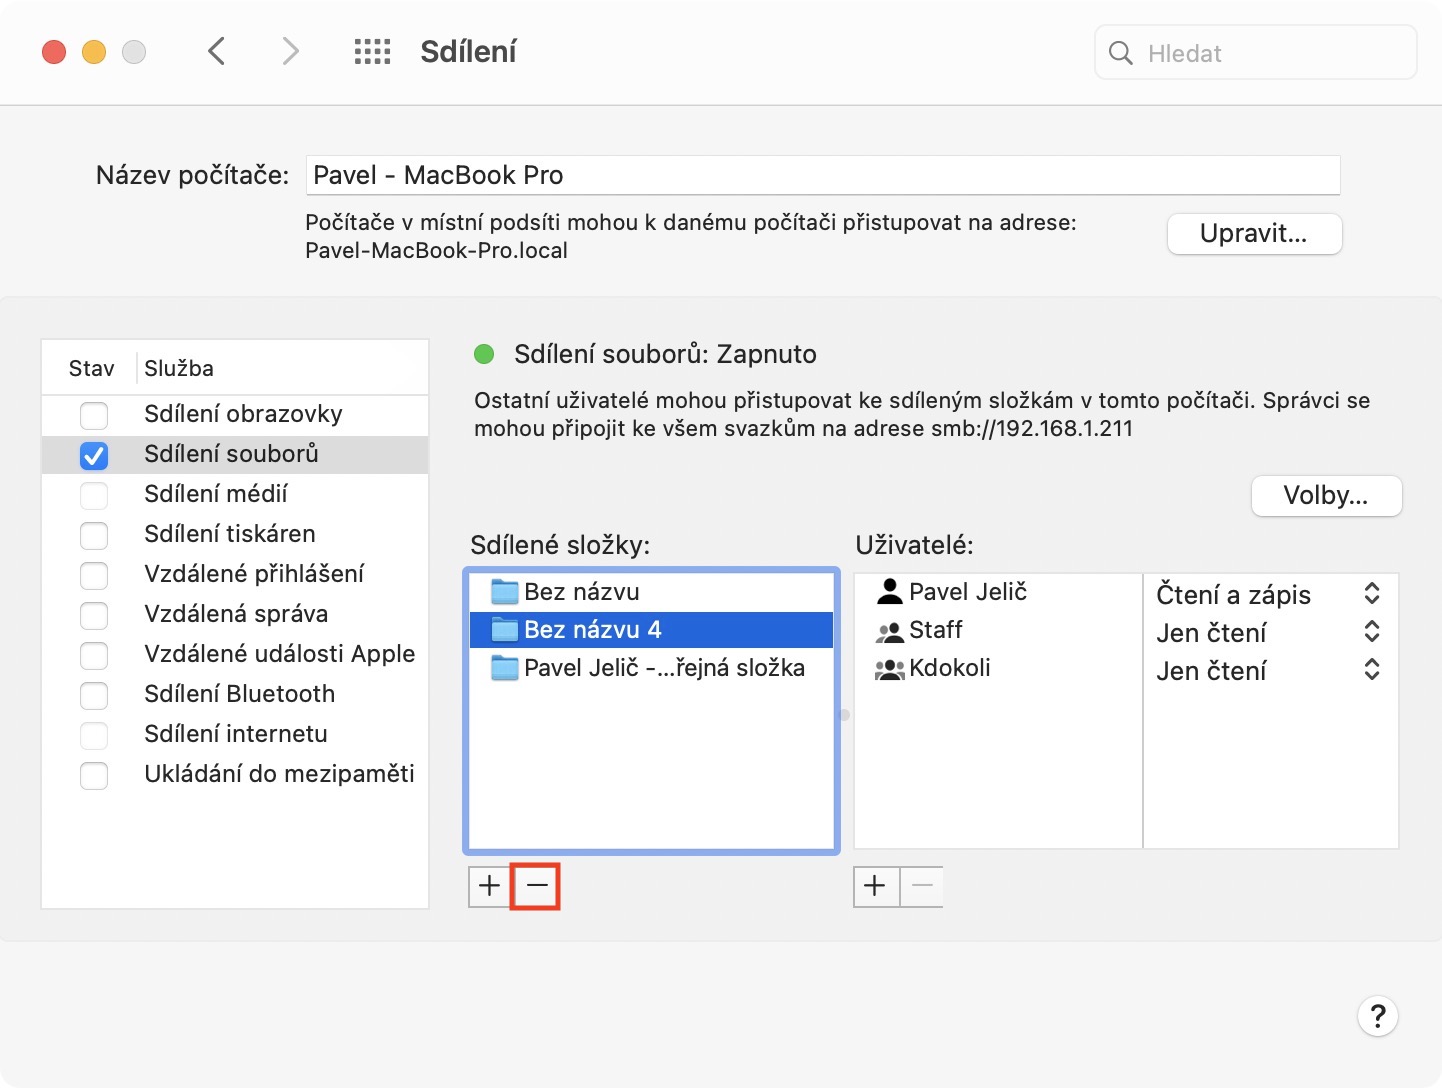
- If you want a folder from the share remove, so her in the window mark and then tap below icon -.
This way you have successfully set up the folder or folders to be shared within the network.
Rights settings
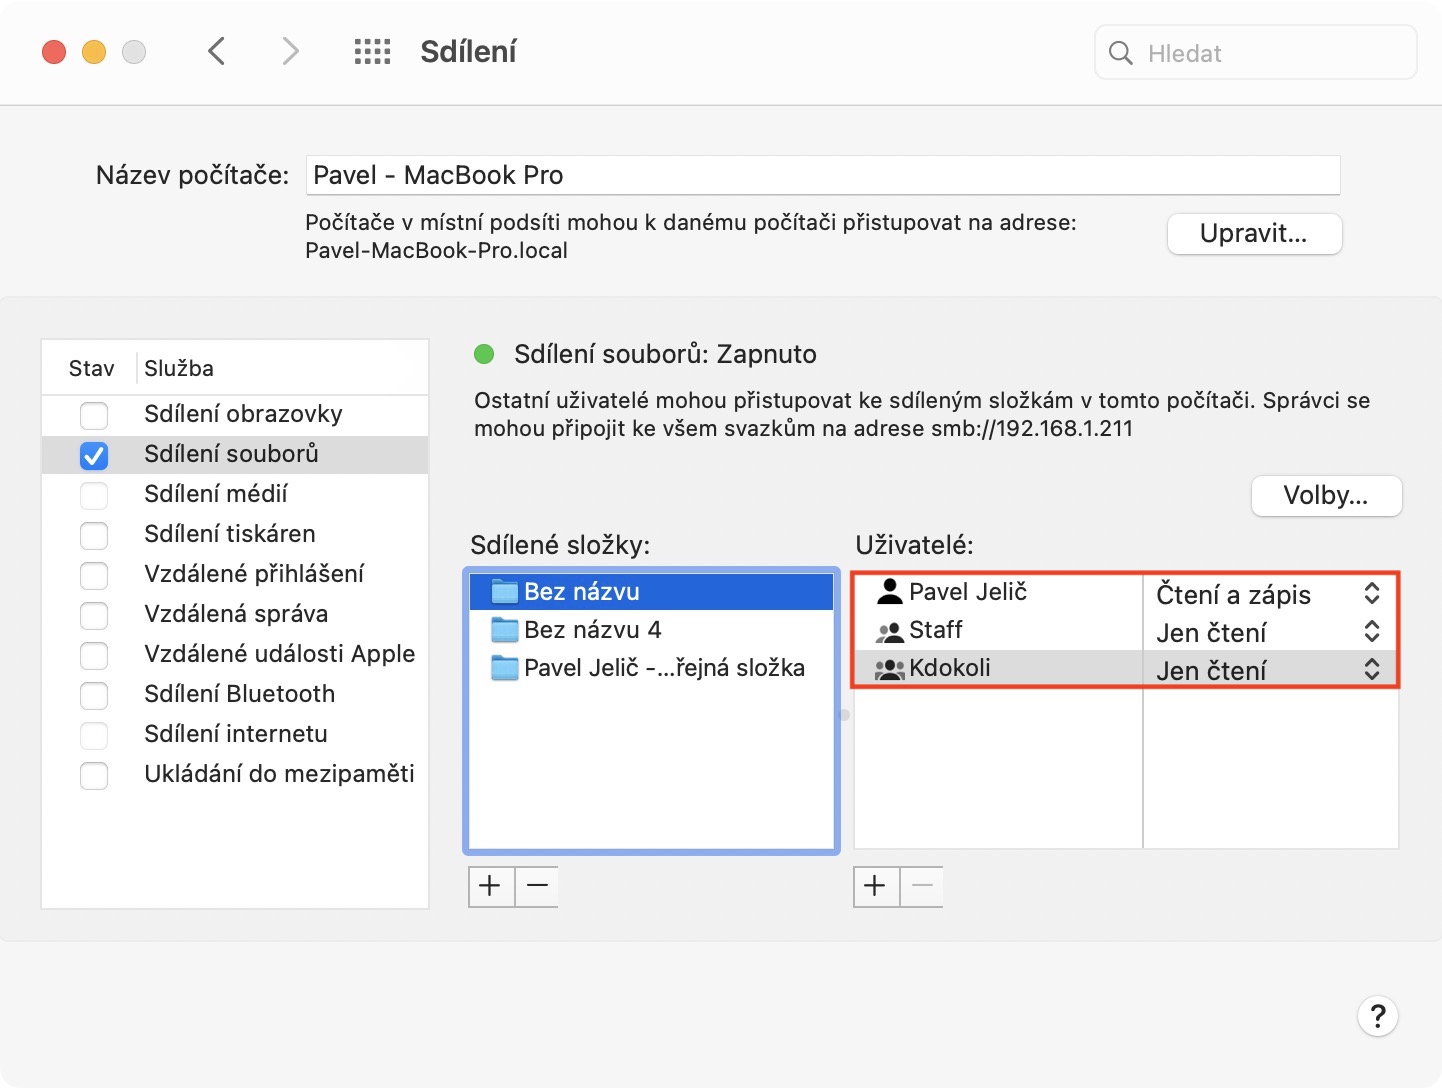
Before mapping on other devices, you should set it up on your Mac right of individual users, i.e. how users will be able to work with the folder. You can set this up in the next two windows in the Sharing section:
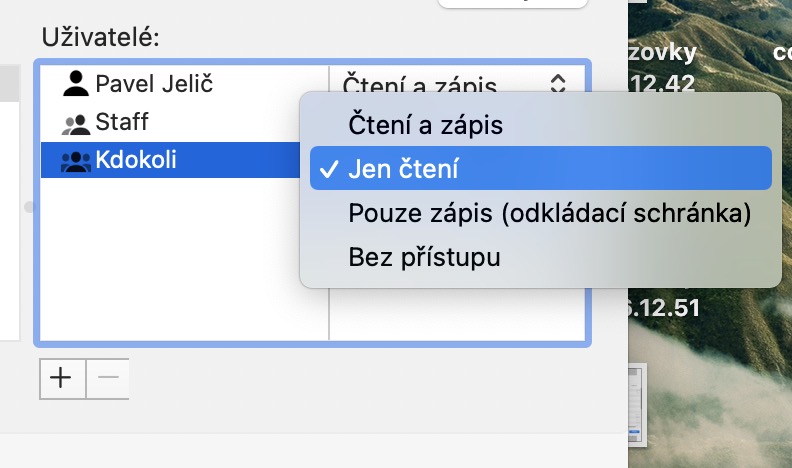
- By default, all users are set to read only the data in the folder.
- If you want to change this for all users, in the Anyone line, change the option from Read Only to Reading and writing.
- In case you want to add read and write option only to a specific user, so click below below the window Users na the + icon.
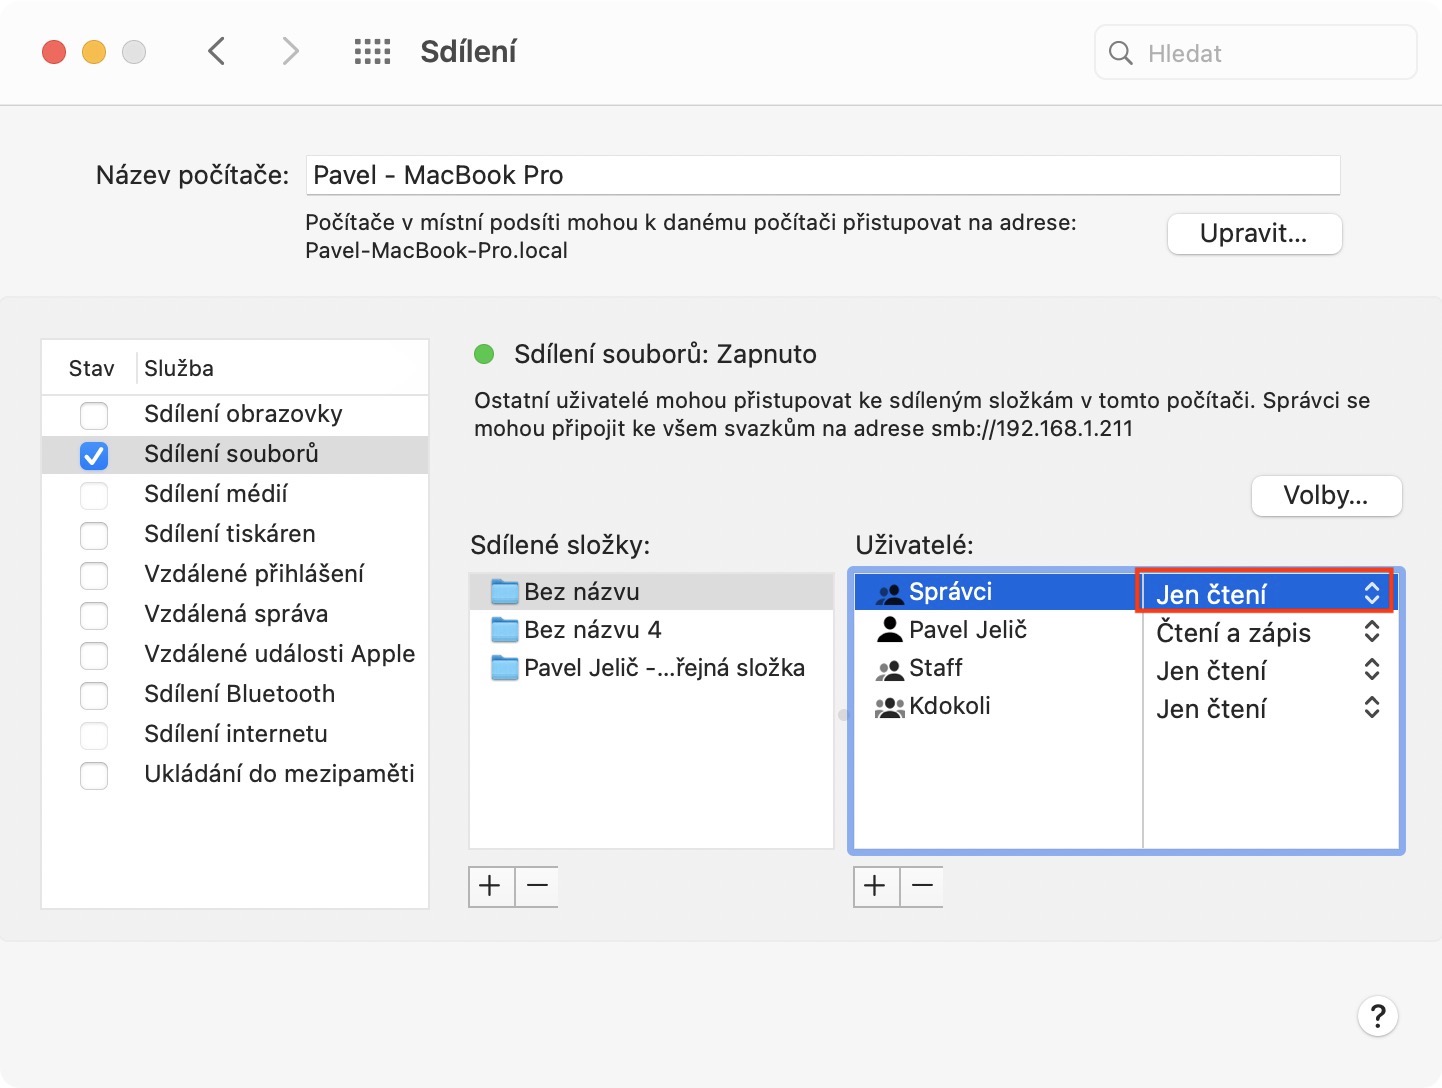
- Then select from the new window user, whose rights you want to manage, and tap Choose.
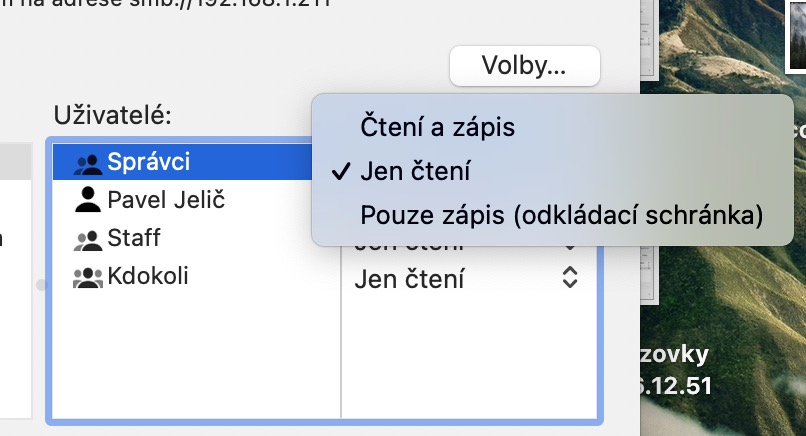
- The user will appear in the window Users. Here, in the same line, you just have to choose which one from the menu right the user will have
This is how you can set rights for all users or user groups in the network. It is clear that you are most likely not at risk of data deletion by a family member at home, but if you set up sharing at work, for example, you may encounter an unpleasant colleague who may delete or change certain data due to incorrectly set rights, which is definitely not wanted.
Folder mapping on other devices
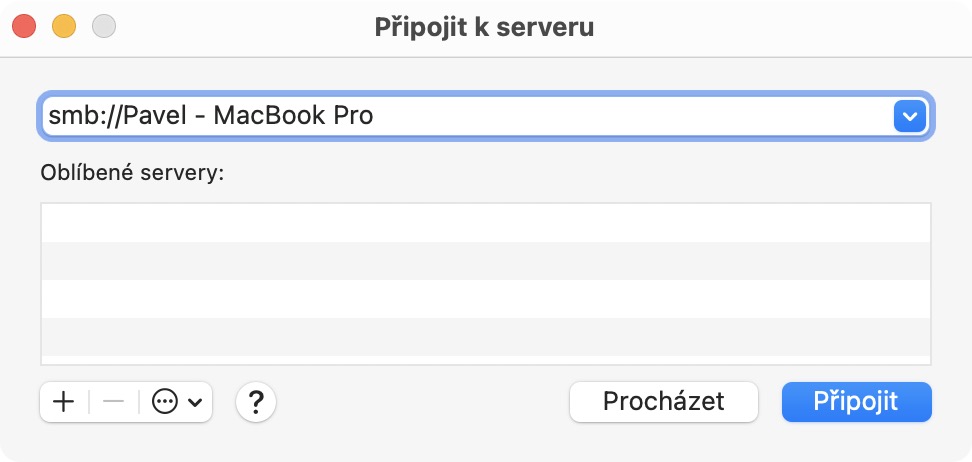
Now you just have to put the folder on another device they mapped. If you want to map in the macOS operating system, move to the active window Finder, and then tap on the top bar Open -> Connect to Server. In the case of Windows, it is then necessary to v file explorer tap the option Add a network drive. As the address you must use computer name (found at the top of Sharing) with a prefix smb: //. In my case, I map all shared folders to this address:
smb://Pavel - MacBook Pro/
In conclusion, I would just like to point out that all devices that want to connect to the folder must of course be connected to the same network. At the same time, it is necessary that all devices have an active option for sharing - for macOS, see above, then you can find the sharing settings in Windows in the Control Panel, where you just have to enable it.
