A few weeks ago, we finally saw the release of public versions of the expected systems in the form of iOS and iPadOS 15, watchOS 8 and tvOS 15. However, the last system, macOS Monterey, was missing from this list of operating systems released to the public for a long time. As has been the custom in recent years, the new majority version of macOS is released several weeks or months later than other systems. But the good news is that earlier this week we finally got around to it, and macOS Monterey is available for all users of supported devices to install. In our tutorial section in the coming days, we will focus on macOS Monterey, thanks to which you will quickly master this new system to the maximum.
It could be interest you

How to quickly shrink images and photos on Mac
From time to time you may find yourself in a situation where you need to reduce the size of an image or photo. This situation can occur, for example, if you want to send pictures via e-mail, or if you want to upload them to the web. Until now, on the Mac, in order to reduce the size of images or photos, you had to go to the native Preview application, where you could then change the resolution and set the quality during export. This procedure is probably familiar to all of us, but it is definitely not ideal, as it is lengthy and you will often see the wrong expected size of the images. In macOS Monterey, however, a new function has been added, with which you can change the size of images or photos with a few clicks. The procedure is as follows:
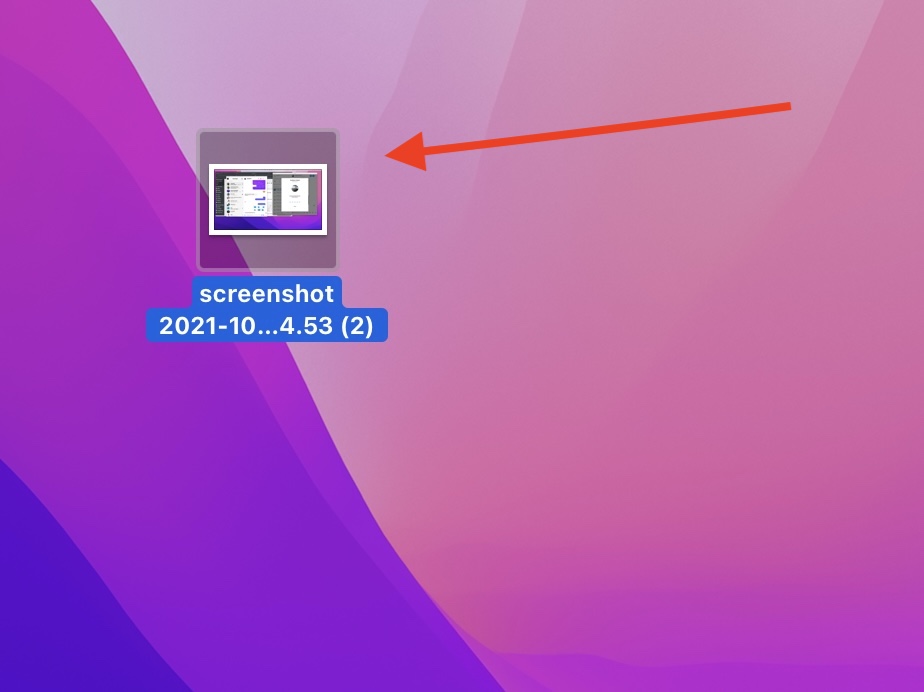
- First, on your Mac, the images or photos you want to reduce find.
- Once you've done that, take pictures or photos in the classic way mark.
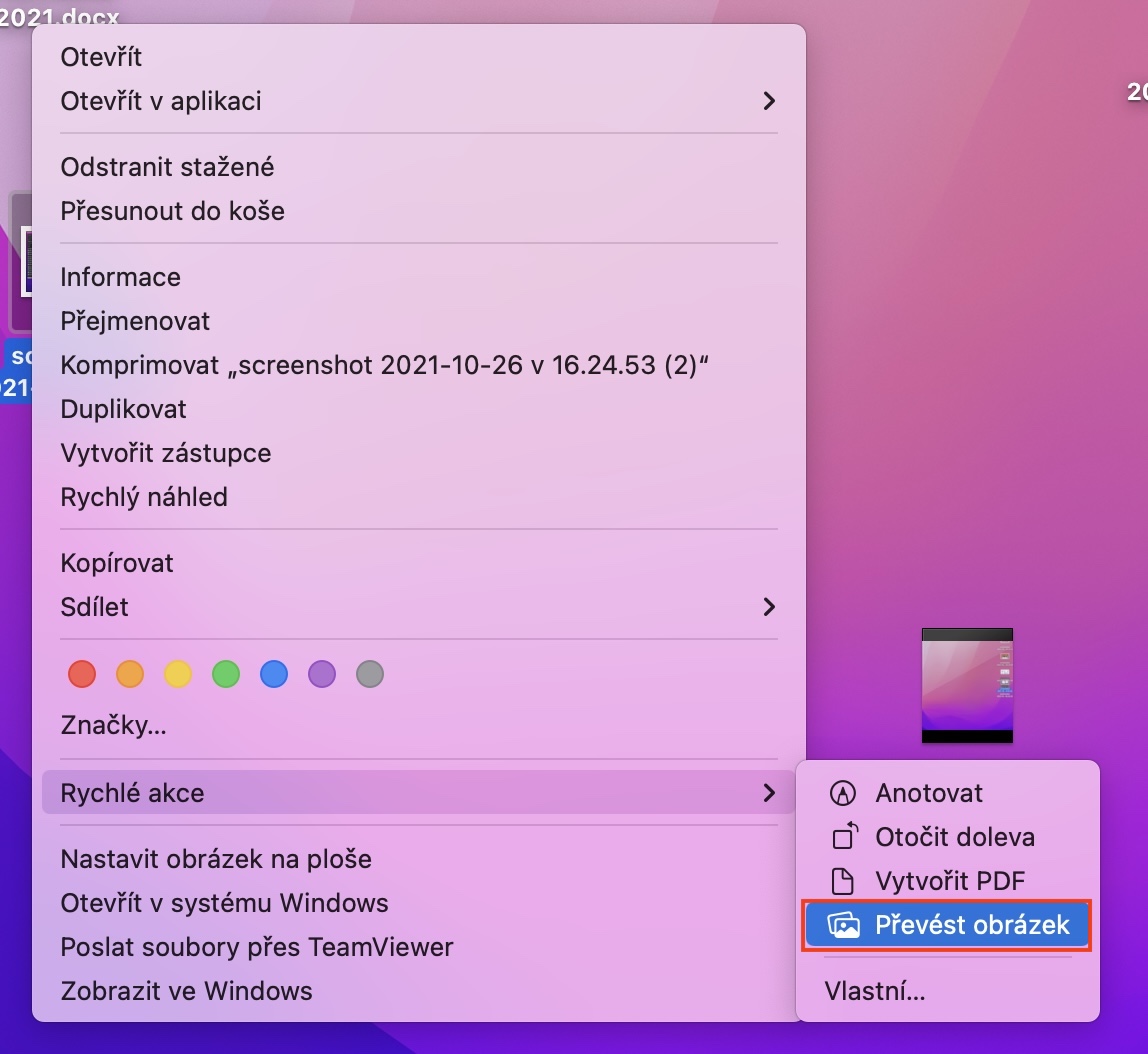
- After marking, click on one of the selected photos right click.
- A menu will appear, scroll to the option at the bottom of it Quick action.
- Next, you will see a sub-menu in which click on Convert image.
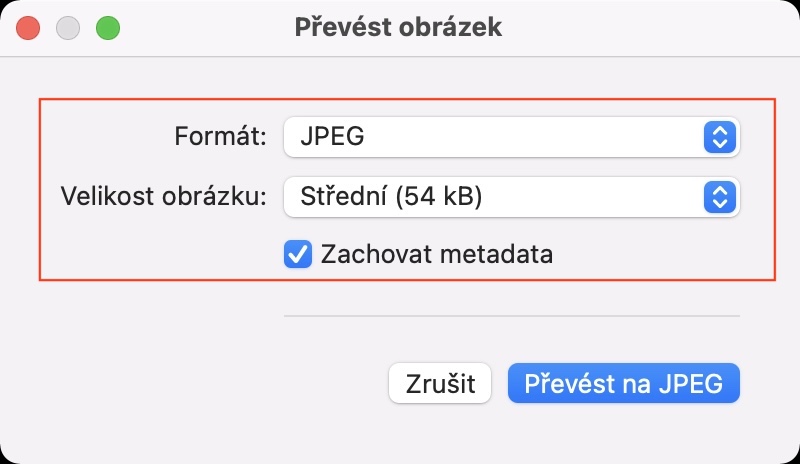
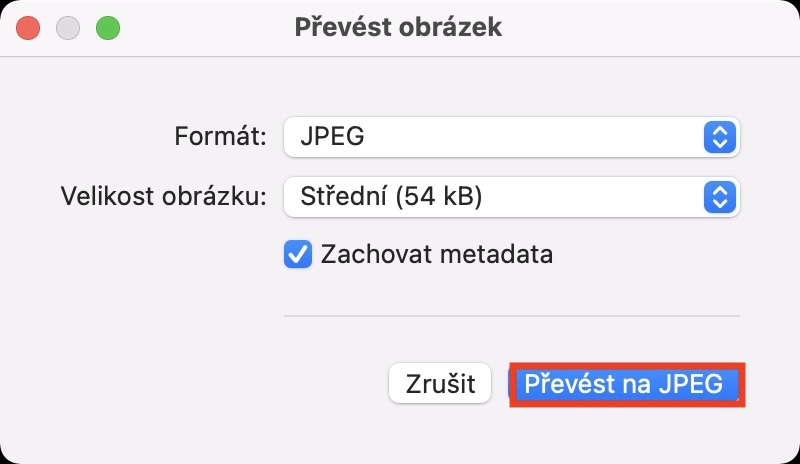
- A small window will then open where you can change parameters for reduction.
- Finally, once you have selected, tap on Convert to [format].
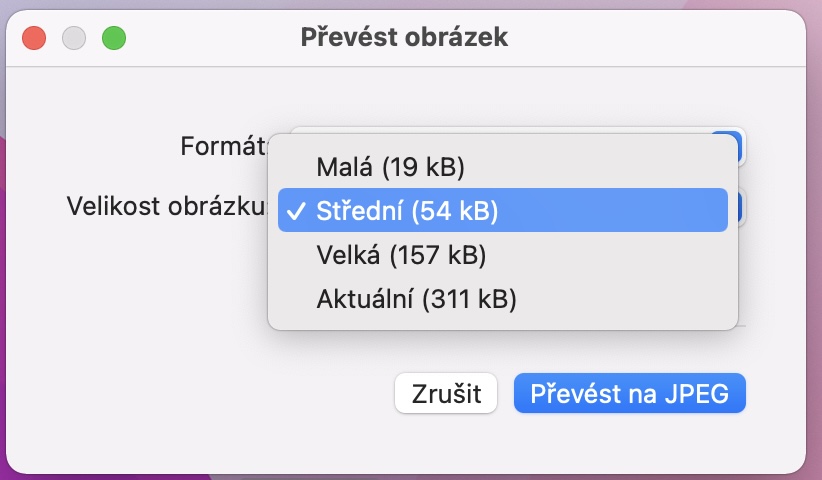
So, it is possible to quickly reduce the size of images and photos on Mac using the above method. Specifically, in the interface of the Convert image option, you can set the resulting format, as well as the Image size and whether you want to keep the metadata. As soon as you set the output format and click the confirmation button, the reduced images or photos will be saved in the same place, only with a different name according to the selected final quality. So the original images or photos will remain intact, so you don't have to worry about duplicating before resizing, which is definitely handy.
 Flying around the world with Apple