Personally, every day I find myself in a situation where I need to change the size of an image or photo. Many users use special programs for this purpose, but none is needed. The native application Preview, which can do much more than it might seem at first glance, will serve perfectly. In today's guide, we will look at how you can easily and quickly adjust the resolution and format of images in macOS in the Preview application, so that the result is images with a small size, which will be suitable for uploading to websites, for example.
It could be interest you

Adjust image resolution in Preview
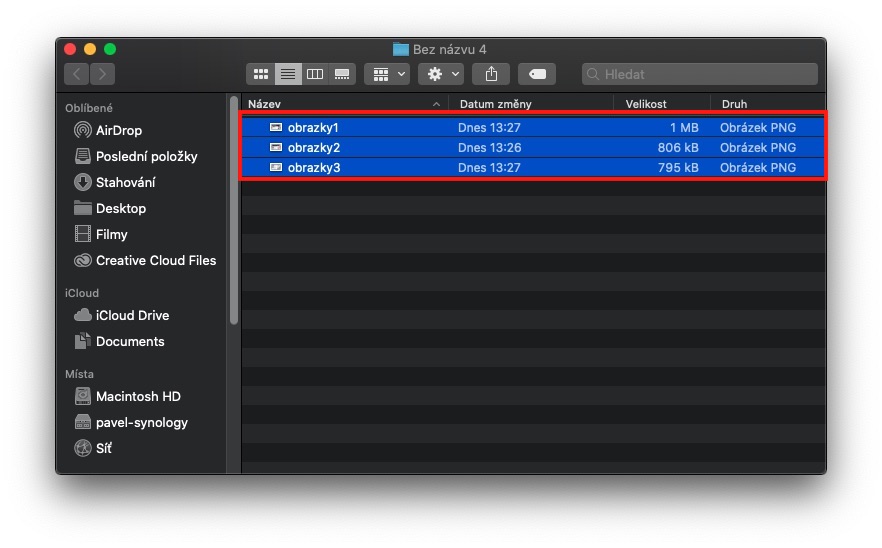
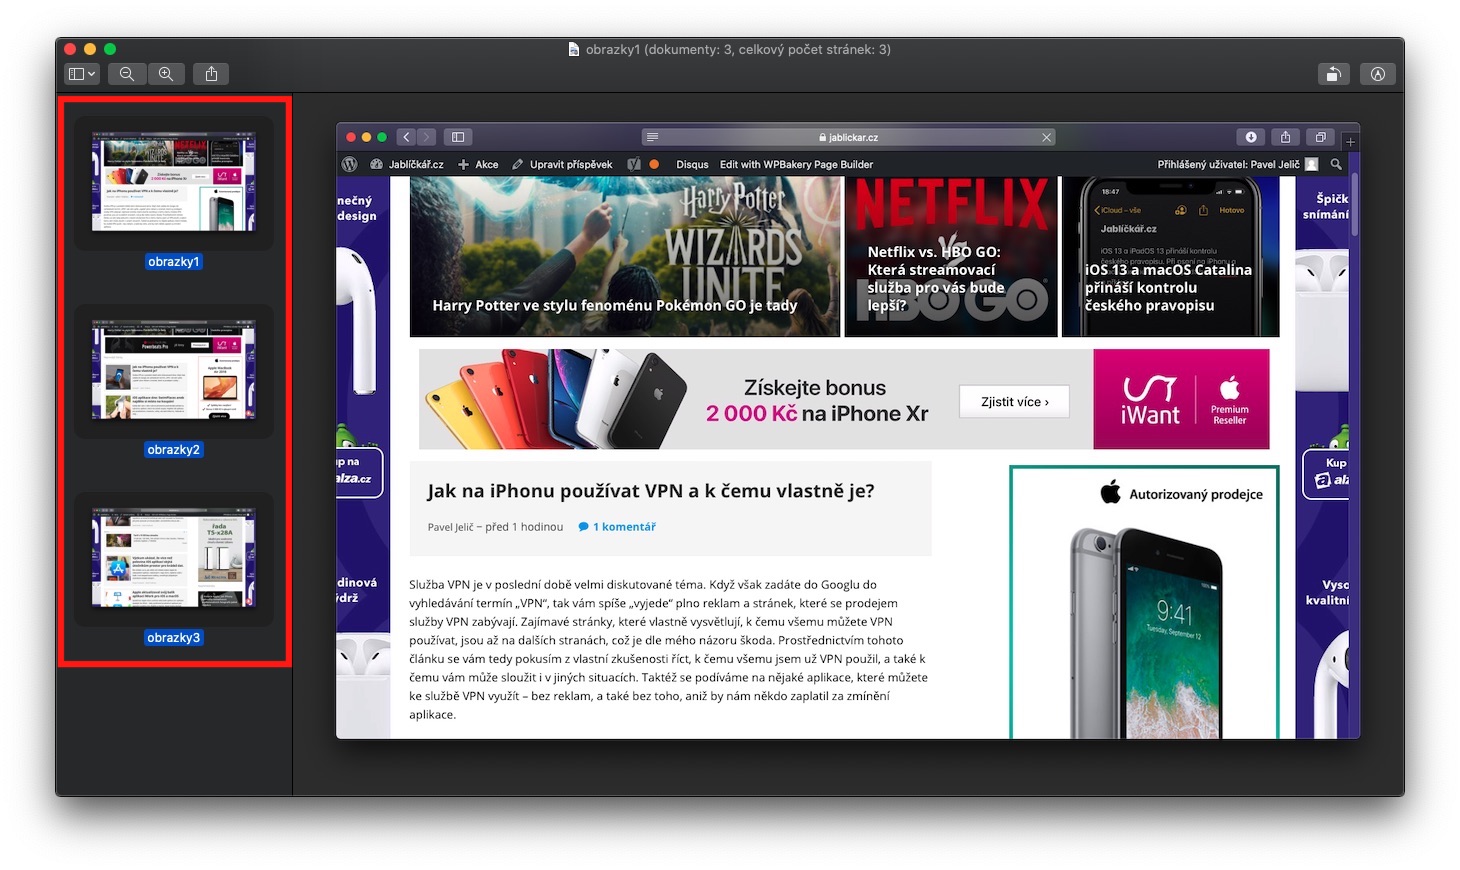
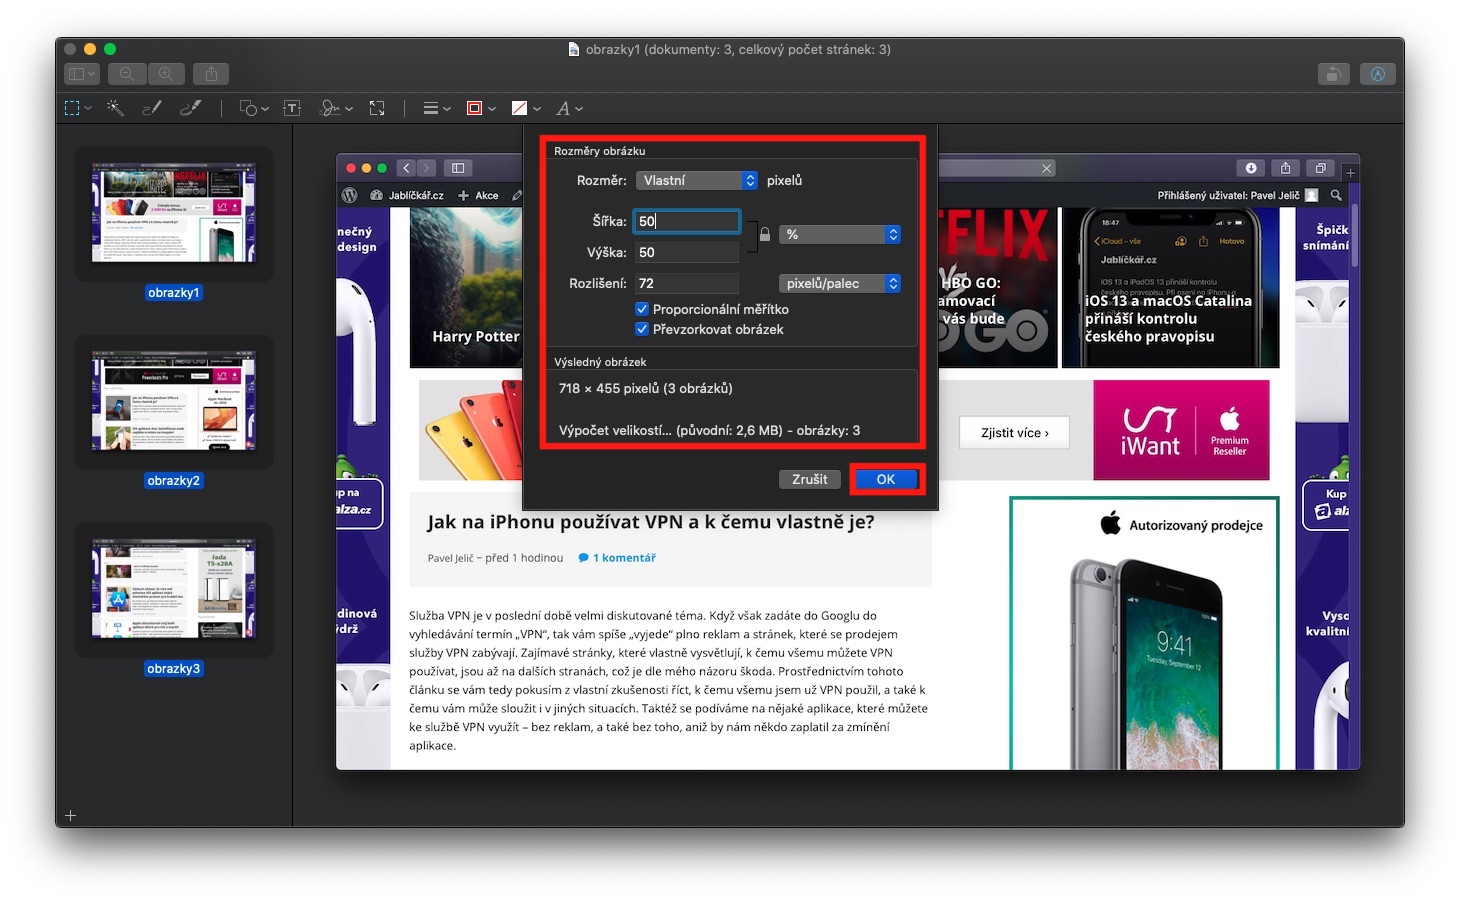
First, of course, we need to find pictures, for which we want to change the resolution. I recommend that you have the pictures for clarity together, for example in one folder. Once you do that, all the images mark (for example, a keyboard shortcut Command + A) and open them in the application preview. Then all images again in the application mark and click the option in the top bar Editing. Select an option from the drop-down menu that appears Adjust size. A window will appear in which you can adjust the size of the images to your image. You can choose either to shrink to a specific size or to shrink by a percentage. If the images have the same original size, the bottom part of the small window will show what size the images will be after reduction. Once you are satisfied, click the button OK. Note that scaled images after scaling they will overwrite the originals. So if you want to keep the images in their original size, create them copy.
Editing the format of images in Preview
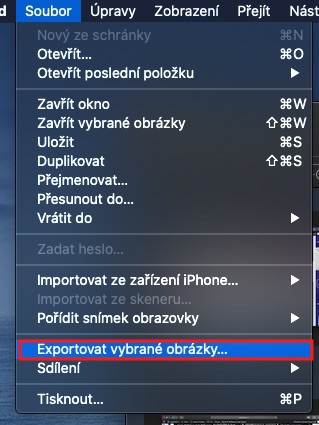
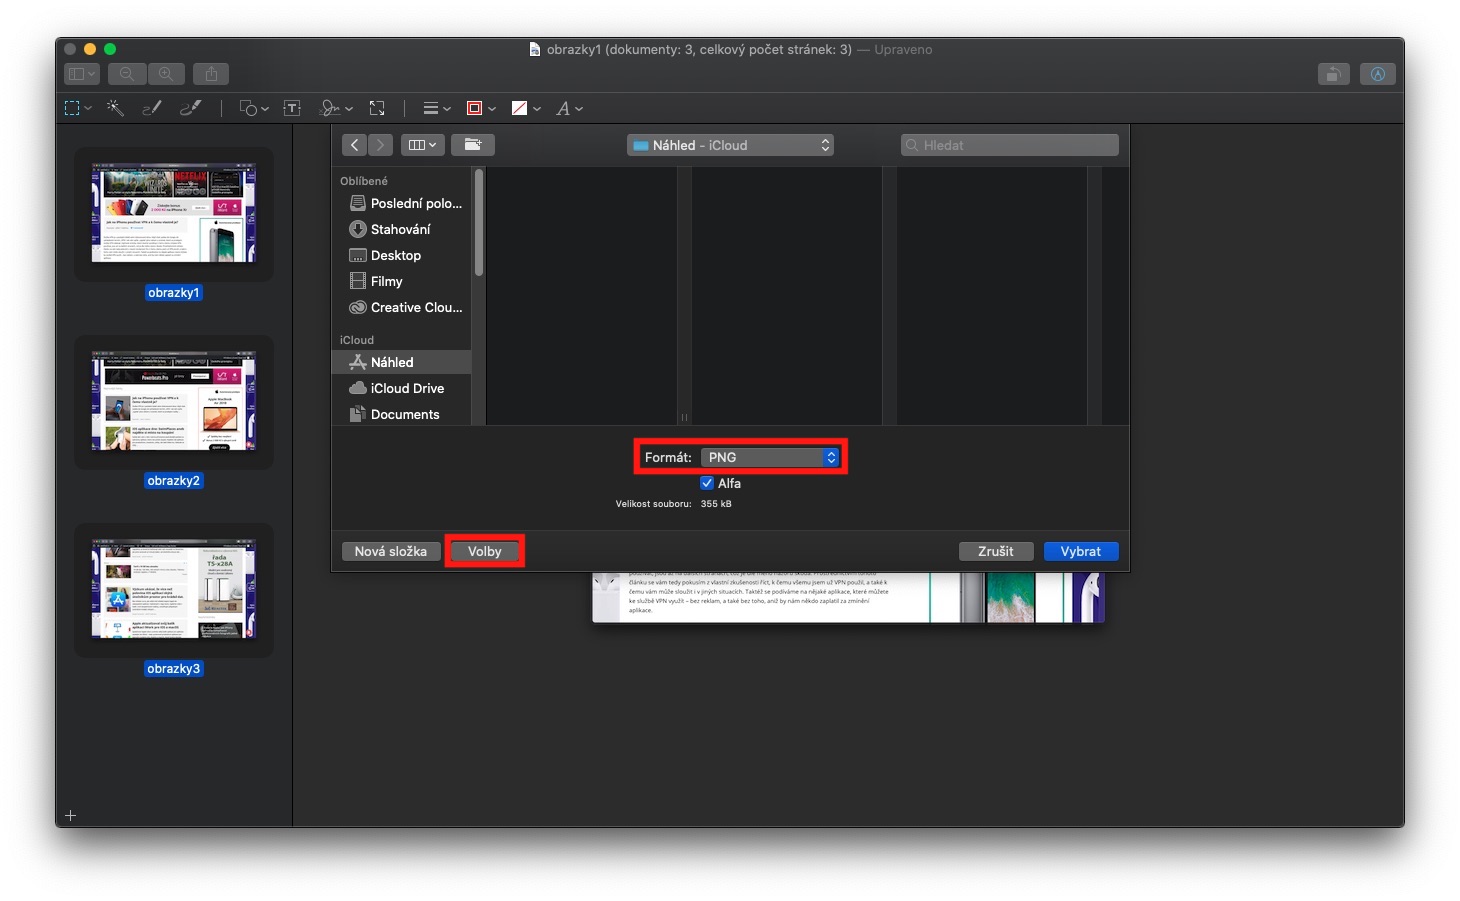
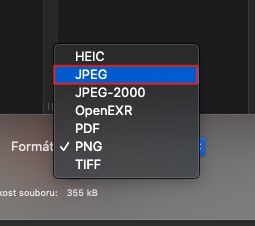
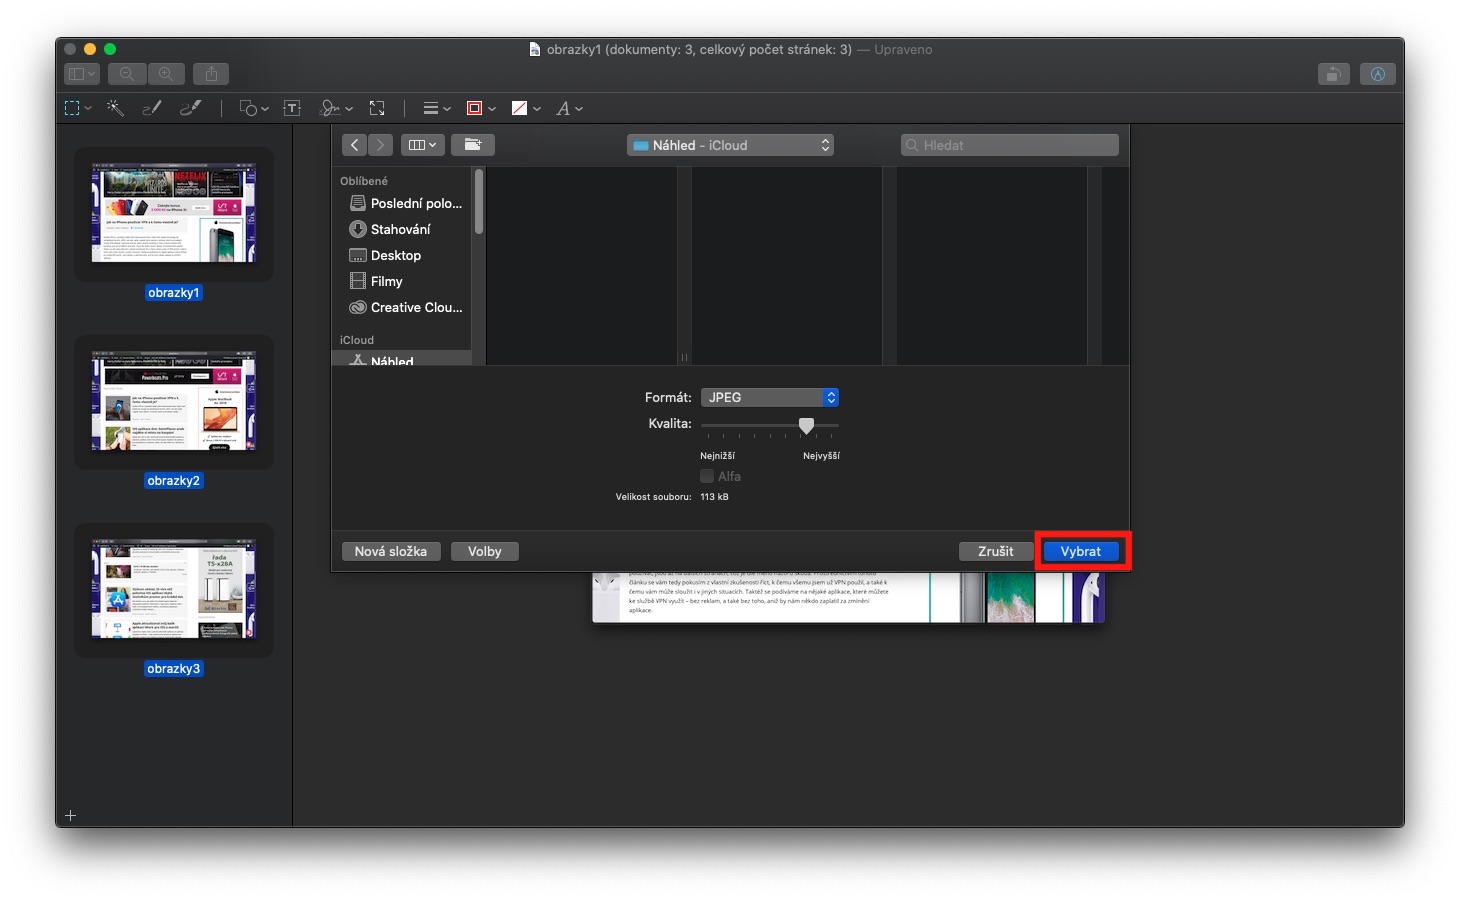
In order to make this guide complete, we will also show how easy it is to change the Preview in the application image format. Since some images are in PNG format, such as screenshots, they take up a lot of disk space unnecessarily. Images in the HEIC format, in which the latest iPhones take photos, are not yet widespread. In both of these cases, you might find it useful to change the image format to JPEG. So how to do it? Mark again in the folder all pictures, for which you want to change the format. It is necessary to think that the images must be in the same format. So, if you want to change the format from PNG to JPEG, for example, it is necessary that all images are in PNG format before the change - otherwise you will be forced to edit the Preview application won't let go. Images after opening in Preview mark again and click on the tab in the top bar File. Select an option from the menu that appears Export selected images… A new window will appear, in the lower left corner click on the option Elections. Then you can choose from the menu format, in which you want the images impose. Don't forget to choose kam have the resulting images export. Once you have everything ready, click the button Choose in right down corner. You can then close the Preview application.
As I've mentioned before, I've been using the Preview resizing feature almost every day since I got my first Mac. Personally, I find it unnecessary to download additional applications to the Mac that do something that the native application itself can do - and even very well and easily. Do you use any apps to resize images on macOS, if so what? Be sure to let us know in the comments.
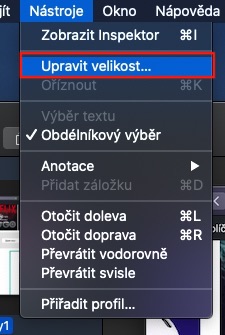
“……open them in the Preview app. Then mark all the images again in the application and click on the Edit option in the top bar. Choose Adjust Size from the drop-down menu that appears. ….. “ is correct … in the top bar, click on the Tools option. :-) Otherwise, thank you for the article.
Hello, is it possible to save 50 edited photos with one click?
Thank you.
Hello, I tried it and it worked, but when I need to edit several photos that have different resolutions and I need to keep the maximum number of points at 1600×1200, Preview cannot do this. Udela 1600X1546 for example and this is wrong. Do you have any tricks for this? Or do you recommend other programs? Thank you Tomas.