With the arrival of the iPhone 7 Plus, we got a dual camera for the first time ever. It was thanks to the second lens that it was possible to take pictures in portrait mode, i.e. with a blurred background. The dual camera then also appeared on the iPhone 8 Plus, and then on most newer iPhones. But the truth is that in some "cheaper" devices, the telephoto lens, intended for taking portrait photos, has been replaced by an ultra-wide-angle one. Background blurring is added to these devices using artificial intelligence. The telephoto lens received a big improvement with the arrival of the iPhone XS - specifically, the option to change the depth of field was added, both when taking a photo and after. Let's see how to do it together in this article.
It could be interest you
How to change the depth of field of a photo in portrait mode on iPhone
If you own an iPhone XS and later, you can change the depth of field both when taking a photo and afterwards, which is useful if you set it wrong when taking a photo. In this article we will look at both procedures together, you can find them below:
When taking pictures
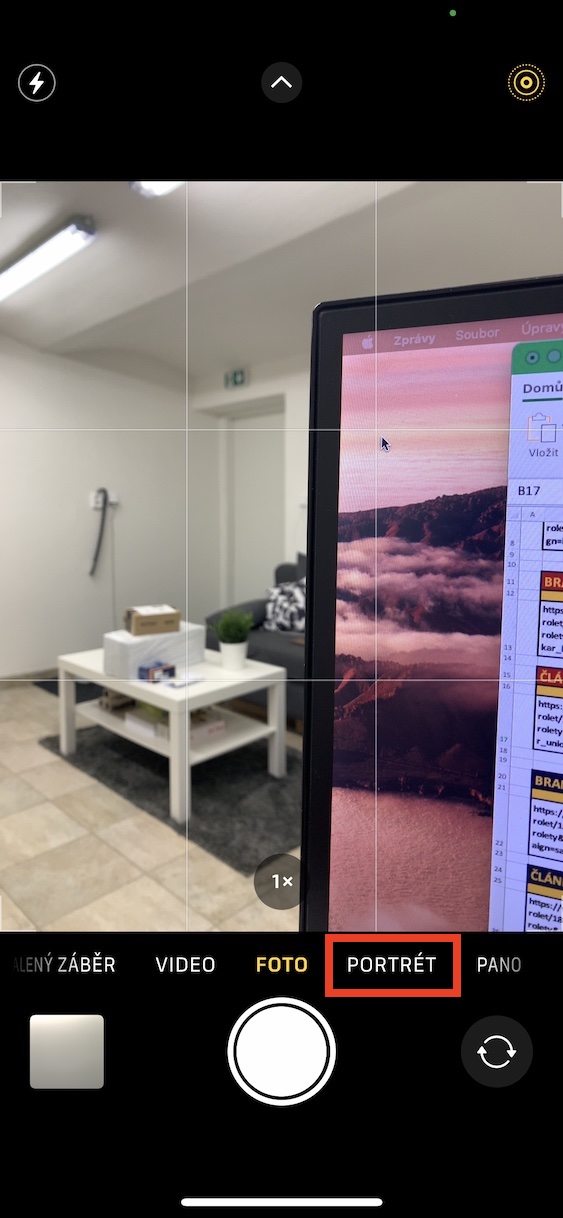
- First, open the native app on your iOS device Camera.
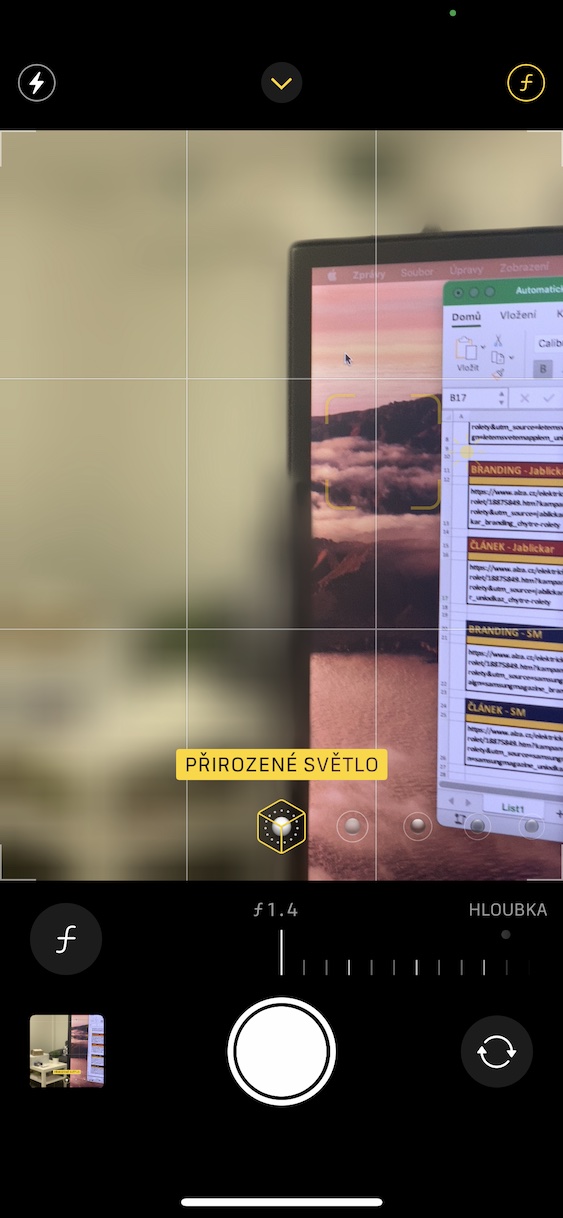
- Once you've done that, move to the section at the bottom Portrait.
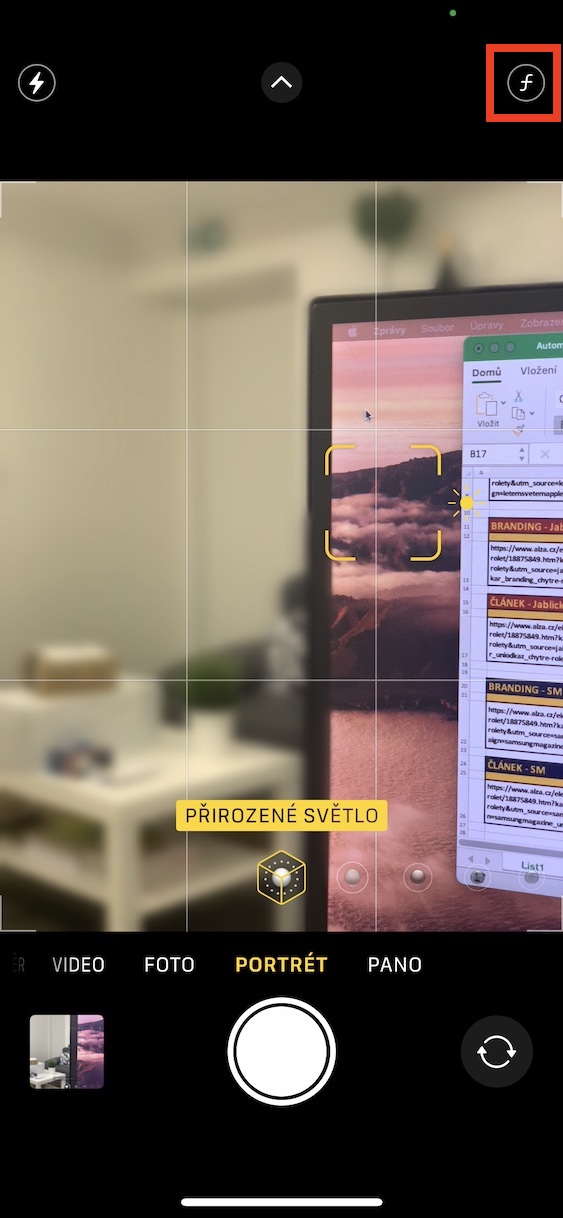
- Here in the upper right corner tap on fv ring icon.
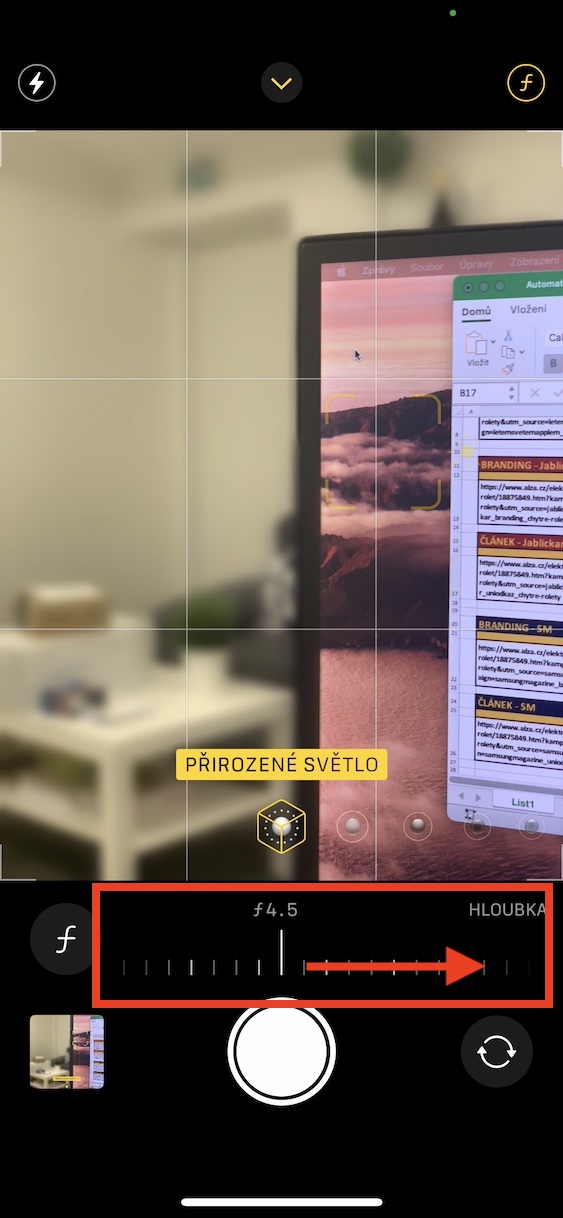
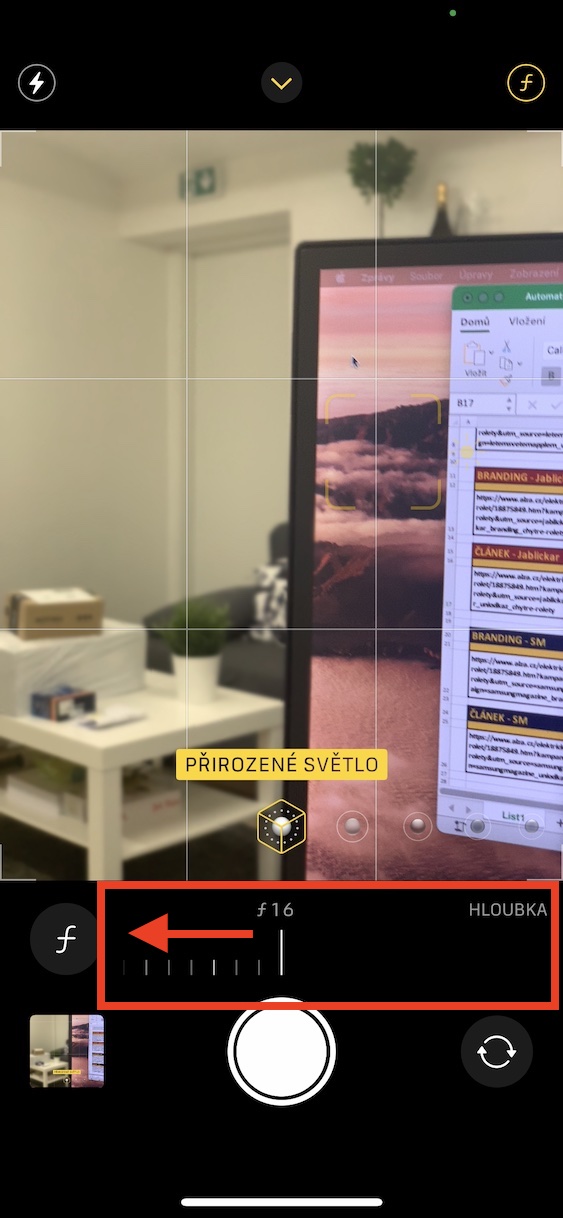
- It will appear at the bottom of the screen slider, which is designed to change the sharpness of the photo.
- The smaller the number, the more noticeable the blur (and vice versa).
- Of course, you can change the depth of field track in real time.
Back in Photos
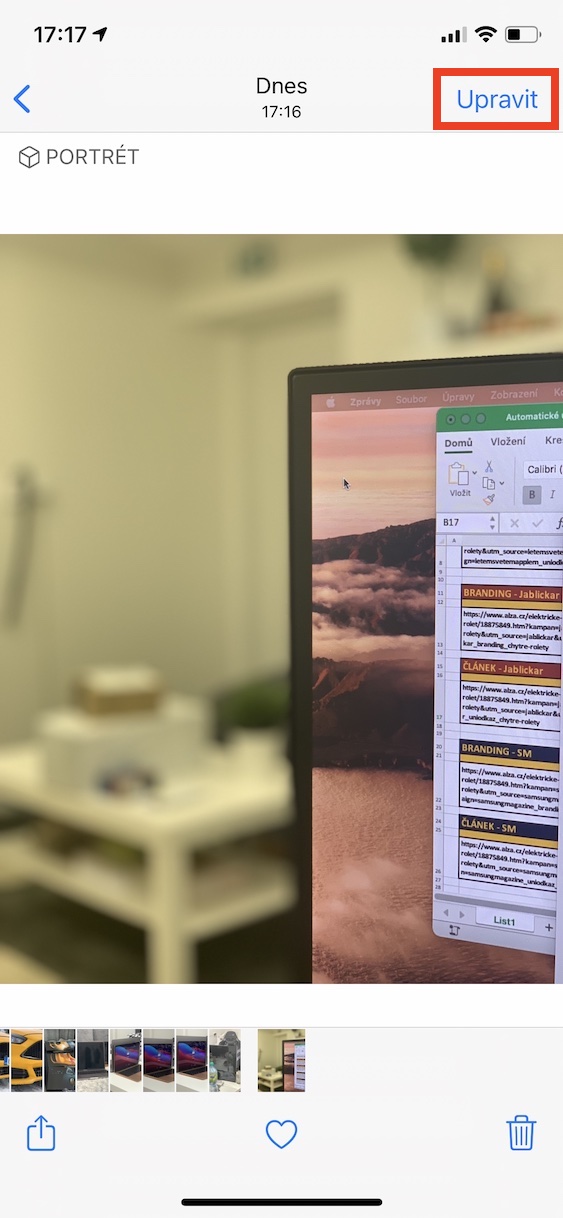
- If you want to change the depth of field on an already taken photo, go to the application Photos.
- Within this application you click on the photo taken in portrait mode.
- You can easily find portrait photos in Albums -> Portraits.
- After clicking on the photo, click on the top right Edit.
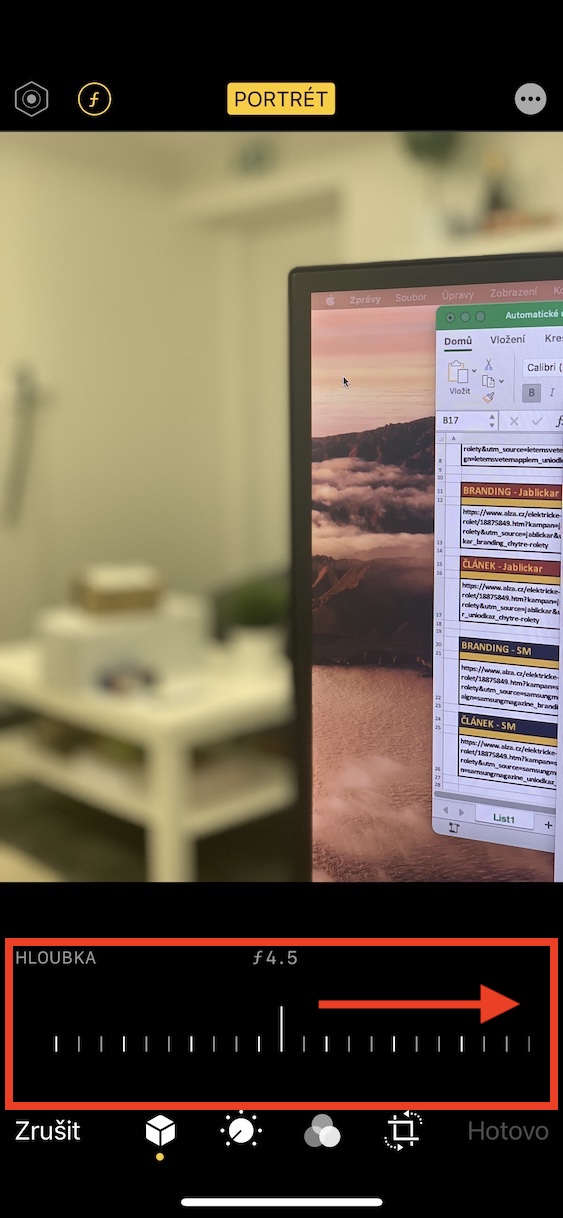
- The photo editing interface will open, where you can, among other things, change the depth of field.
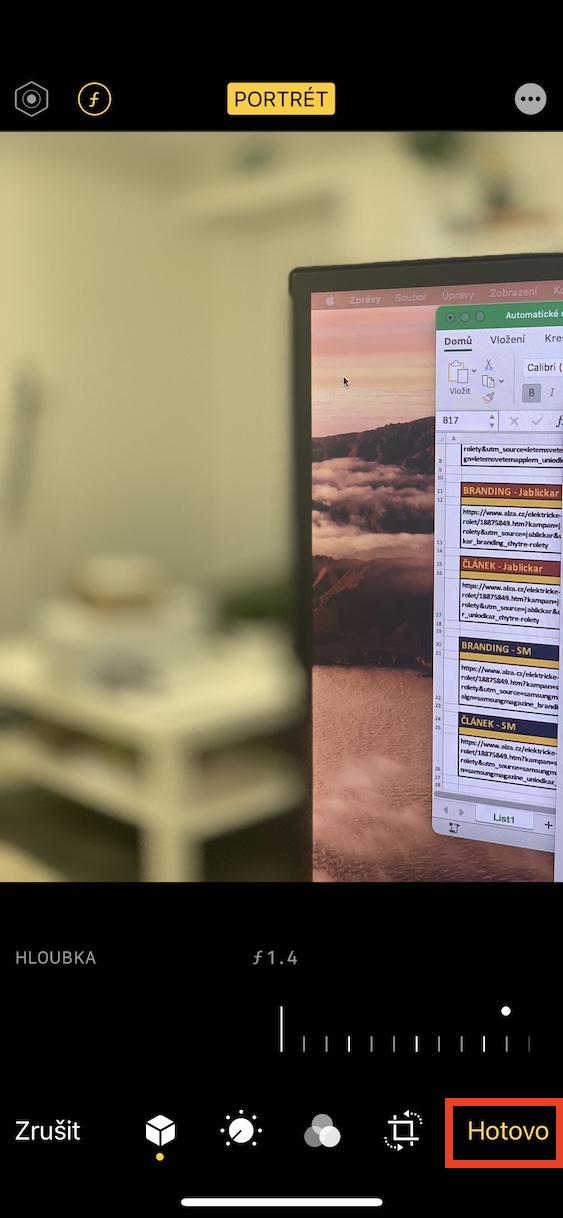
- In the upper left corner, now tap on rounded rectangle fv icon with numeric data.
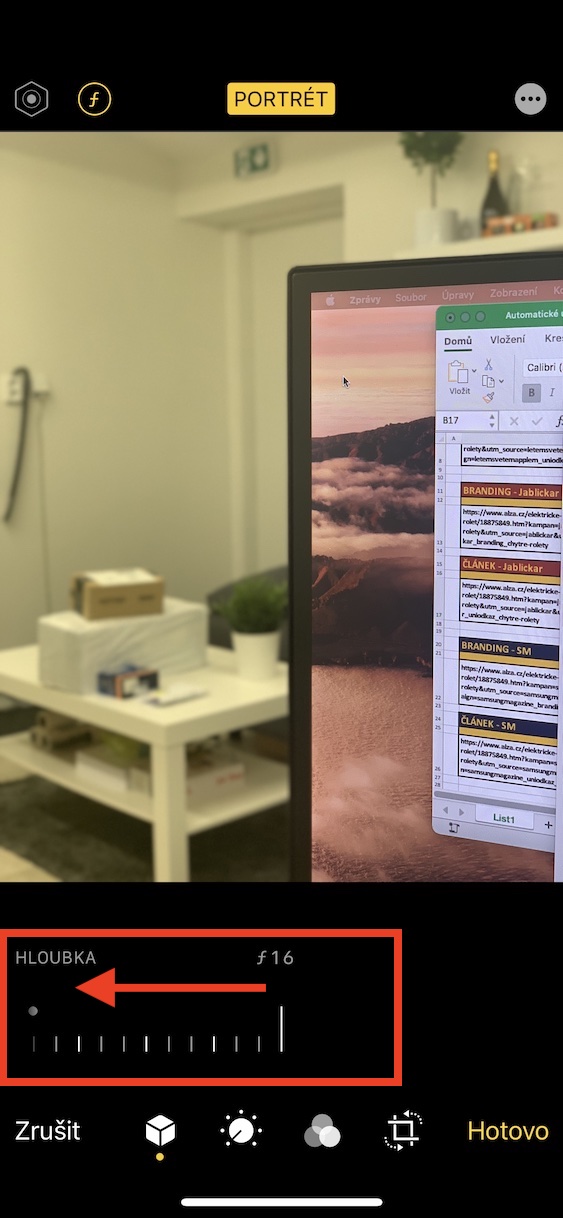
- This will make it appear at the bottom slider, with which the depth of field can be changed retroactively.
- Once you have the depth of field changed, tap on the bottom right All done.
With the methods above, you can easily change the depth of field on your iPhone XS and later, either directly while taking a photo or in reverse. Of course, the camera automatically adjusts the depth of field using artificial intelligence, but sometimes it can happen that it is not quite ideal. Precisely because of this, you can simply reach in and change the depth of field. Of course, when adjusting the depth of field, keep the photo still looking good - remember that too much is too much.
 Flying around the world with Apple