One of the main innovations of the recently released iOS 16.1 update is definitely the Shared Photo Library on iCloud. Unfortunately, Apple did not have time to fine-tune and prepare this function so that it could be released in the first version of iOS 16, so we simply had to wait. If you activate it, a special shared library will be created to which you can add content in the form of photos and videos together with other participants. However, in addition to adding content, all participants can also edit or delete it, so you need to think twice about who you invite to the shared library.
It could be interest you

How to move photos to shared library on iPhone
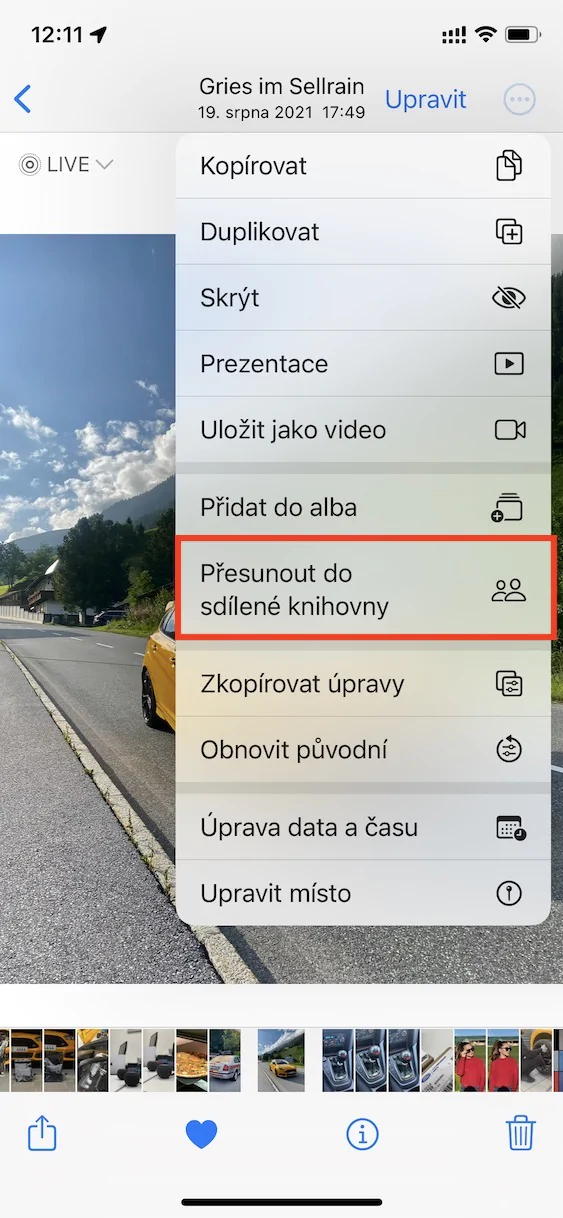
There are two ways you can add content to a shared library. You can either activate saving directly from the Camera in real time, or content can be added at any time retroactively directly in the Photos application. This can be useful, for example, if you want to add some older photos or videos to the shared library, or if you don't want to save directly from the Camera at all. The procedure for moving content to a shared library is as follows:
- First, go to the native app on your iPhone Photos.
- Once you do that, find a click the content that you want to move to the shared library.
- Then, in the upper right corner of the screen, tap on icon of three dots in a circle.
- This will open a menu where you press the option Move to shared library.
So, in the above way, it is possible on the iPhone in the Photos application to move the content from the personal to the shared library. If you would like to transfer multiple photos or videos at once, of course you can. It's enough that you classically marked the content, and then tapped on the bottom right of the three dots icon and selected the option Move to shared library. It is of course possible to move the content back to the personal library in exactly the same way. To be able to move to a shared library, you must have the Shared Photo Library feature on iCloud turned on.


