The power of cell phones is that once you unbox them and fire up the camera app, you can immediately take photos with them. Just aim at the scene and press the shutter, anytime and (almost) anywhere. But the result will also look like that. So it takes some thought to make your images as pleasing as possible. And from that, here is our series Taking photos with an iPhone, in which we show you everything you need. Your still first steps should still remain in Settings.
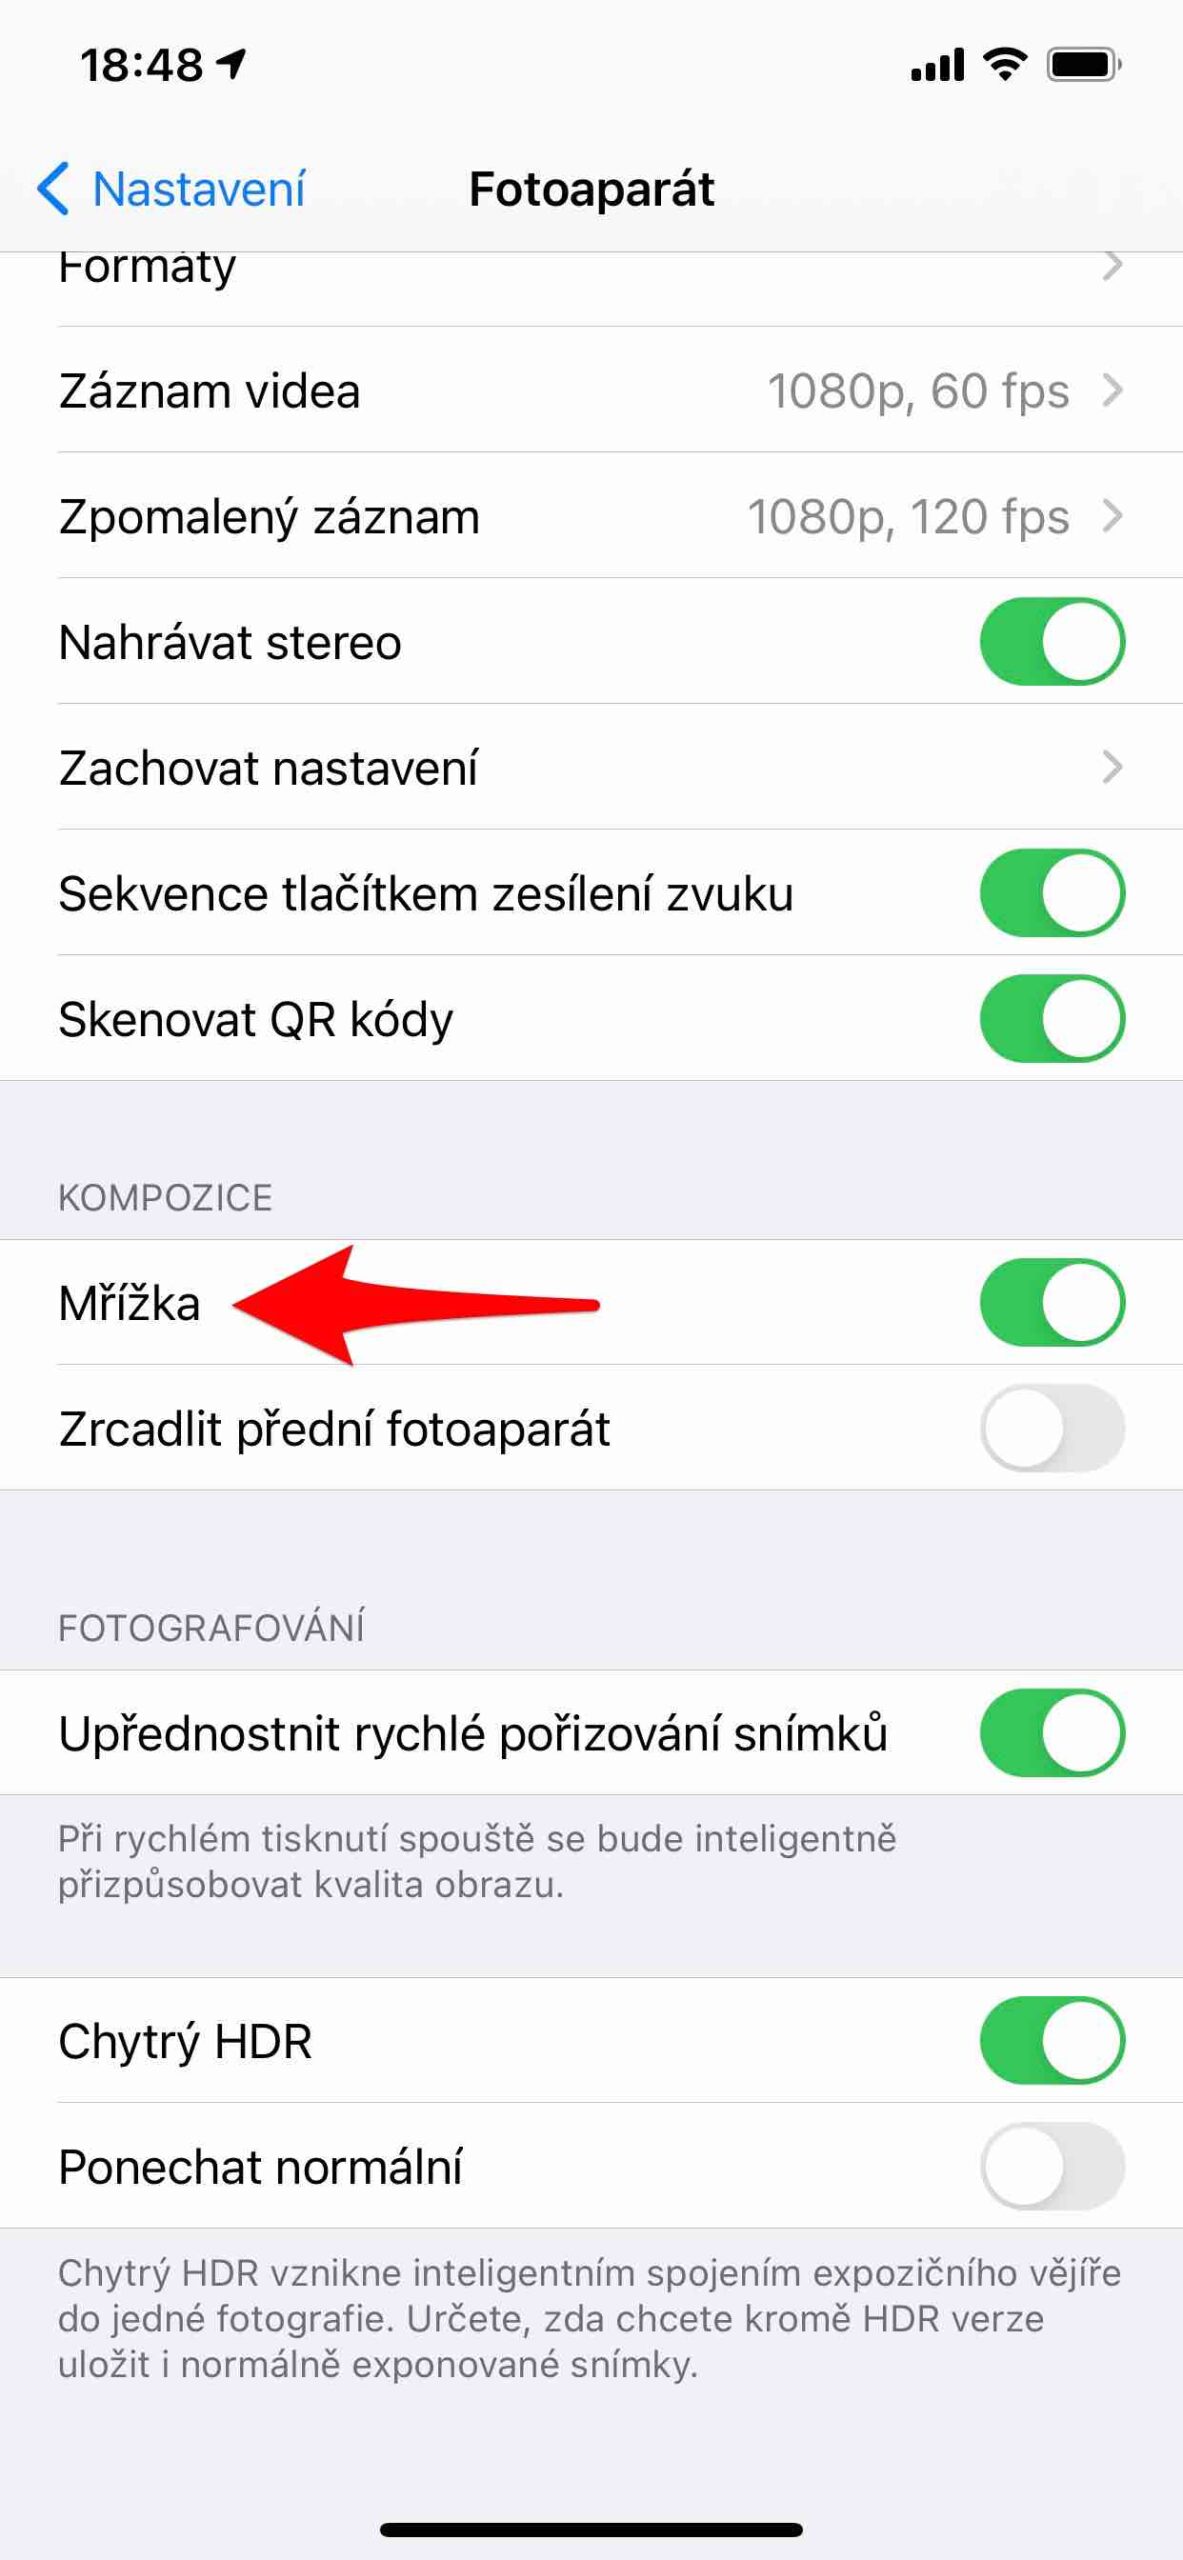
Whether you bought your first iPhone or you're transferring a backup from one generation of phone to another without ever bothering to set up the Camera app before, you should pay attention to it. Not only will you avoid unpleasant surprises, but you will also optimize the quality of the content you capture. You can find everything in the menu Settings -> Camera.
It could be interest you

Keep settings
I'm sure you know it too. You take portrait pictures one after the other, and turn off the Camera app for a moment or clean up the phone completely, saying that you will continue in a moment. In it, you see your loved one in an ideal pose, you quickly want to immortalize it, and the application starts again only in Photo mode. So you have to switch to Portrait, which delays you and the model is no longer willing to pose for you, or you simply run out of light.
Proposal Keep settings this is exactly what it solves. By default, the Photo mode is set to start every time you close the application and then open it again. Here, however, it is enough to move the switch and the application already remembers the last used mode and will also start in that mode. Creative controls it actually does the same thing, it just focuses on filters, setting the aspect ratio, turning on the backlight or manually setting the blur. At the same time, you can define here how the function should behave Live Picture.
It could be interest you

Composition
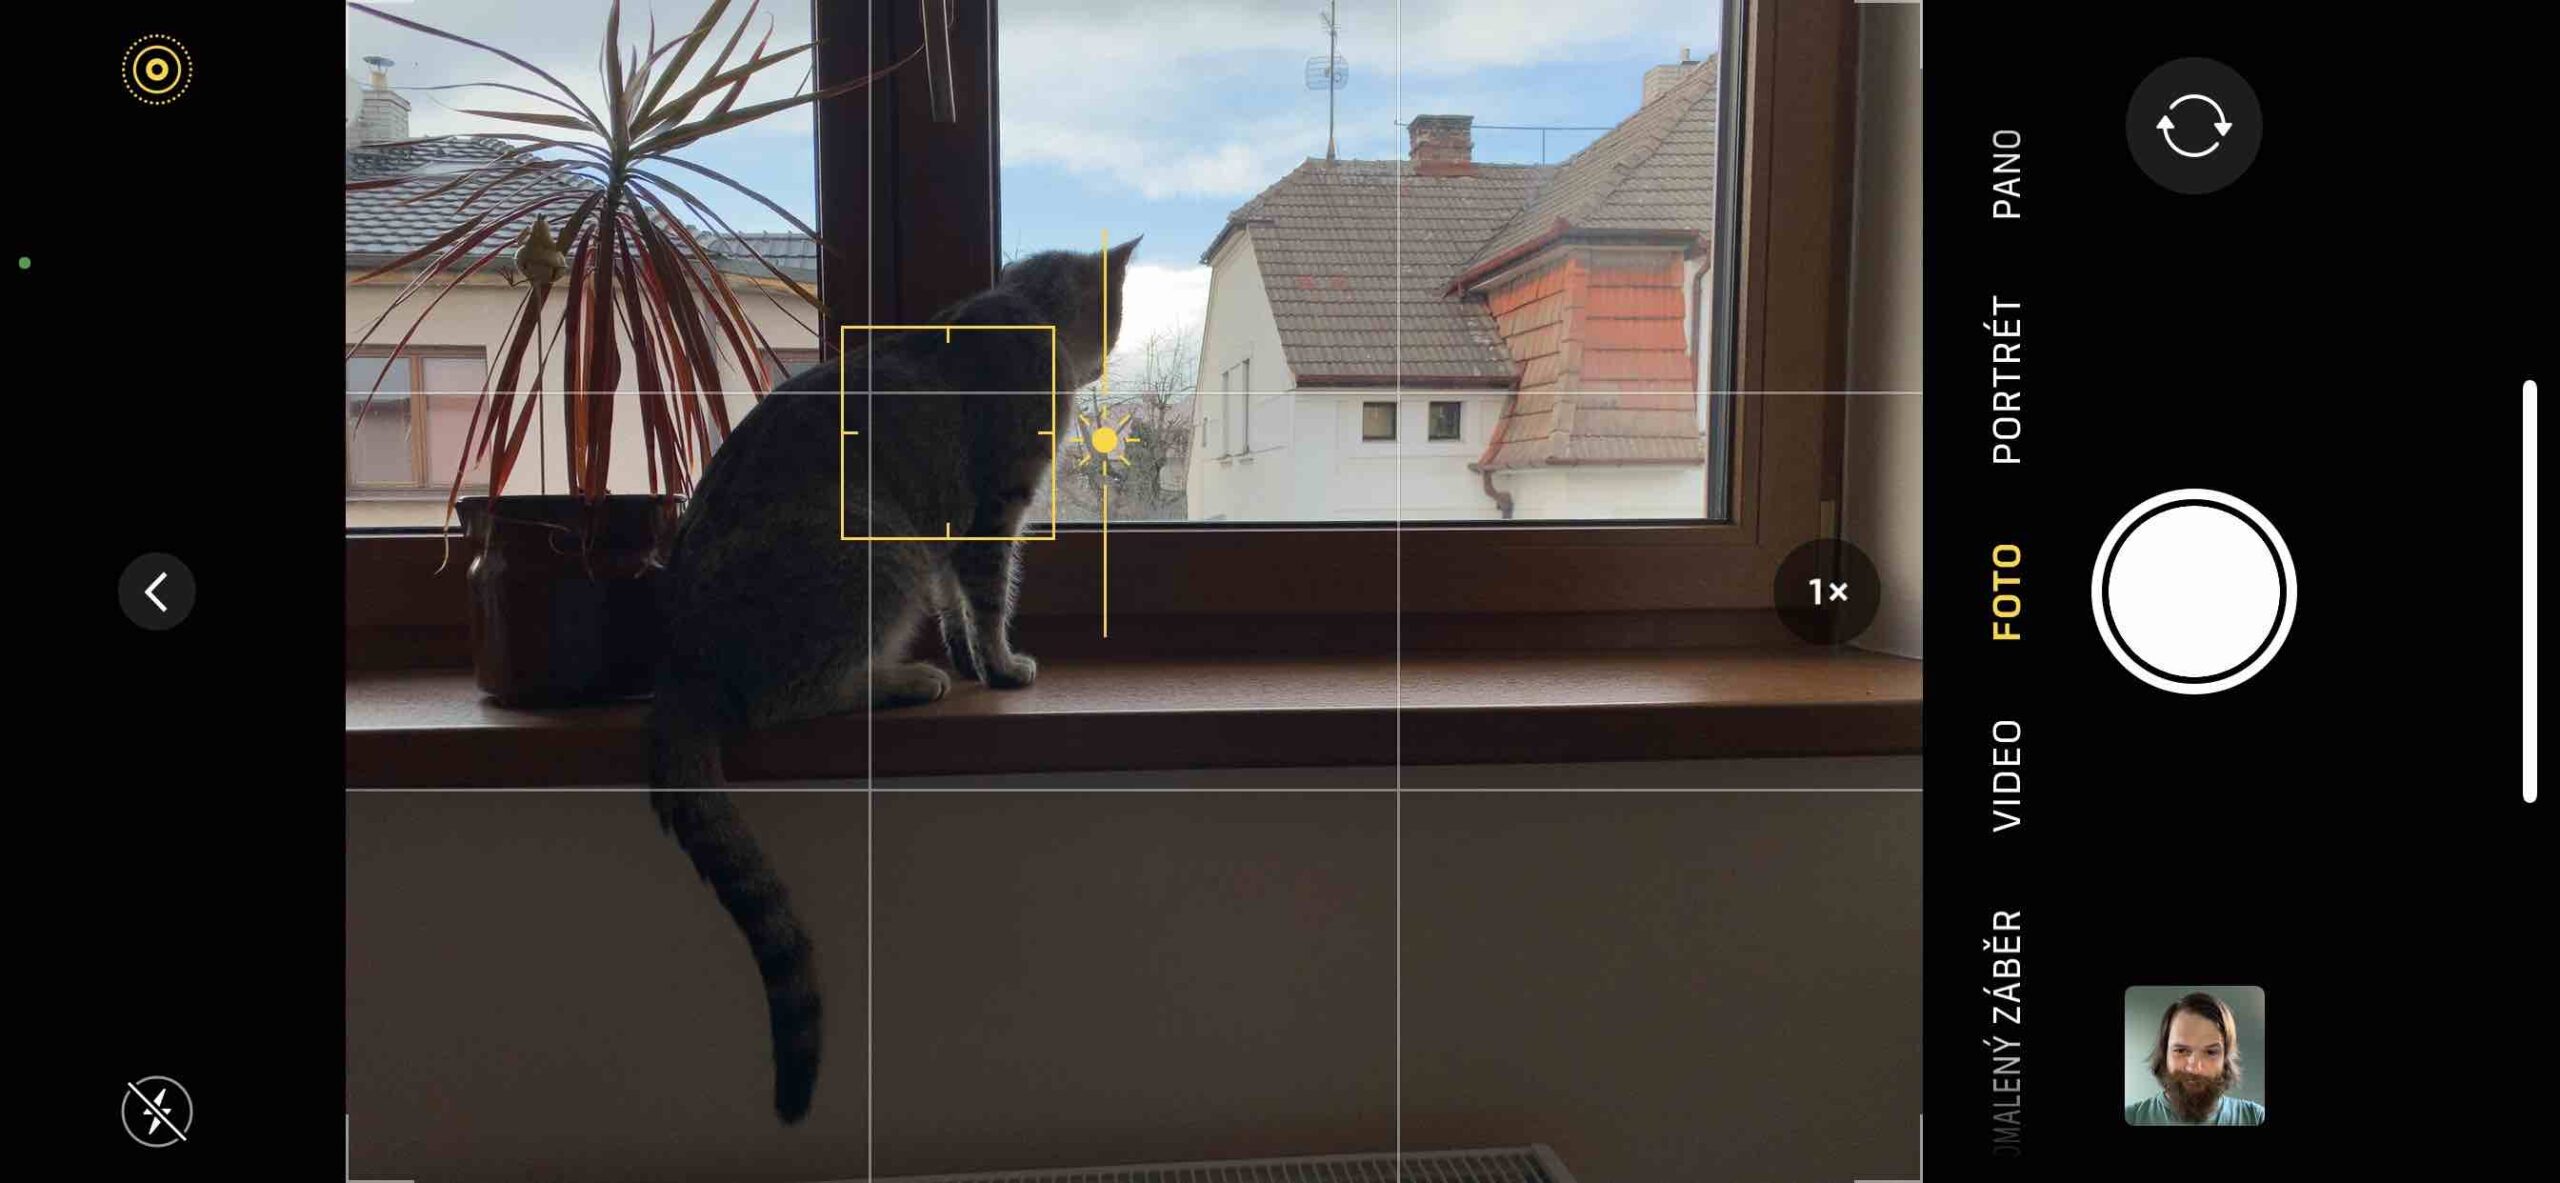
Grid should be turned on by everyone, regardless of how advanced their abilities are. The answer to why is quite simple: it helps with composition. The grid thus divides the scene according to the rule of thirds, which is a basic rule used not only in photography, but also in other visual arts such as painting, design or film.
The goal is to place objects and areas of interest near one of the lines so that the image is divided into three equal parts. Another goal is to place objects in the intersections of the third lines. Placing objects in these places will make the photo much more interesting, energetic and exciting than a simple and uninteresting display of the main subject in the middle. If you have a long time, you can learn Czech Wikipedia also study the issue of the golden ratio. The menu also includes the option to mirror photos taken with the front camera. Here you have to decide for yourself what suits you better. Simply take a picture once, then turn the feature on and take another picture. Perhaps mirroring will feel more natural to you and you'll keep the function on.
Photography
It's up to you if you prefer to take pictures quickly when pressing the shutter button quickly, but at least from the beginning of your quest for better photos you should turn on the option Leave normal when shooting an HDR scene. High Dynamic Range (HDR) offers a higher dynamic range, and you can meet this term not only in photography, but also in the field of displays, 3D rendering, sound recording and reproduction, digital display and digital audio.
So be sure to turn on HDR. Thanks to this, your photo will get more drawn shadows, but at the same time, the reflections present will be reduced to the maximum. It all consists in combining several photos taken with different exposure settings. Function Leave normal then means you will find two images in Photos. One original and one captured with HDR. Then you can compare the differences yourself. be si but be sure to delete the original one anyway, because the HDR results are clearly better. But here we want you to understand how this function actually works.
 Adam Kos


