After a long hiatus, we are finally coming with another part of the popular series We start with engraving. In the last part, we looked together at the LaserGRBL program, which is used to control the engraver. We thought that there are of course several similar programs available, for example Lightburn, but for classic purposes, the free LaserGRBL will suffice. At the end of the previous part, I promised you that in this part we will look at how you can import an image for engraving into LaserGRBL, and how you can edit it directly in the mentioned program before engraving. Next, we will also look at the engraving settings.
It could be interest you
Import image into LaserGRBL
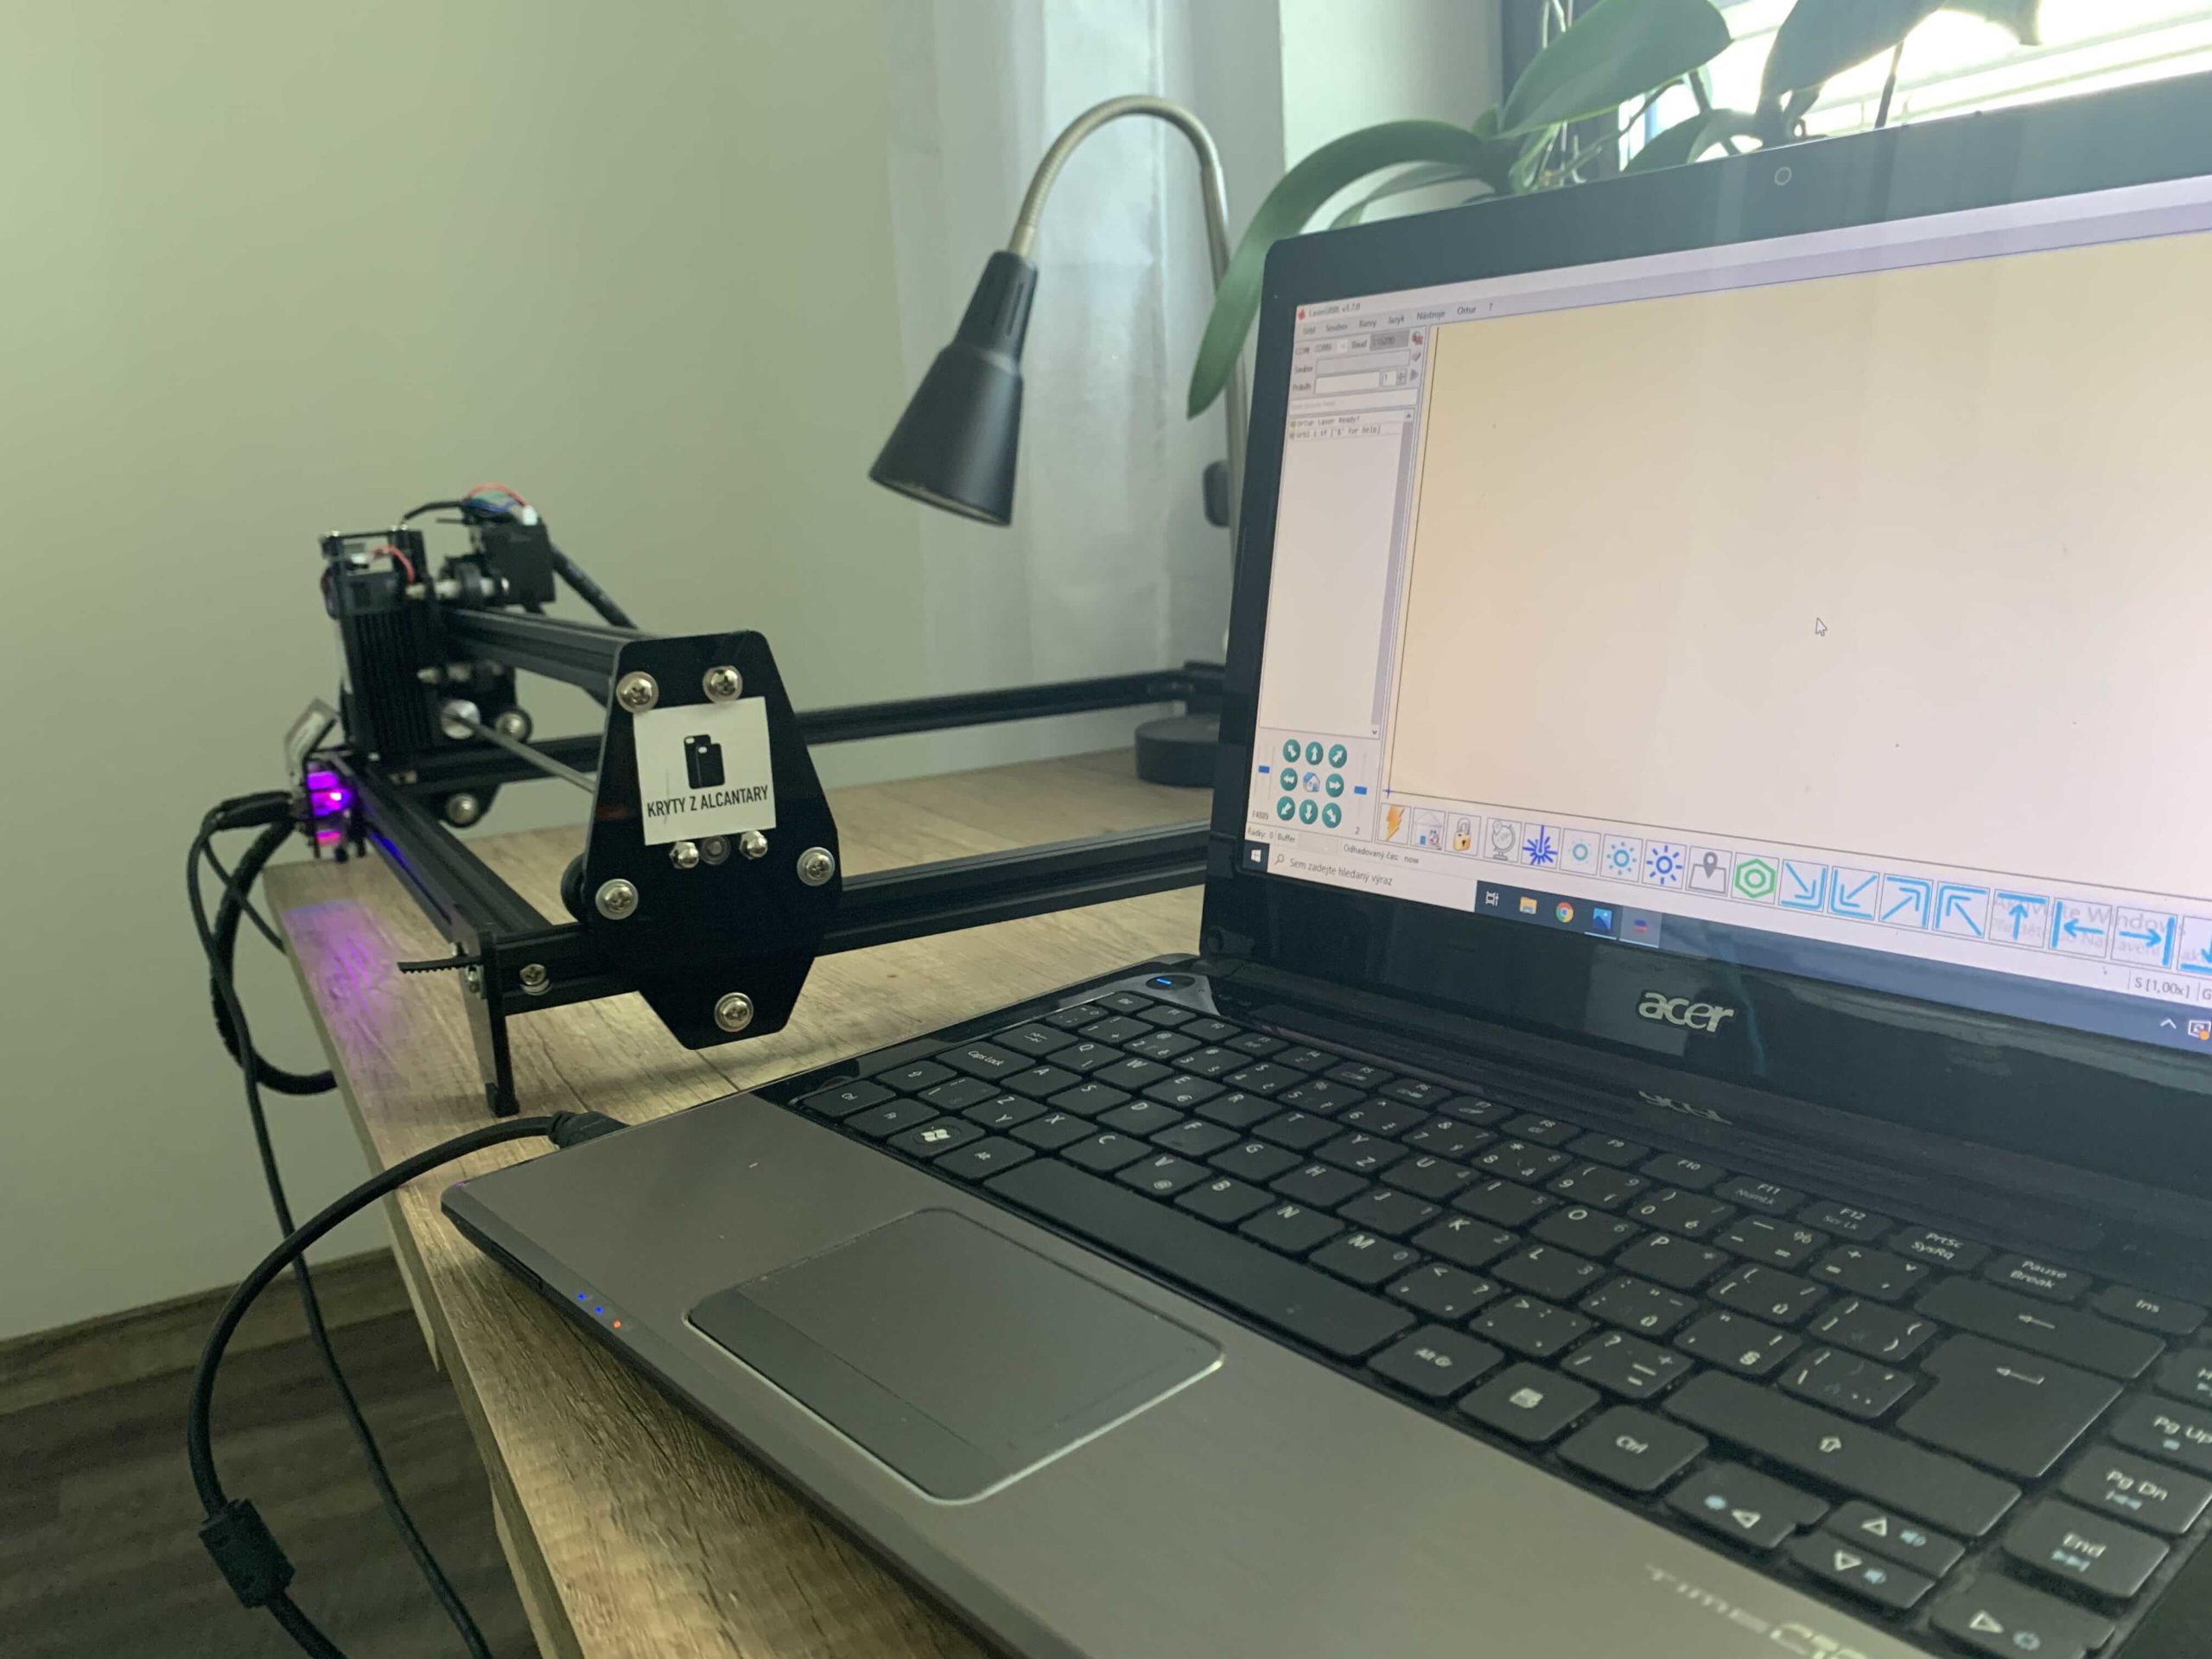
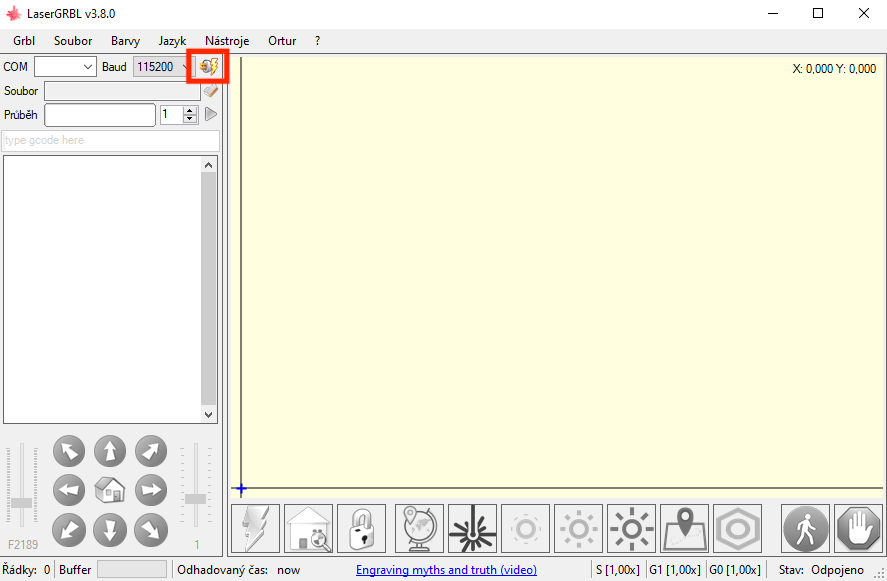
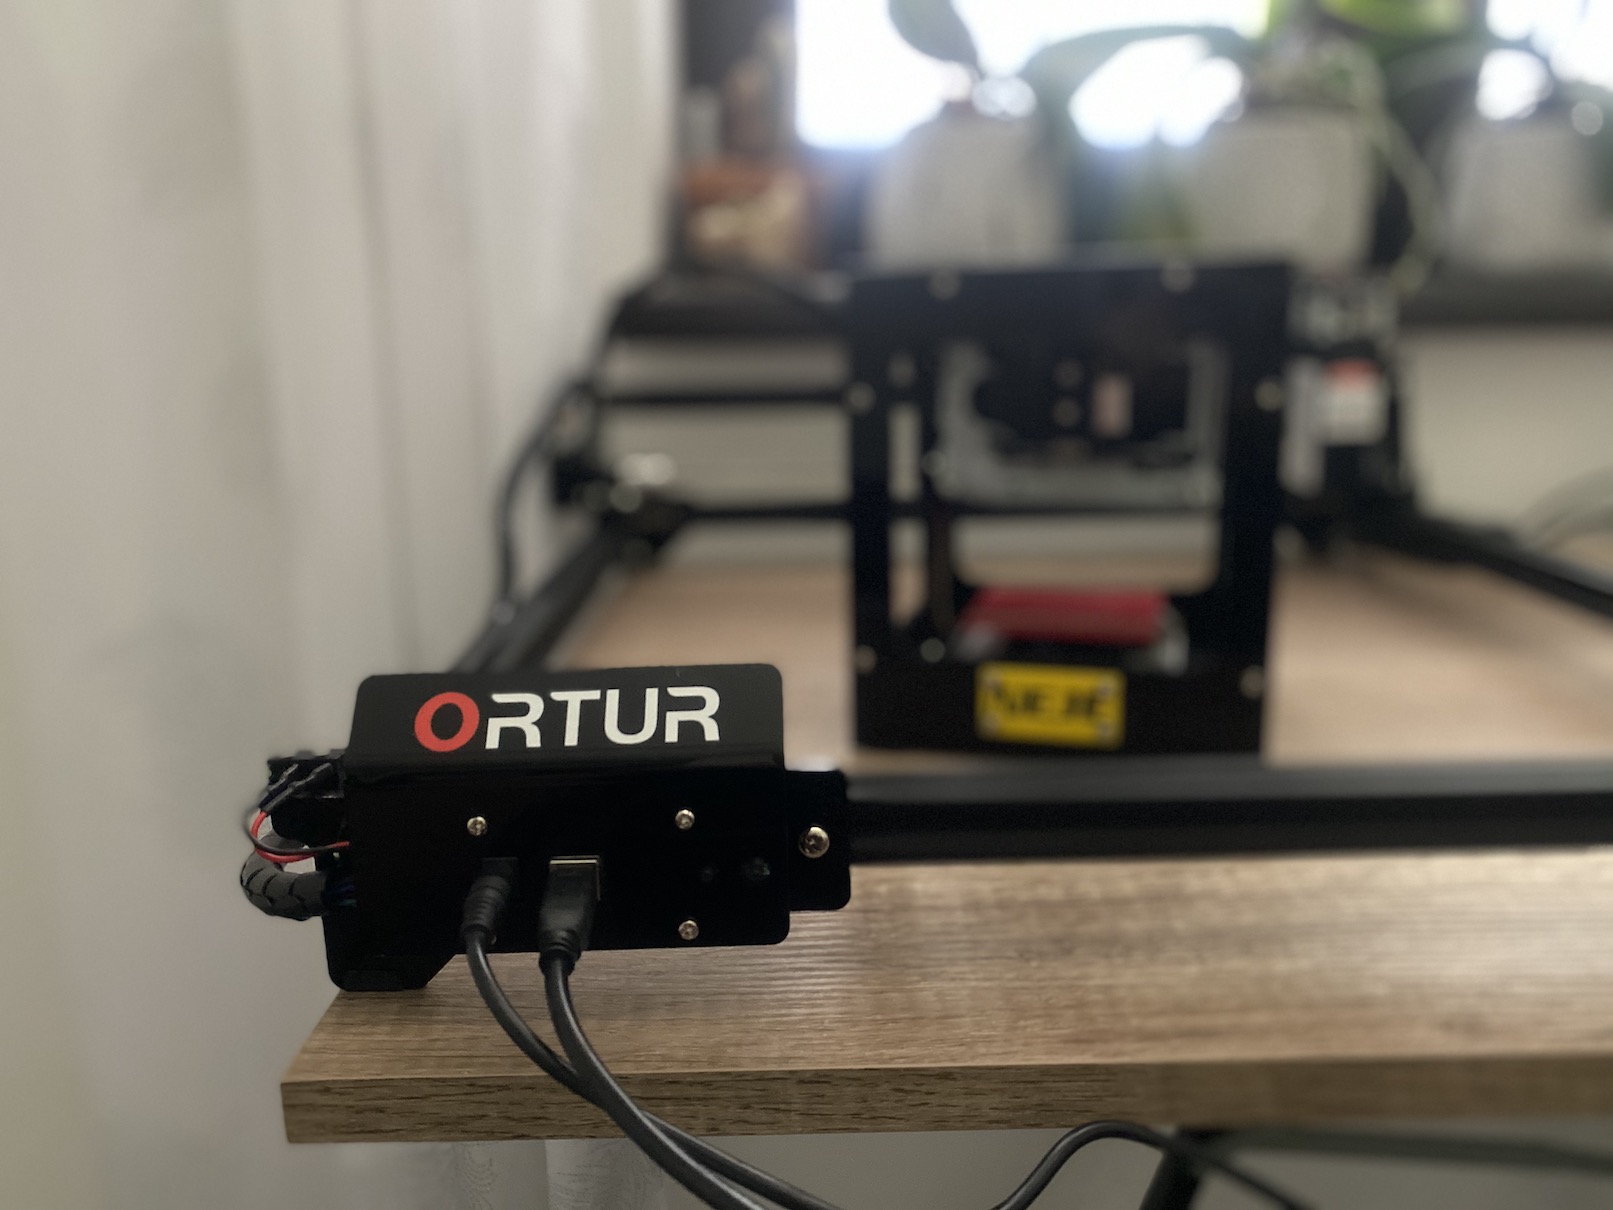
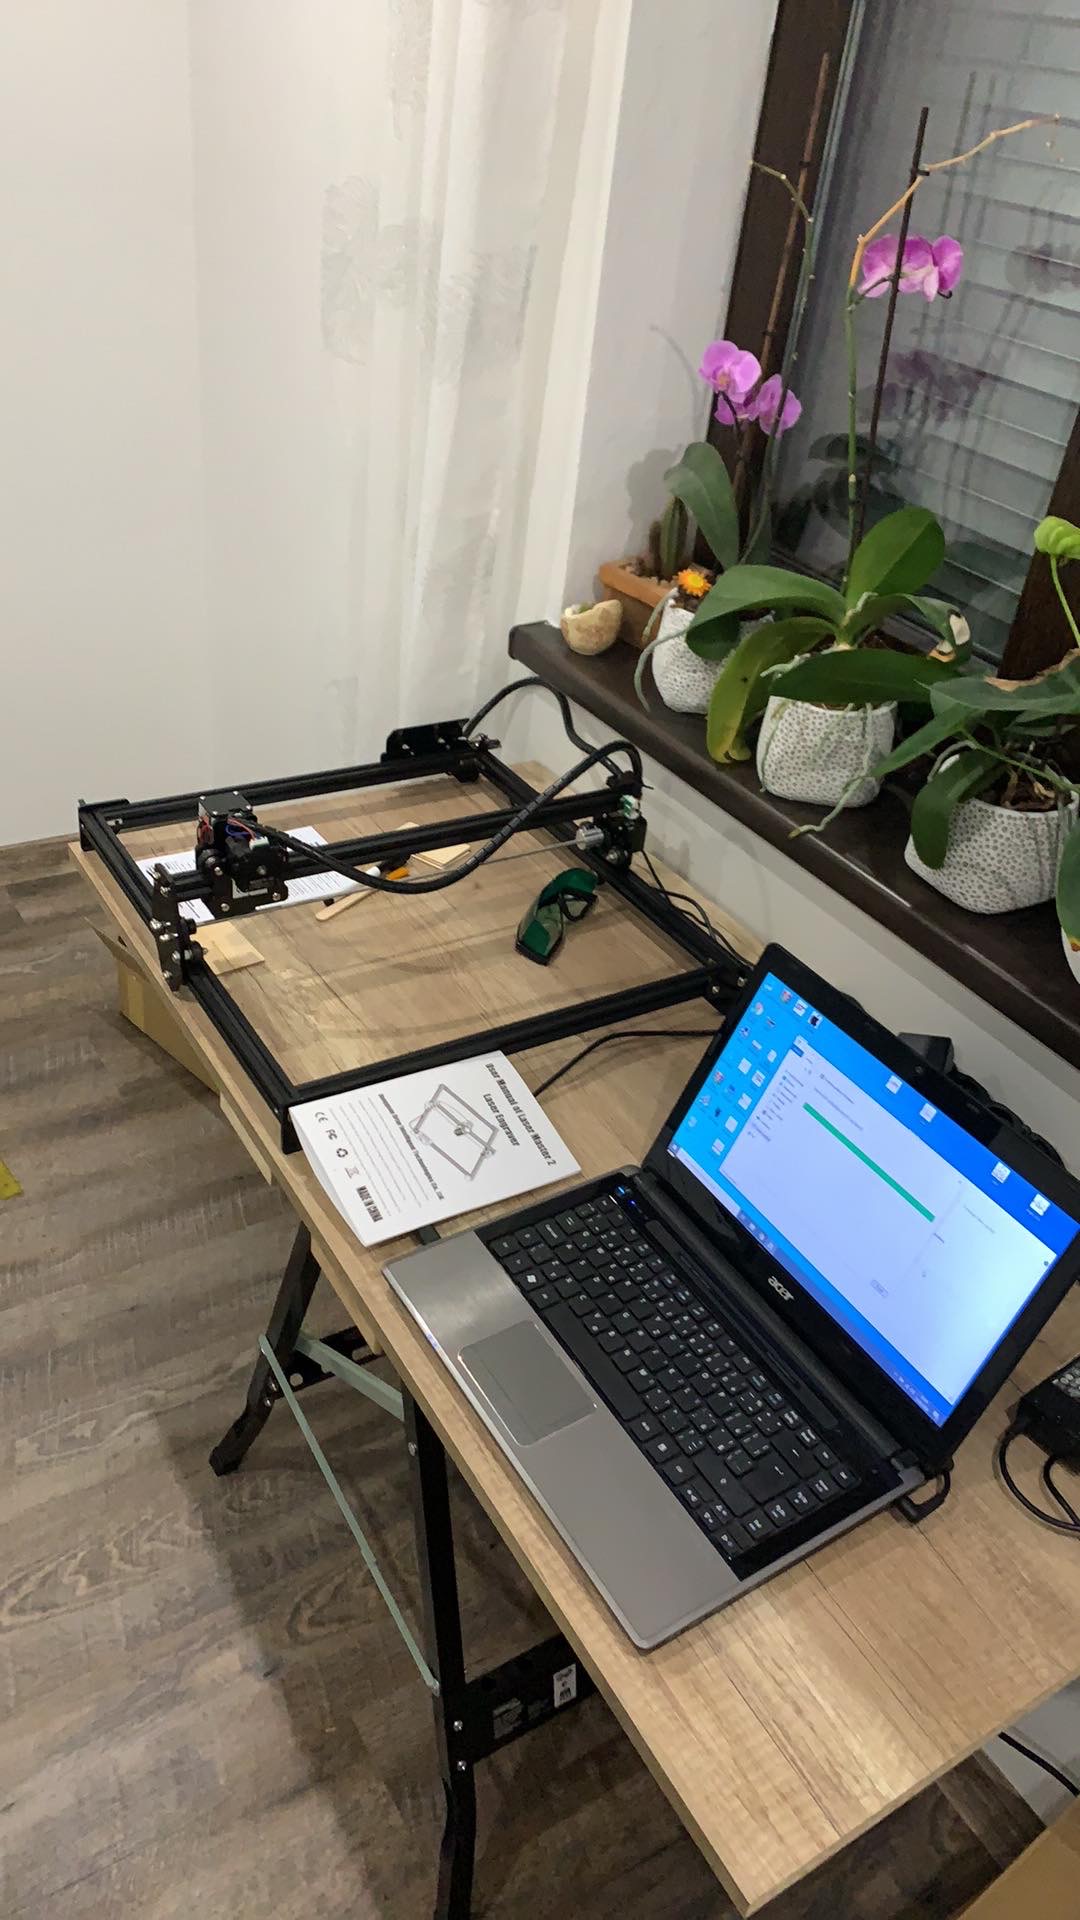
As I mentioned above, in the last part we looked together at how you can control the LaserGRBL application, as well as how to import buttons that will make it easier for you to control. So, if you've already gotten used to the program and explored it, you've probably found out that it's really not complicated. If you want to start engraving for the first time, of course first connect the engraver to the socket and to the USB connector on your computer. Once you've done that, tap on the top left of the app socket icon with lightning, which connects the engraver to the computer.
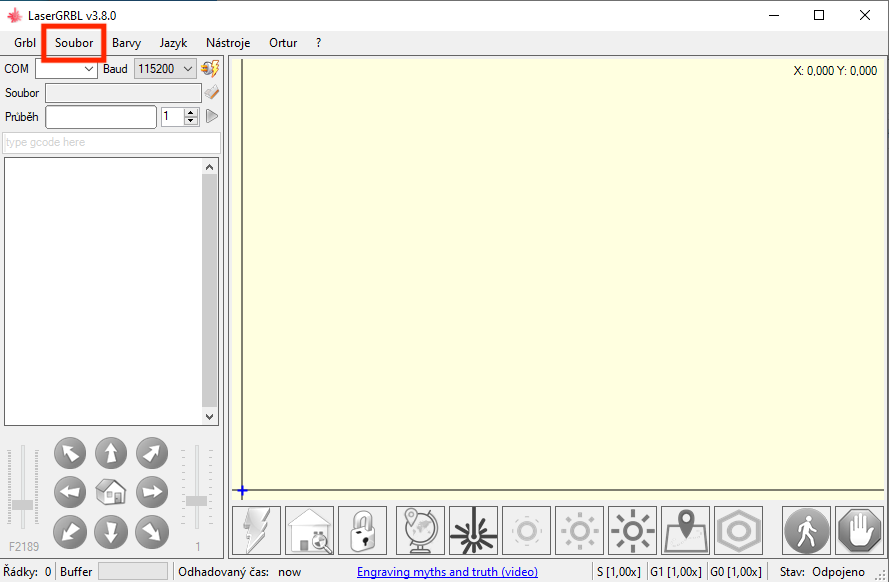
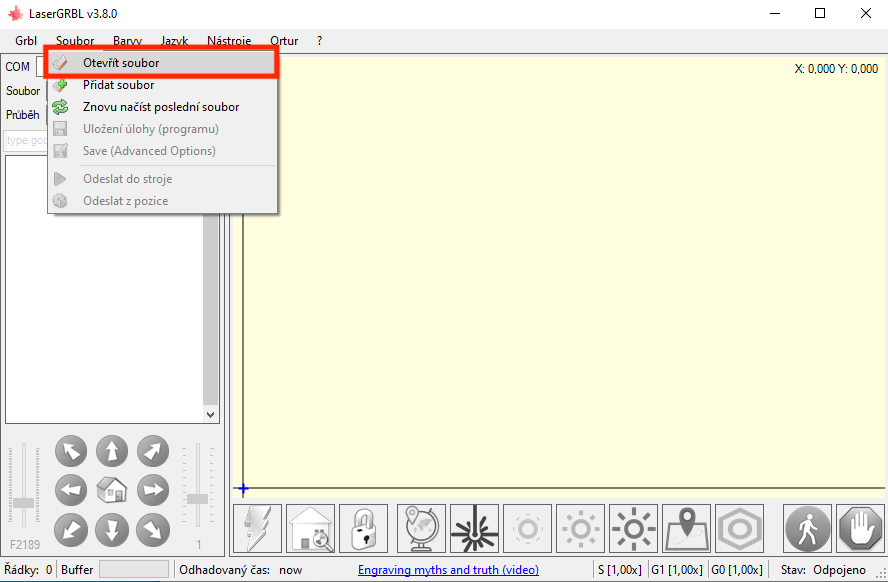
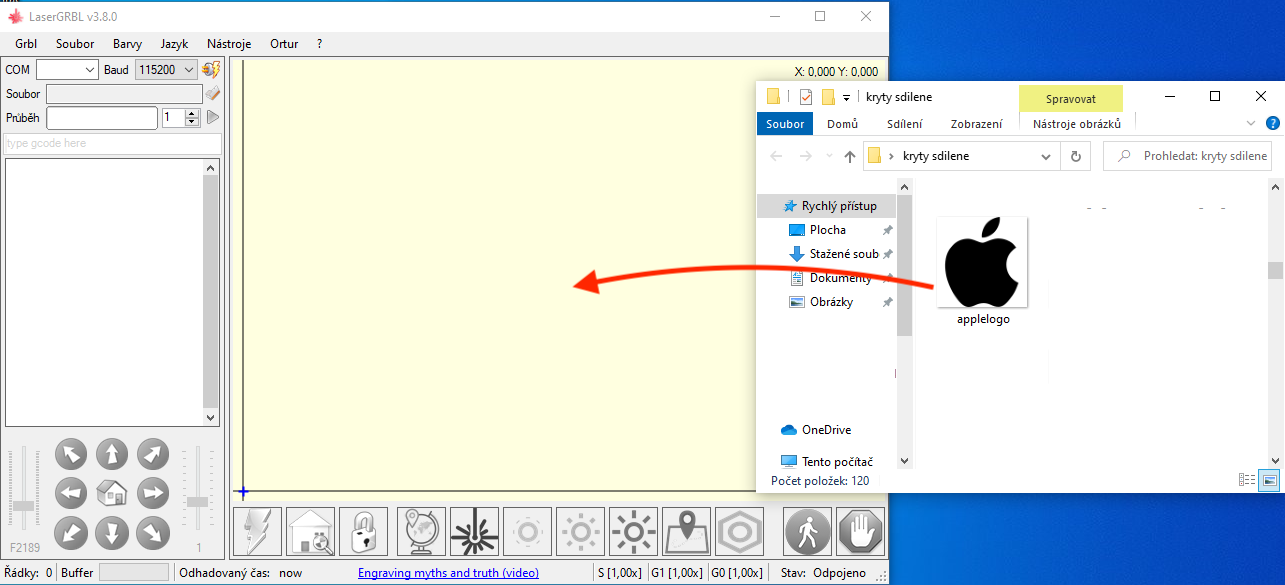
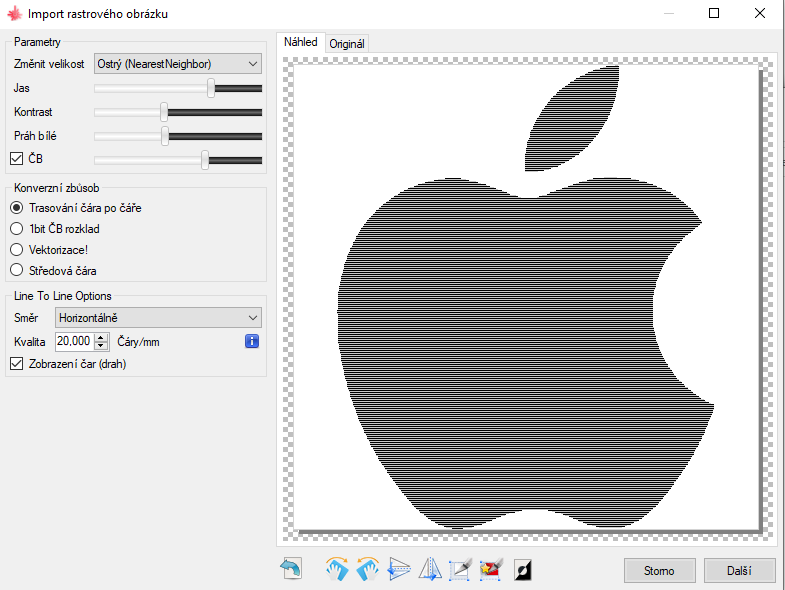
If you want to import the image into LaserGRBL, click on the tab above File, and then on Open the file. If you want to speed up the whole process, you can directly add a specific image to the application drag, for example from a folder. In both cases the result is the same and the following procedure is no different. Immediately after that, another window will appear where the image will already be loaded. Attention must be paid now left part, where is Parameters. In addition, you can edit the image directly in LaserGRBL using the tools at the bottom of the new window. First, let's focus together on the parameters, the setting of which is very important.
Editing an imported image
Using the parameters within LaserGRBL, you determine how the selected image will be engraved. Among the most important parameters are sliders Brightness, Contrast a Threshold of white. If you move these sliders, you can watch in real time how the image in the right part of the window changes. Within the first option Change size you can then set "sharpness" image, again I recommend checking the differences in real time. In the section Conversion method you can set how the image is converted to the format for engraving. I personally use only Tracing line by line, for various logos and simple ornaments. 1bit B&W decomposition then I use it when I start engraving photos. IN Line To Line Options then the menu is located Direction, with which you can set the direction in which the engraver will move during work. Quality then determines the number of lines per millimeter. The maximum value is 20 lines/mm.
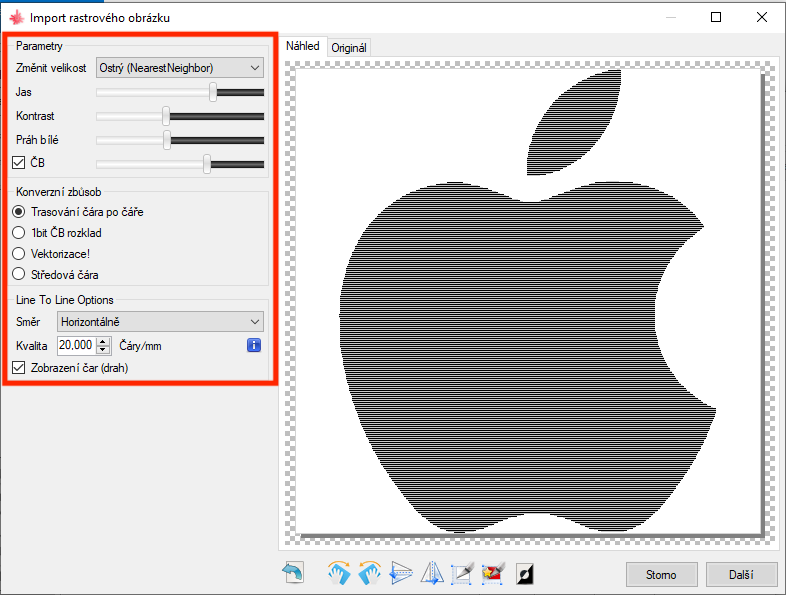
As I mentioned above, in this window you can also use image editing tools - they are located in the lower part of the window. Specifically, there are options for turning right or left and further for overturning (both horizontal and vertical). You can also use crop, automatic smart cropping and functions for inverting colors. Personally, in any case, I use Photoshop for complete image editing, to convert the photo to black and white (not grayscale) I use an online tool called Threshold. When setting the parameters, take into account the size of the resulting image. If you plan to create a small picture, within a few centimeters, then you can't count on any details. Be sure to expect that your first project will most likely not go as planned. But definitely don't give up and keep going - the engraver comes with, among other things, materials that you can use for testing.

The speed and power of the laser, the size of the engraved area
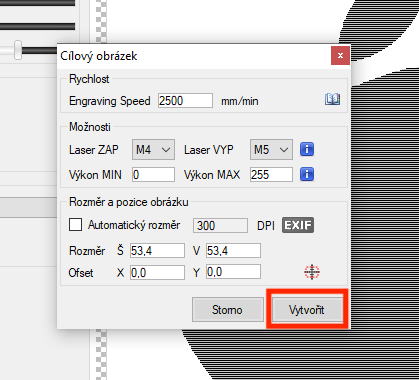
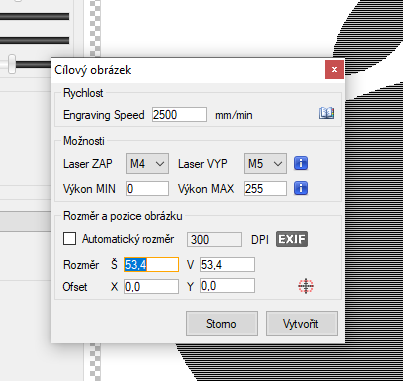
Once you have the image ready for engraving, click on the bottom right Next. This will take you to the next screen, where you need to set the last parameters. IN Engraving Speed you set how fast the laser will move. The higher the speed you choose, the less the beam will affect one place. Unfortunately, in this case, I cannot tell you exactly what speed will be the right one for your material. Personally, I use a speed of 1000 mm/min for wood, and 2500 mm/min for fabric, but this is definitely not a rule. However, if you tap on the top right of the little book so you can have a kind of display "calculator", which you s setting the speed will help significantly.
Below in the options, you can set the Laser ON and Laser OFF parameters. AT Laser ZAP you have a choice of M3 and M4 when M3 means always on. M4 then supports special dynamic performance laser, which can change during a certain task and thus create shading - this must be taken into account when creating and editing the image. AT Laser OFF it is then always necessary to set M5. In the text boxes below with the title Performance MIN a Power MAX you can set, as the name suggests, the minimum and maximum power of the laser, in the range of 0 - 1000. The booklet on the top right can also help you with these parameters. In the second half of the window, you can then set it the size of the engraved surface, Offset is then used to create a kind of border. If you right-click on the target, the edge will be set exactly in the middle, so the laser will appear in the middle of the image at the beginning of the task and not in the lower left corner by default. After complete setup, just tap on Create.
záver
Click Create to process the image. Most often, processing takes a few seconds, but if the image is larger, it can take a minute. After processing, the image appears in LaserGRBL. Now all you have to do is focus correctly on the object to be engraved. But we will talk more about this in the next part of our series, which you can look forward to soon. For alignment, it is necessary that the object to be engraved is as perpendicular and parallel as possible to the engraver - that is, if you want to engrave accurately and straight. For this you will need a ruler, but ideally a digital gauge - a "supler". In case of any questions, of course, contact me again here in the comments, or at the e-mail address.




Hello, really great tutorials! I went through the first three just out of curiosity, and after reading part 4.. I was done, so that's why I started with four. Anyway, the last two parts helped me a lot. In addition, the articles are written semi-literally so that almost everyone can understand them. Thank you very much for your effort and willingness ;)
Hello, can someone please give me some advice. Everything works for me on the laser, it just fires upside down, not mirrored. I've tried just about everything. Can anyone advise? Thanks a lot
I haven't engraved yet, but all the arrow movements were awesome. I simply turned the engraver upside down and flipped the control electronics to the opposite side. ?;
Otherwise great articles, they helped me a lot. I'm already looking forward to the sixth volume. :)
I solved it by downloading the configuration from the manufacturer, instead of using the attached one. Then it burned normally. She used to burn mirrors..
Hello,
where to buy such an engraving machine.
Good job Pavel, I want to get into this fun after the Prusa 3D printer and thanks for this guide, I'm looking forward to the laser, it's on its way.
Thank you, a similar series about 3D printing will appear in our magazine soon.
Do you have the exact parameters for burning photos on plywood?
A few times there was mirroring or shifting in the opposite direction. Sometimes it's by changing the cable to the motorbikes. The movement and inversion of the motorbike movement can be changed in the Grbl configuration by changing the port routing parameter $3 = 0. A value of 0-3 is set. A value of 4-7 is used for the moving Z axis
Good day. Can I control where my own buttons for the program are located?
Either on the manufacturer's website, where they are usually available for download, or a CD comes with the engraving.
Good day. I would like to ask if it is possible to engrave something that I paint myself? Thank you for answer :)
Hello, of course. You paint, scan, convert to shades of gray or black and have it engraved.
Hello, do you know how to set whether it is possible to cut out the image after engraving? I'm making a magnet and I don't know how to do it. If I use 2 images, it always shifts somehow and the crop is shifted. Thank you
Hello, the instructions are perfect. Assembled without any problems, the Wainlux engraver has her own program, but it doesn't quite suit her - she only takes photos in shading. So I'm going to use the LaserGRBL program, which you described very nicely. Well, how to solve the engraving on white photo paper - I found that the beam is reflected and does not burn at all. So I have to say goodbye to white at the engraver completely, or is there some trick to it. Thank you for answer. ;-)
Good day. I watched your whole series about the engraver. I have procured TTM-S with FAC.
Only then did I notice that you offer instructions for ORTUR.. E.g. I can't adjust the laser power on this one. It burns my plywood terribly. And I can't even set the speed.. Furthermore, I can't carve with it at all.
Can you advise me please?
Hello, I am asking for advice, is it possible to write text in GRBL as in lightb...?