Lately, I have noticed more and more families who have started to care about their photos and other memories. That's why they decided after purchasing a so-called home server, which you may know under the term NAS station. Together with the arrival of iOS 13 and iPadOS 13, we gained more freedom in these operating systems, which can be felt especially in the Files application. Now we can also download files from Safari without problems and perform other actions that we couldn't before. In addition, we can also connect to a home NAS station within the Files application.
It could be interest you

How to connect to a home NAS server in iOS 13 and iPadOS 13
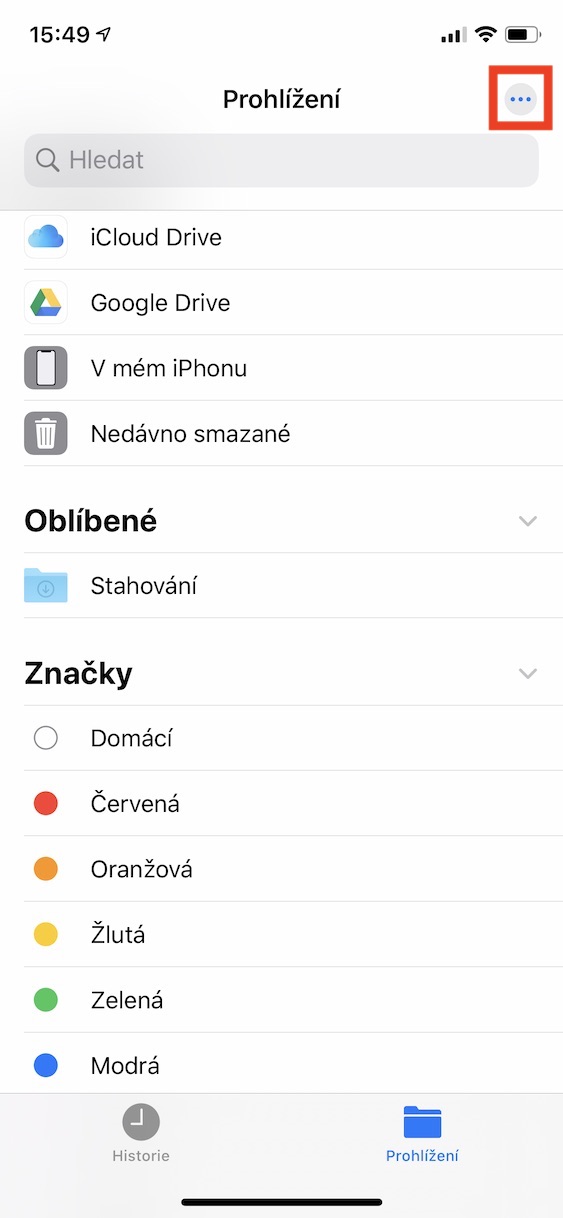
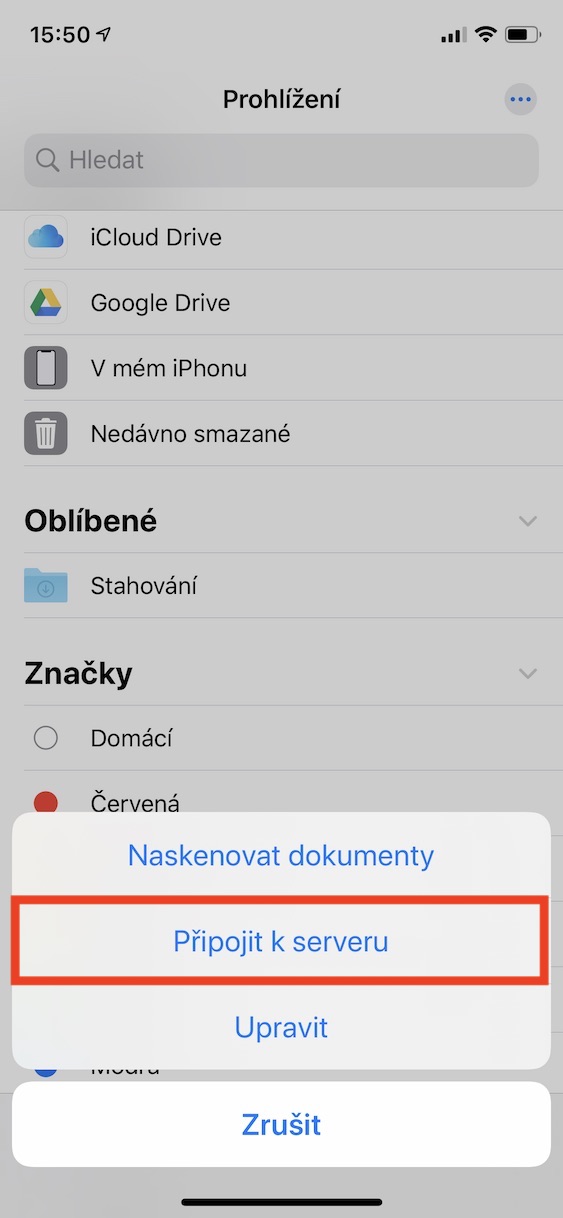
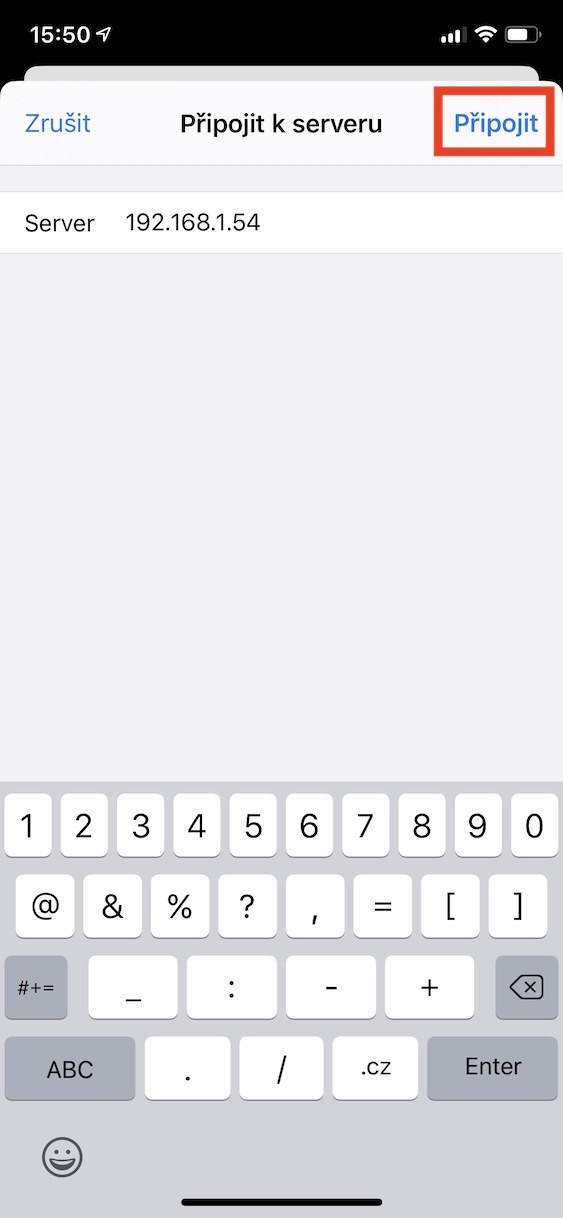
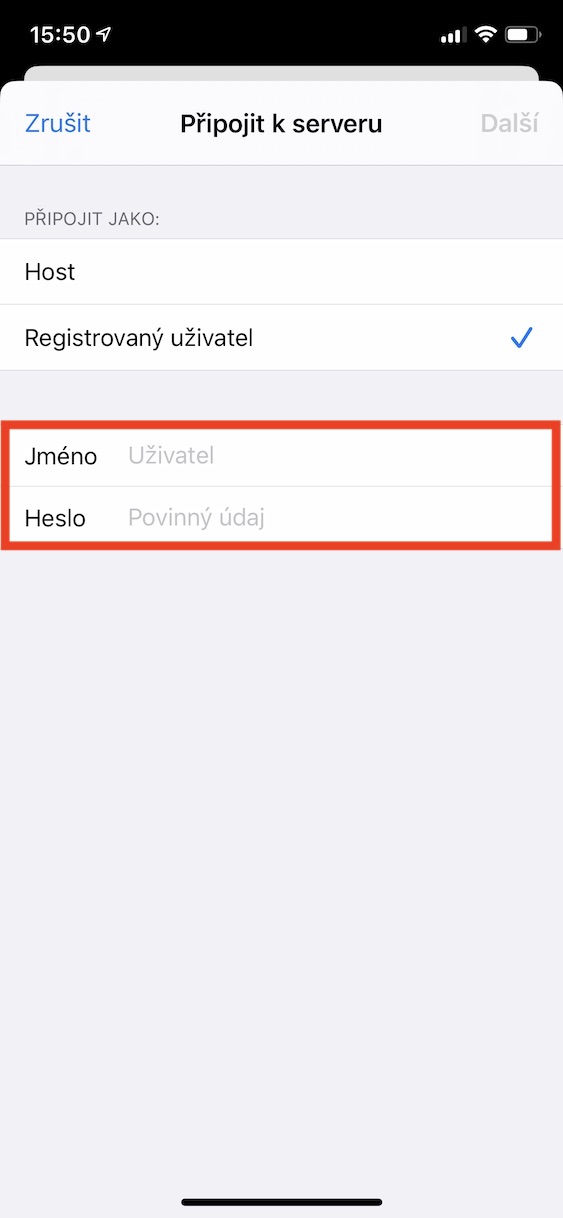
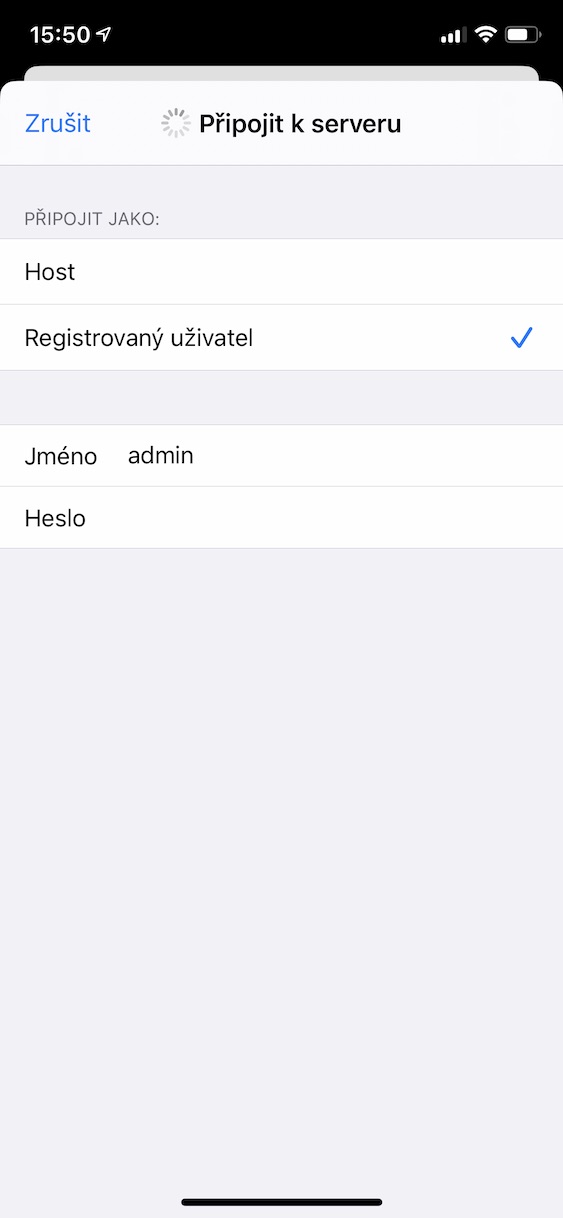
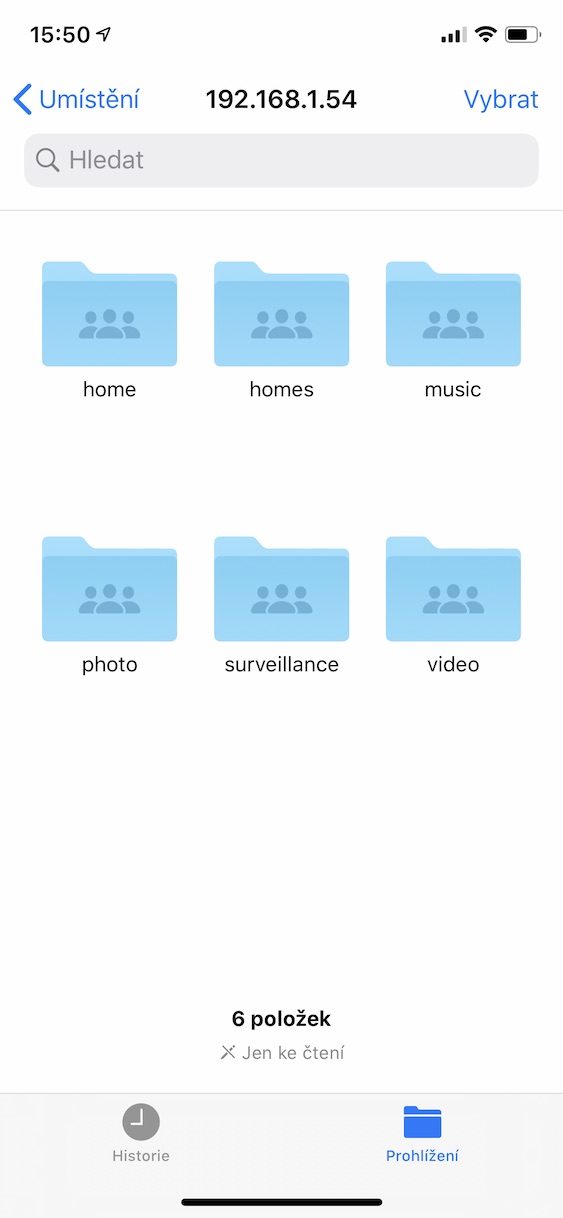
On your iPhone or iPad updated to iOS 13 or iPadOS 13, go to the native app Files. Once you've done that, tap on the option in the bottom right corner Browsing. Then press in the upper right corner three dots icon and select an option from the menu that appears Connect to server. You will then be presented with a text box to paste into The IP address of your NAS station – in my case it was about 192.168.1.54. Then tap on Connect and sign in with your account. Then just press it Další and wait until your device connects to the NAS station. Once the connection is established, you can easily view all files from the comfort of your iPhone or iPad - be it movies, photos or other documents.
Of course, in this case it is necessary that your iPhone or iPad is connected to the same network as the connected NAS station. Otherwise, the connection will not work. At the same time, I will mention that the above procedure does not need to be repeated every time. Once you have connected to the NAS station, you will always find it in the Browse section under the IP address. Then just click on this IP address and the connection will be established immediately.
Useful type. Only this sentence is quite funny:
"Recently, I see more and more families who have started to care about their photos and other memories."
Thanks for the tutorial. And how to connect outside the home?