Even though macOS and Windows are two completely different operating systems, there is a fairly simple way to share files from a Mac to a PC within the network. This can be useful, for example, when you absolutely need to work on a Windows computer for some reason, but you would like to process the resulting data or files on a MacBook. Whatever your reason for sharing data, I think it's a good idea to have this option set. Sharing on the network is much easier than having to unnecessarily search for a flash drive and move files to it, or to upload them somewhere to the Cloud. In the article, we will therefore show you step by step how to do it.
It could be interest you
Settings on Mac
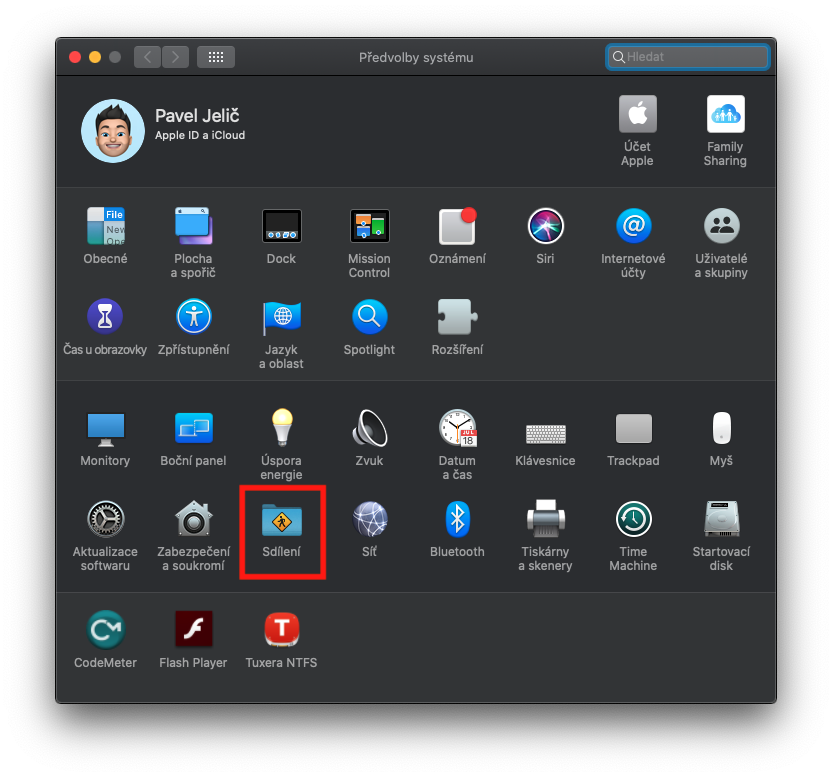
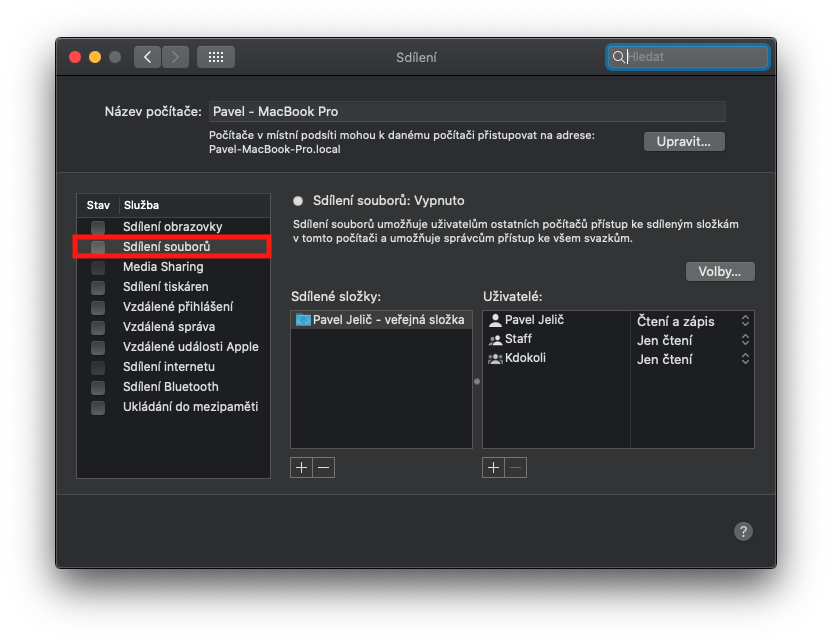
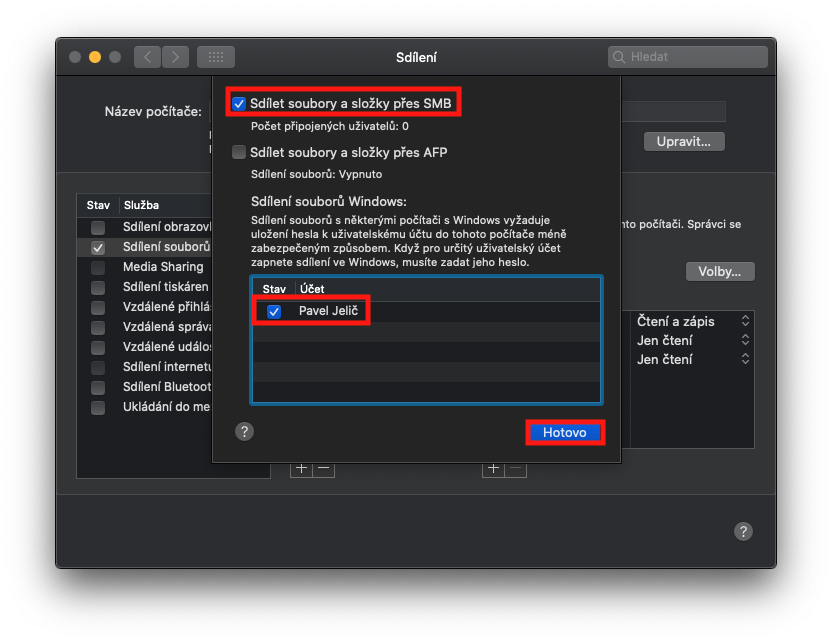
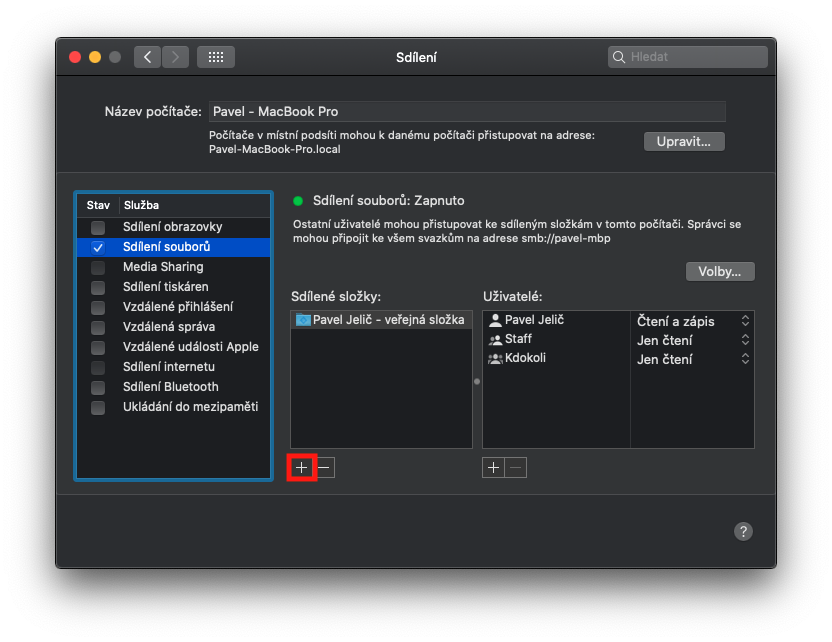
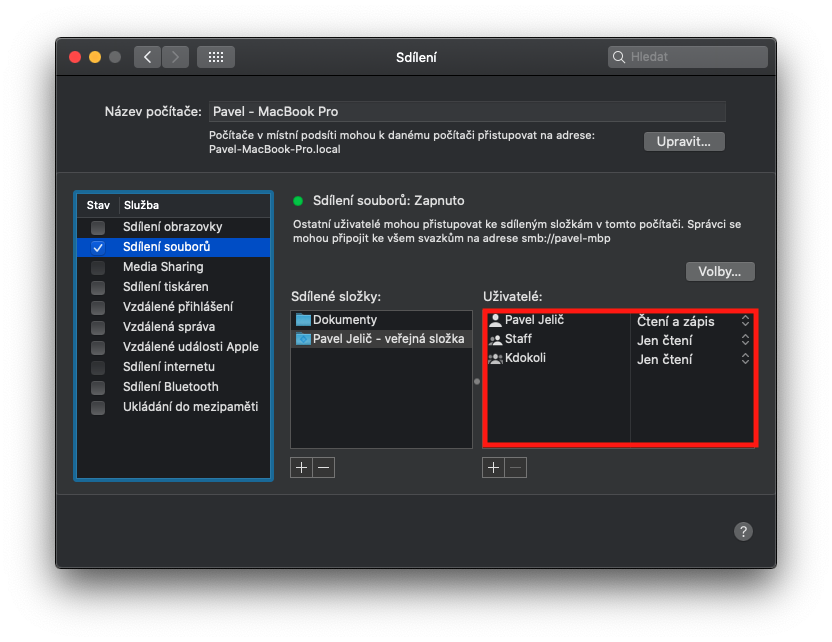
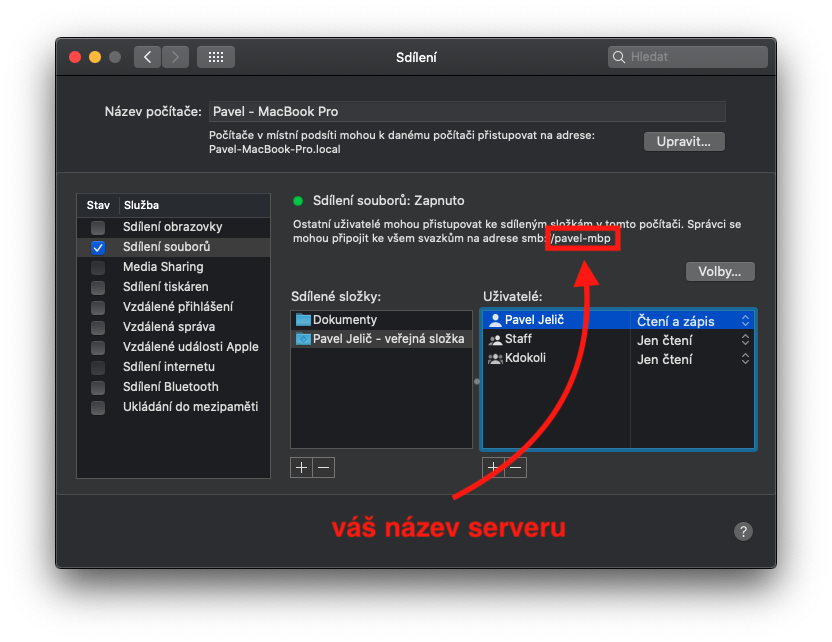
First, it's important to set up some essentials and preferences on your Mac. In the upper left corner, click on Apple logo and from the drop-down menu that appears, click the option System Preferences… Then open the section here Sharing. In the left part of the window, click the option File sharing and at the same time using this option check the whistles. After turning on file sharing, press the button Elections…, where you check the option Share files and folders via SMB. Then at the bottom of the window tick user profile, with which you want to share files. Then click on Done. Now it is important to choose folder, which you want to share – in my case I selected a folder Documents, but you can create special folder intended for sharing only. Just make sure that the created folder does not contain diacritics (hooks and dashes) - because it could cause "crossing". You can add a folder by pressing the "+". After adding the folder, you can still choose user rights for reading and writing.
Configuring a folder in Windows
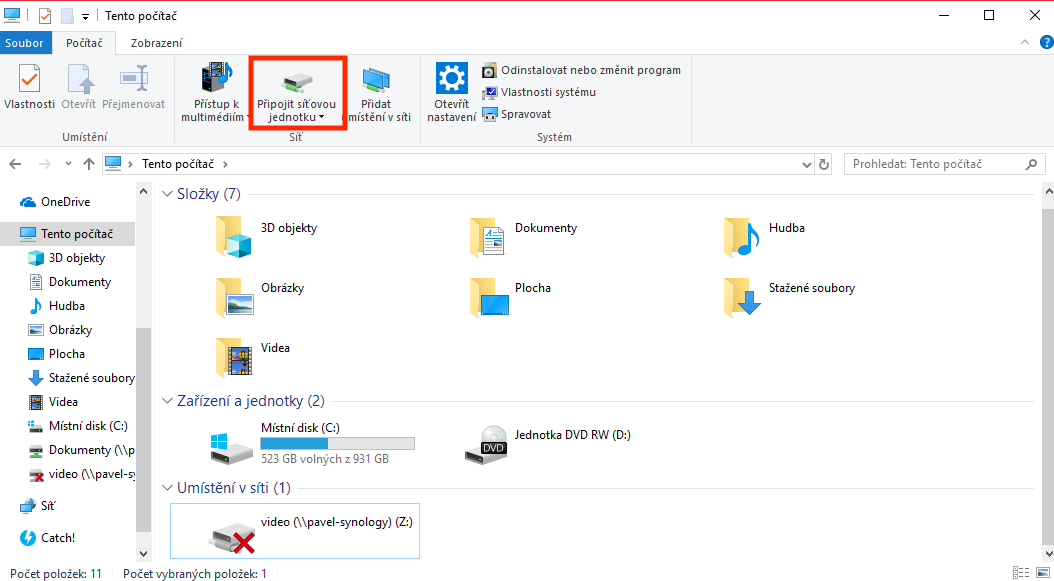
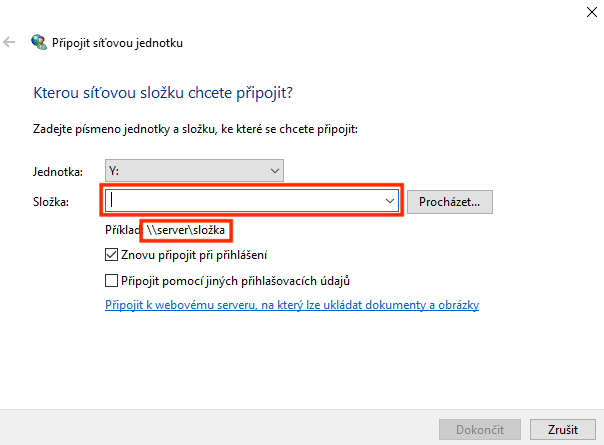
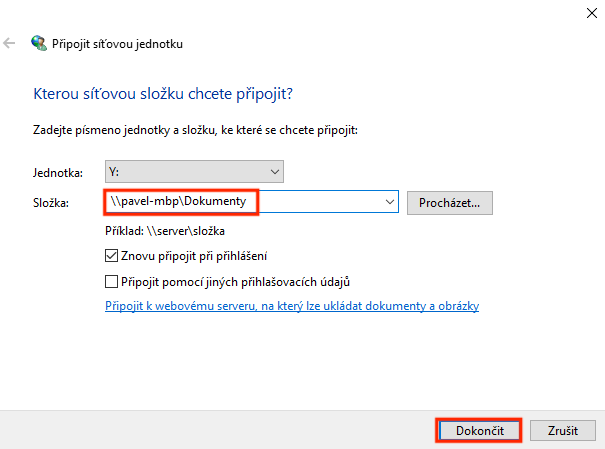
After setting up a shared folder in macOS and enabling file sharing using the SMB protocol, you can move to the operating system Windows to add a folder. Open it This computer and click the button at the top of the window Connect the network drive. Then make your choice letter, which you want to assign to the folder (it's up to you) and into the box Component write the path to the shared folder on your Mac. This is a path in format \\server\folder, in my case:
\\pavel-mbp\Documents
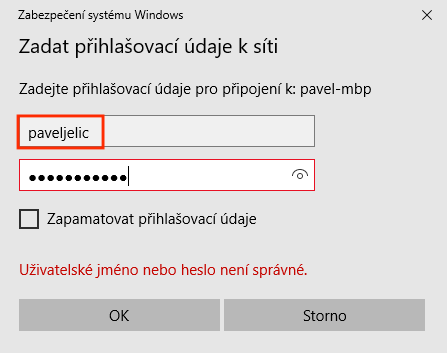
The name of your computer (in my case pavel-mbp) you can find out at macu v preferences in the section Sharing, see gallery below. Choose as a shared folder folder name, which you are shared in the previous step on a Mac (in my case Documents). Then click the button Complete. As the last step comes the login to your profile on macOS. Enter yours Username (you can find out for example after opening Terminal, see gallery below), and then password, under which you log into macOS. Then click the button OK and voilà, the shared folder is suddenly connected to the Windows operating system.
You can now work with a shared folder in Windows in exactly the same way as with other folders. Just with the difference that if you put anything in it, that file or folder will also appear in macOS in the folder you assigned for sharing. The speed of file transfer between the two devices then depends on your network speed.
